When you perform a clean Windows 10 or Windows 11 installation, it automatically creates a Recovery Partition on your primary disk that takes up relatively small space, on a UEFI/GPT machine. With the partition still in place, Windows also allows you to create a Recovery Drive.
This article discusses what these are, how they can be used, and what functions they provide.
Table of Contents
What is Windows Recovery Partition?
As we mentioned, a Recovery Partition is automatically created on your storage disk. This is a dedicated partition that stores all critical system files that can be used to restore your computer to factory settings. The Recovery Partition does not have a drive letter assigned so it cannot be accessed or manipulated through File Explorer.
You can view the Recovery Partition and the space it takes through the Disk Management Console.
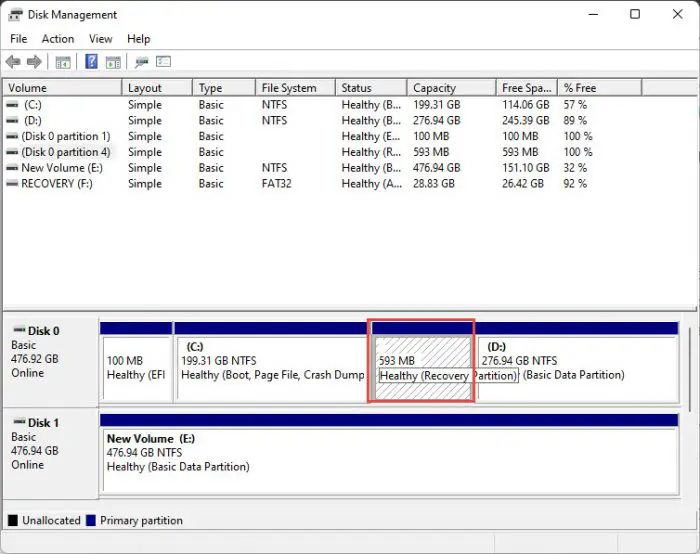
There are two types of Recovery Partitions: One created by Windows, which contains the Windows Recovery Environment (Win RE) to restore the operating system, and the other is created by the PC manufacturers (Dell, HP, Lenovo, etc.), which is used to restore operating systems, drivers, apps, etc.
The Recovery Partition created by computer manufacturers takes up more space on your PC than the Windows Recovery Partition, as it holds more data.
What is Windows Recovery Drive?
A Windows Recovery Drive is a bootable Windows environment stored on an external source (CD/DVD or USB drive). It can be used to restore the OS to its original state in case it goes haywire.
People who fear losing their systems must manually create a recovery drive.
Even though the Recovery Partition is built into the hard disk, it can still be lost if the disk is damaged. Therefore, people often prefer to create a Recovery Drive just in case.
That said, both Recovery Drive and Recovery Partition do not back up your personal data like files, folders, apps, configurations, etc.
What is a System Image
A system image is an identical copy of your operating system that stores all configurations, files, folders, applications, and of course the operating system. They are usually created as ISO images.
You can create a system image using Backup & Restore (Windows 7).
System images must be manually created, which cannot be updated. Each time you want to backup your new OS, a new image will need to be created.
Windows Recovery VS System Image: Which One Should You Choose?
As you must have already understood, each of these backup types offers a different solution. So which one is the right one for you?
As a system image takes a complete backup of your machine, it can also be used to redeploy the entire environment onto other machines. It is especially useful if you want to pre-install apps and programs on Windows and copy them onto other computers.
Whereas a Recovery Partition/Drive is useful for restoring your PC to default settings and provides a completely different option compared to a system image. One should opt for a Recovery Drive if they want to avoid losing their operating system and performing a clean install.
Having both a system image and a recovery drive will significantly increase your chances of restoring your operating system if something bad were to happen.
How to Create Windows Recovery Drive
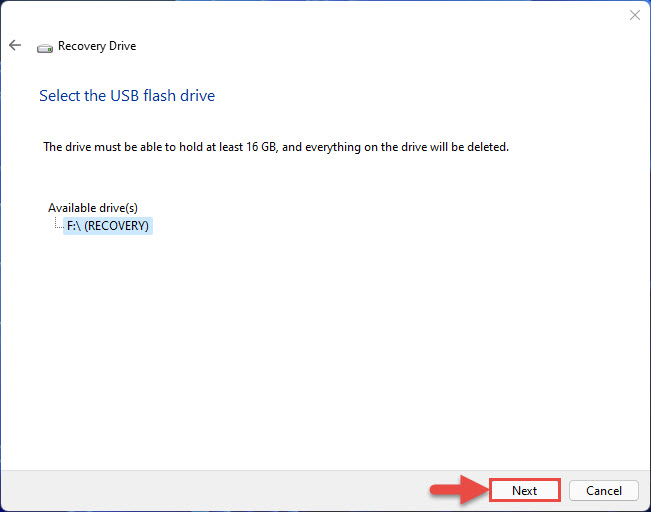
To create a Recovery Drive, you will either need to use a CD/DVD or a USB flash drive with at least 16 GB of space.
Note the USB drive will be formatted and any data on it will be lost. Follow the steps below to create a Recovery Drive:
- Plug in the CD/USB drive and open the built-in Recovery Drive app in Windows by searching for it.
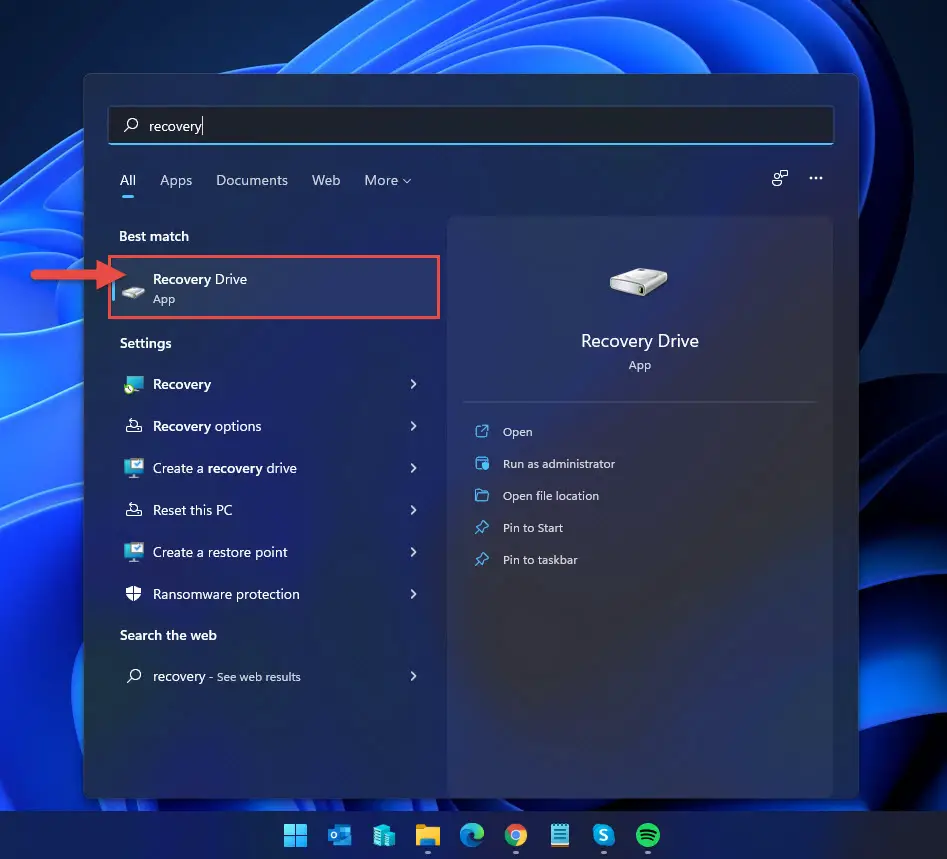
- If prompted with a UAC, click Yes.
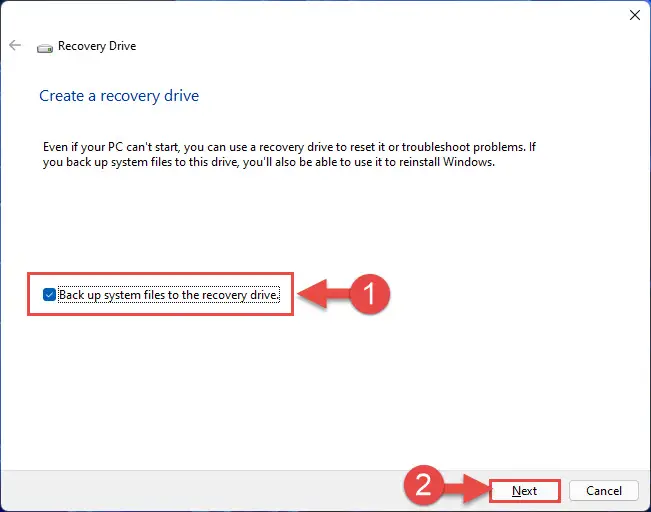
- From the Recovery Drive wizard, make sure the check box next to “Back up system files to the recovery drive” is checked, and then click Next.
- The wizard will then detect the attached USB drive. Click Next.
- Now click Create.

- The Recovery Drive will now begin creating. This step may take a while. When it is completed, click Finish.
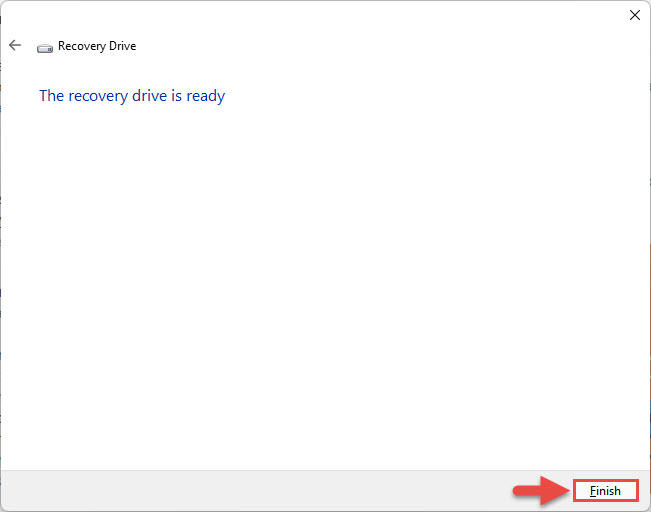
You have now successfully created a Windows Recovery Drive. It can be used in the future to boot into Windows and perform diagnostics.
How to Restore using Recovery Drive
If you have the Recovery Drive around, you may plug it in and boot it in to restore your operating system to factory default settings.
- Plug in the Recovery Drive and boot into it using One-Time Boot Menu (usually the F12 function key).
- From the first window, select your keyboard layout.

- Next, click Recover from a drive.

- On the next screen, choose Just remove my files if you want to restore your PC, or select Fully clean the drive if you want it to leave no trace of data on your PC.

- Now click Recover if you are sure you want to restore your PC to its default settings.

Windows will now begin recovering your PC. When it is finished, Windows will be as good as new. At this point, we suggest that you install any outstanding Windows updates and drivers.
When people usually have a Recovery Drive, they often want to delete the Recovery Partition on their hard disks. Let’s discuss it from another perspective.
How to Delete Windows Recovery Partition
Is it Safe to Delete Recovery Partition
Before we dig into the technicalities of deleting and creating Recovery Partitions, let’s discuss whether you should be doing it or not.
The answer is yes, it is safe to delete the Recovery Partition. Most people do it so they can create free space on their storage drives for other stuff. Removing the partition would free up negligible space, as the partition itself is only a few MB.
That being said, it is not recommended that you delete it. As we already mentioned, a Recovery Partition is used to reset your PC and restore it to its original self. Once removed, you will not be able to restore the OS if you do not have a Recovery Drive.
Regardless, the operating system will continue to function normally even when the Recovery partition is gone.
Delete Windows Recovery Partition
Follow the steps below to delete the Recovery Partition using Windows PowerShell:
- Launch PowerShell with administrative privileges.
- Type in the following to enter disk management mode:
diskpart
- Now enter the following:
list disk
- Note the disk number containing the Recovery Drive and use the following command to select it. Replace # with the disk number:
select disk <em>#</em>
- Now type in the following to list the partitions in the selected disk.
list partition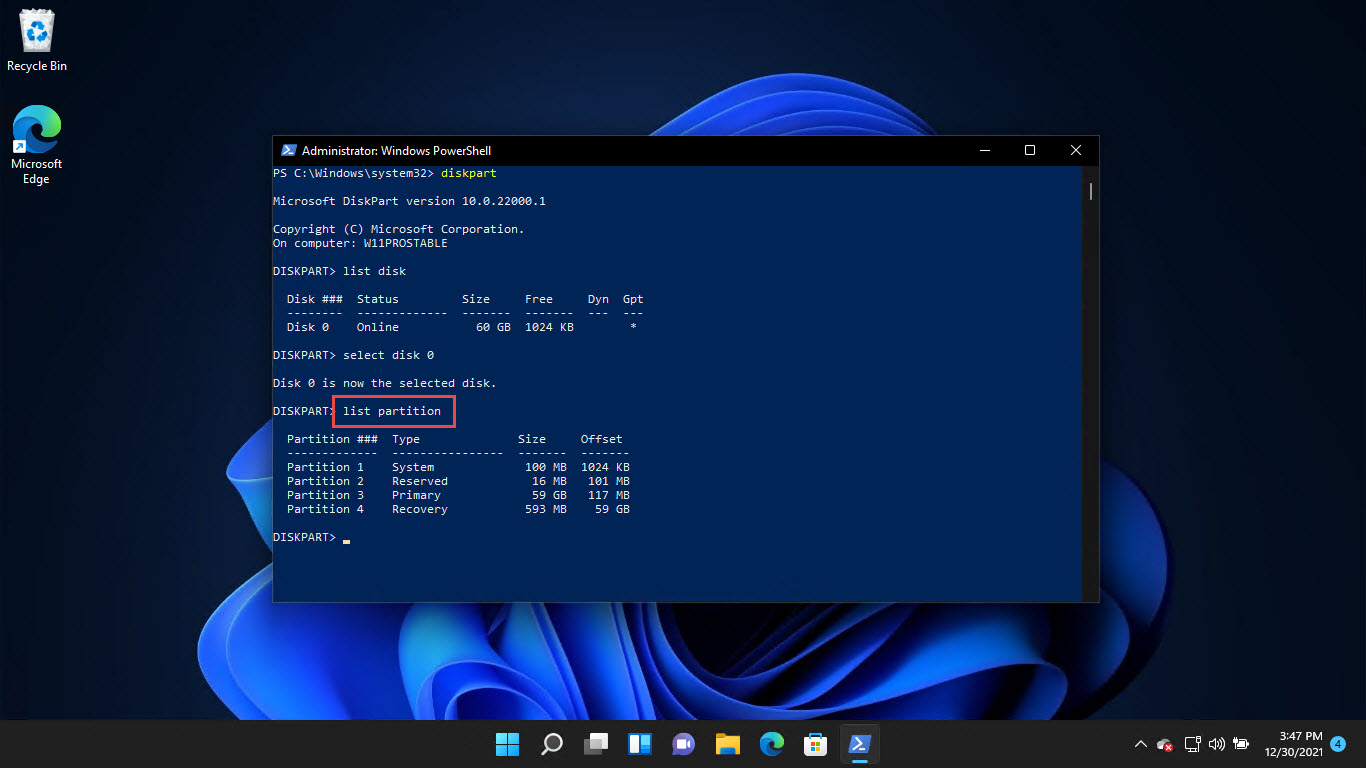
- Note the partition number associated with the Recovery Partition and then use the following command to select it. Replace # with the partition number for the Recovery Partition.
select partition <em>#</em>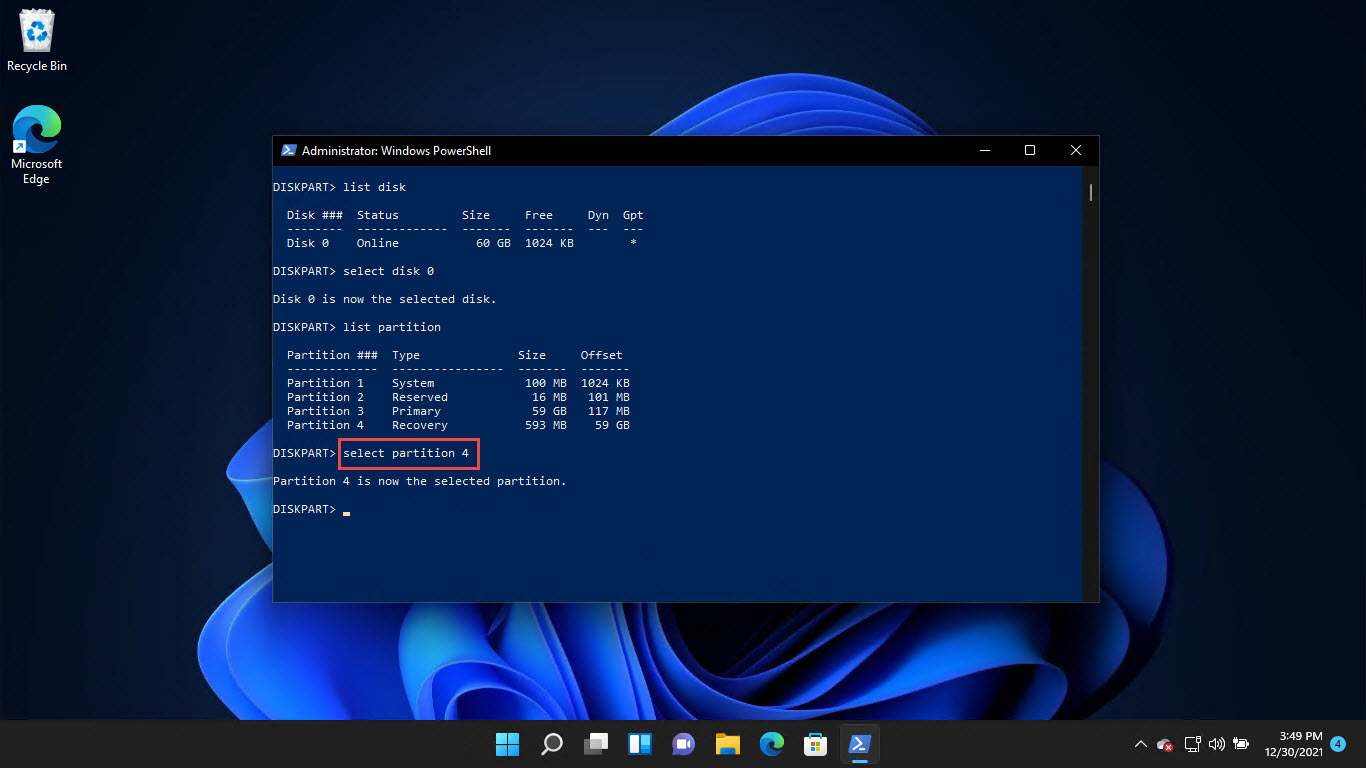
- Now paste the following command to delete the selected partition:
delete partition override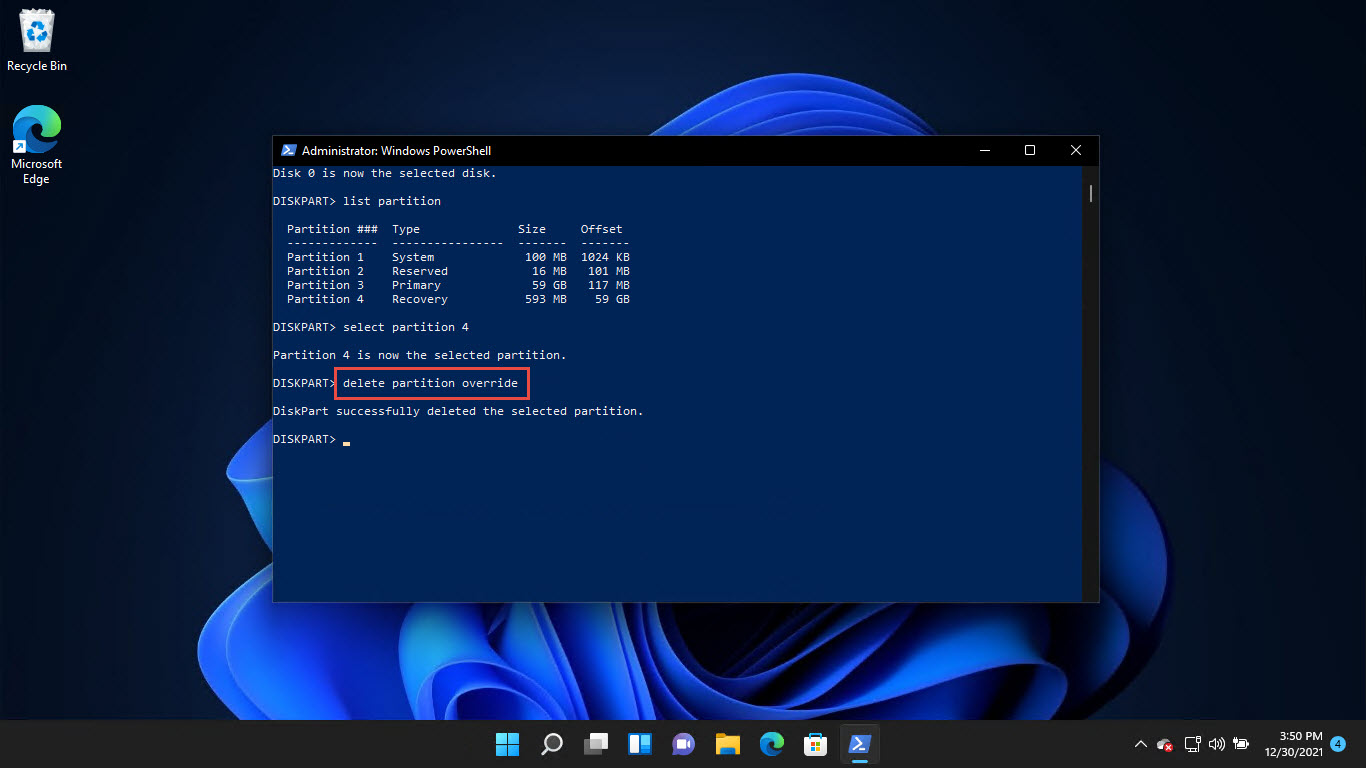
The Recovery Partition will now be deleted, as you can confirm from the Disk Management Console. However, it will be unallocated.
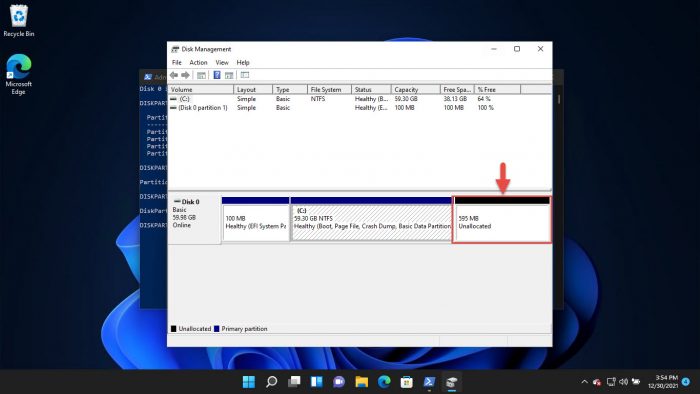
You can now proceed to create a new volume or extend an adjacent partition using the unallocated space.
How to Restore Windows Recovery Partition on Hard Drive
If you have removed the Windows Recovery Partition from your disk, intentionally or accidentally, no need to worry! It can be created again so your operating system still has a recovery option to rely on. However, this method involves using paid third-party tools to recover a lost partition for you.
One of the following tools can be used:
Final Thoughts
Windows provides various recovery options, each with its own purpose and advantages. One of the files and folder recovery options is File History.
We would also like to add that the internet also provides another way to recreate a Recovery Partition if lost. The method involves creating unallocated space on the disk and then capturing the system drive in a .WIM file using Command Prompt. However, after thoroughly testing it out, we found the method does not work.
Therefore, you can only resort to third-party applications to restore the Recovery Partition if deleted.

