If you are experiencing Windows 11 restarting repeatedly and randomly, this post will provide you with 11 different things you can try to resolve the issue.
Windows 11 was released just recently by Microsoft, and thus it may have its own issues. However, it is very unlikely that the auto-rebooting is occurring due to a problem in the operating system.
Some of the most common issues for the problem are:
- Overheating of the graphics card.
- A problem with the app or Windows update.
- Scheduled automatic restart task.
- Faulty hardware driver.
- Faulty power supply.
- A malware rebooting your system.
If you are using Windows 10, you can disable automatic restart easily.
It can be annoying at times when your system reboots automatically without giving any sort of intimation. Users often lose their unsaved work because of it. Let us continue to see what steps you can take to avoid this happening on your Windows 11 device.
Table of Contents
How to stop Windows 11 restarting automatically
The guide given below is in systematic order: start with the top and work your way down from the least aggressive approach towards a more stern approach to fix the problem.
Disable Auto Restart in Windows 11
If there is a pattern in the system rebooting, it is likely that an auto-restart task has been scheduled to run after a fixed interval of time. You can disable it by performing the following:
- Open the About page in the Settings app by using the Windows Key + Pause/Break shortcut keys from the keyboard.
- Click Advanced system settings.

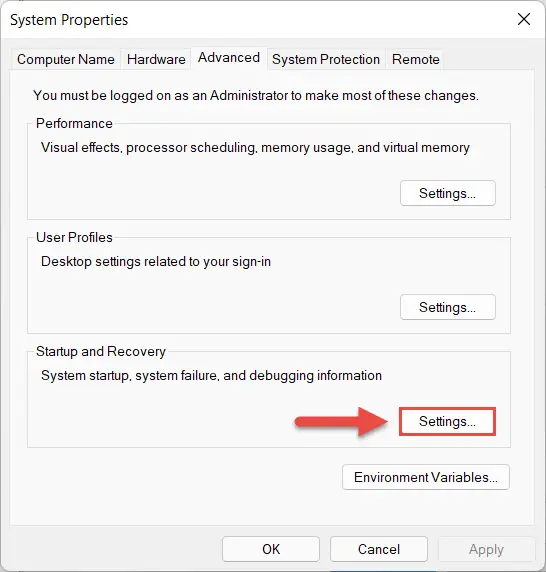
- From the System Properties window in the Advanced tab, click Settings from below Startup & Recovery section.
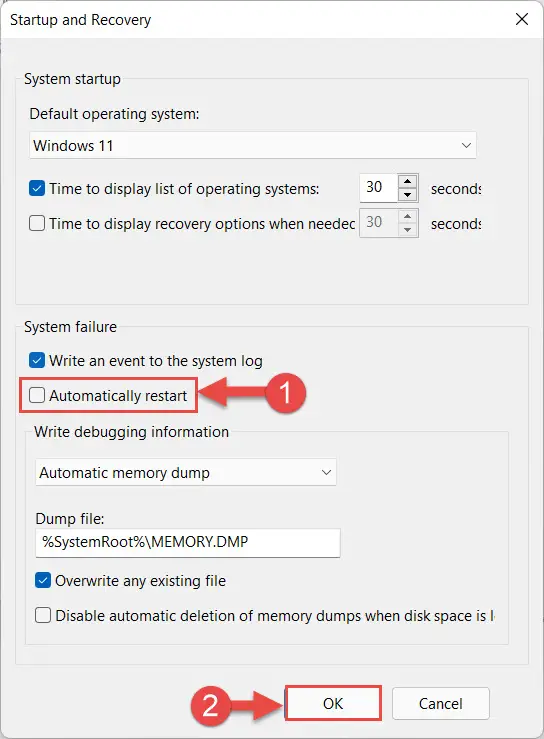
- From the Startup and Recovery window, uncheck the box next to Automatically restart under System failure, and then click OK.
- Back in the System Properties window, click OK to close it.
- Now restart your computer for the changes to take effect.
Now spend some time on the computer to check if the issue remains. If it does, move on to the next step(s).
Boot into Safe Mode
It is possible that an app or program is causing the operating system to behave erratically. We suggest that you boot in Safe Mode to rule out the theory. In Safe Mode, no unnecessary apps, programs, or hardware are enabled by default, which eliminates the possibility of a troublesome item.
To boot Windows 11 into Safe Mode, hold down the power button for about 10 seconds to switch the machine off forcefully. Once off, turn it back on again. Repeat the process 3 times and Windows will automatically boot into Windows Recovery (WinRe). From there, navigate to the following:
Troubleshoot -> Advanced Options -> Startup Settings -> Restart
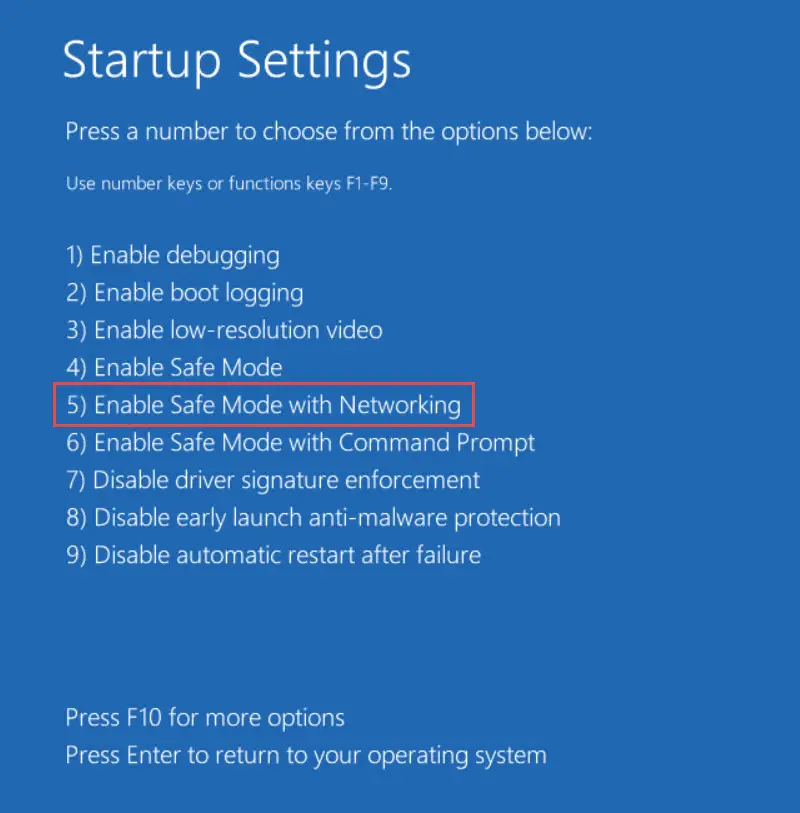
The device will now restart again. This time, you will be presented with a list of options you can choose from using the function keys on the keyboard (F1-F12). Press the F5 function key to “Enable Safe Mode with Networking.”
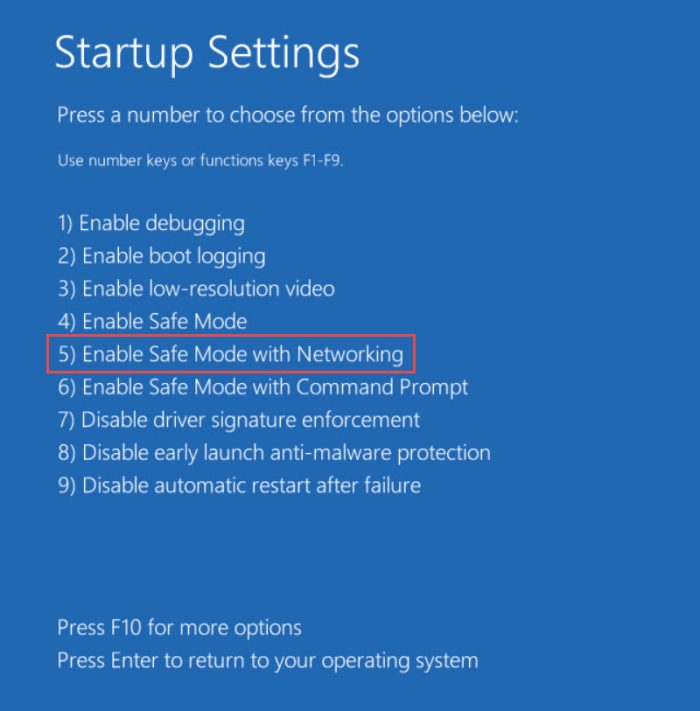
Alternatively, you can also boot into Safe Mode by performing the following:
- Open the Start Menu. From there, click on the Power button while holding down the Shift Key on the keyboard.
- Click Restart still while holding the Shift Key and hold it until the computer reboots. Once it reboots, let go of the press key.
- The system will now boot into recovery mode. From there, click Troubleshoot.

- Then click Advanced options.

- Then click Startup settings.

- On the next screen, click Restart.
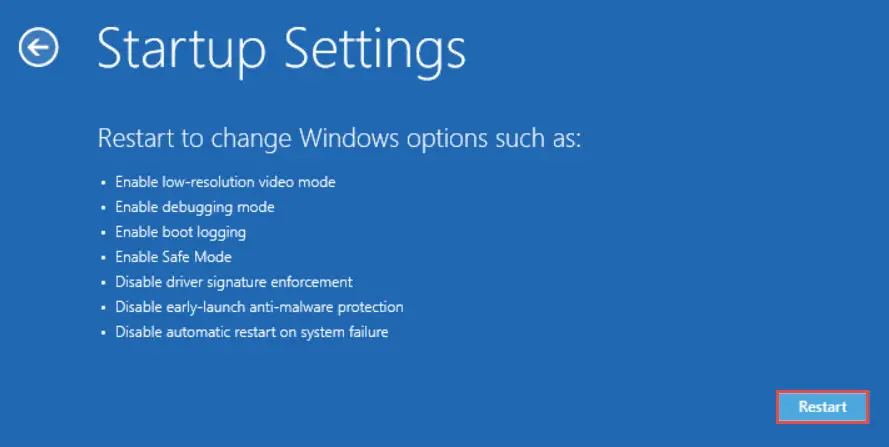
- Now press the F5 function key to Enable Safe Mode with networking.
Your device will now boot into Safe Mode. When it does, the desktop will look something like this:
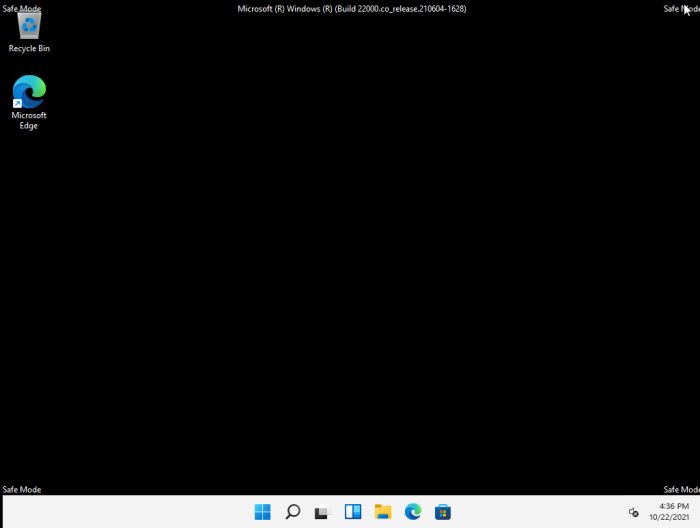
Now test your device in Safe Mode to see if it keeps rebooting. You can then perform a normal restart once the issue has been resolved.
Disable Fast Startup
Fast Startup is a feature that controls the behavior of Windows shut down and startup processes. Fast Startup enables the OS to reload the necessary components while keeping others in the memory resulting in faster boot times.
However, the Fast Startup feature can sometimes go wrong. For example, the user may want to shut down the system but the Fast Startup feature may restart the system instead. So the user may close the laptop lid thinking that the laptop has been shut down.
It may be possible that your system is rebooting due to the Fast Startup feature. Here’s how to disable the feature in Windows 11:
- Open Power Options by typing in powercfg.cpl in Run.
- Now click Choose what the power buttons do from the left of the window.

- Now click Change settings that are currently unavailable.

- Next, uncheck the box next to Turn on fast startup (recommended) and then click Save changes.

Update BIOS
It is possible that an outdated or corrupted system BIOS can cause the OS to reboot randomly. However, updating/downgrading BIOS can be fatal for your computer if done incorrectly. Therefore, we suggest that you be very cautious during the process.
Start by checking your system’s BIOS version, and then cross-reference it online to confirm whether there is an update available.
To check your system’s BIOS version, type in msinfo32 in Run and then check the version in front of BIOS Version/Date.
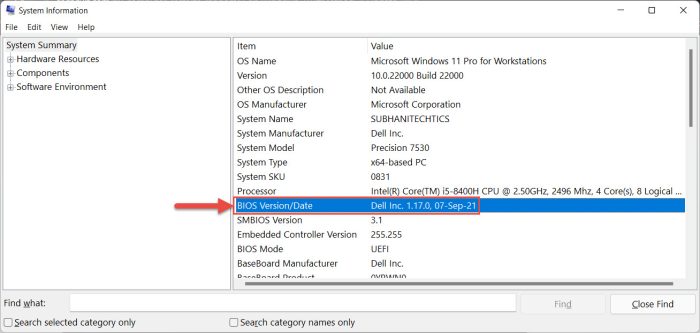
Now go to the manufacturer’s website, put in your system’s details and check if a new version is available. If there is, we suggest that you install it on your device.
Check if BIOS is updated to see if it still reboots automatically. If it does, proceed onto the next step(s).
Reinstall/Update Graphics Card Driver
A faulty graphics driver can also result in the OS rebooting randomly. In this case, you may notice that your Windows 11 computer reboots when a load is applied to the GPU. For example, when you are launching a game or heavy video rendering is required by a game, or you are working on software that pushes the GPU to work hard.
If that is the case, you may need to update or reinstall your graphics driver. Here is how to do so:
- Launch the Device Manager by typing in devmgmt.msc in Run.
- Now expand Display adapters, right click on the display device and then click Update driver from the context menu.

- In the Update Driver Wizard, click Search automatically for drivers.
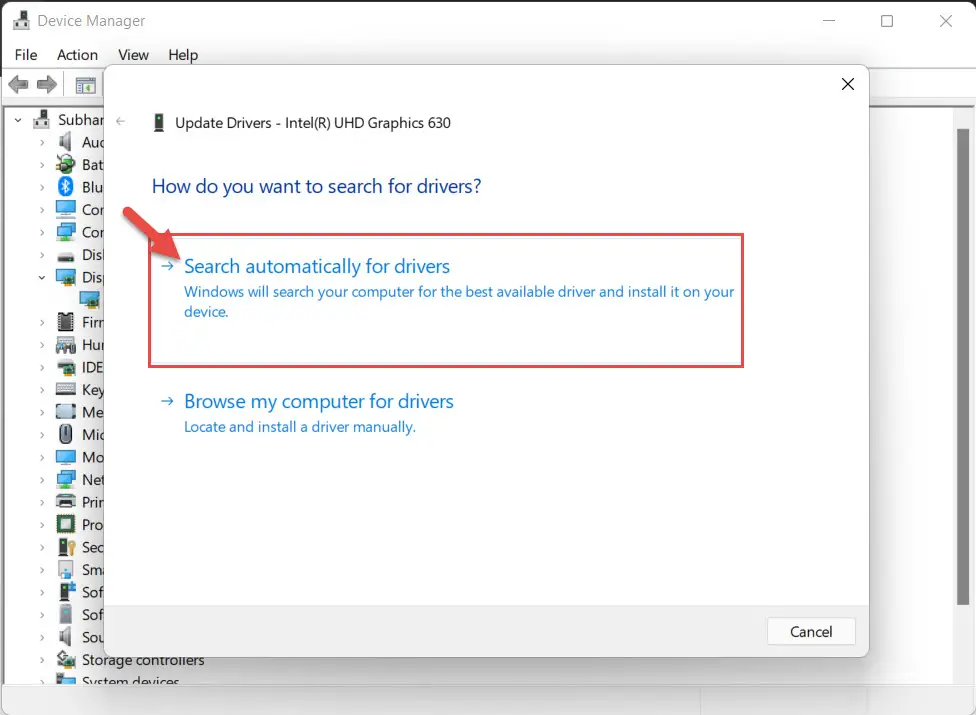
- The wizard will now search online for new drivers. If found, it will download and install them automatically. You can then close the wizard.
However, if the wizard returns with “The best drivers for your device are already installed,” then you will need to continue with the remaining steps below. - Right-click on the GPU in the Device Manager and click Uninstall device from the context menu.

- On the confirmation screen, check the box next to “Attempt to remove the driver for this device” and then click Uninstall.

- You may see the screen flicker several times. But then the driver will reinstall itself in a minute or two.
With the updated/reinstalled GPU driver, check if the issue persists. There are still a few things you can do if the problem has not been mediated.
Scan for Malware
Another likely cause for Windows 11 to reboot automatically is due to malware or viruses in your computer. Therefore, it is recommended that you perform a deep system scan and get rid of any trojan horses or malware. Here is a list of the top antivirus software to use to perform the scan.
In case you are proceeding to purchase antivirus software, here are the 17 aspects you should always consider.
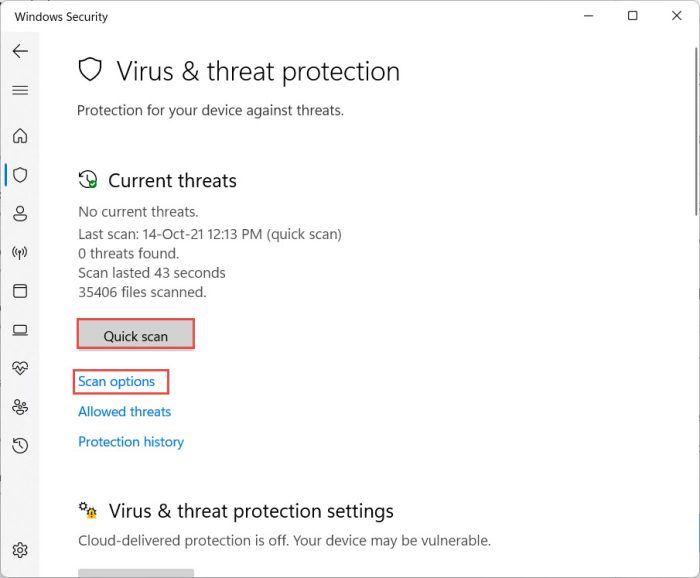
You can also use the built-in Windows Defender in Windows 11 to scan your computer for malware. If you want to, open the Windows Security page in the Settings app, and then click Virus & Threat Protection. Next, click the Quick Scan button to perform a scan. Alternatively, you can also click Scan options below it to select a deep scan of your OS.
System overheating
As a failsafe, systems are designed to reboot if they detect that a hardware component is heating up more than it usually should. Overheating could also be a reason for unprompted system restarts. Therefore, you should check what the temperature of your system is.
There are abundant (free) applications and tools available on the internet, such as Speccy, that display your CPU’s real-time temperature. We suggest you download and install a tool of your choice and then ramp up your OS by putting a maximum load on it and checking what the temperature gauge reads.
Ideal CPU temperatures are 45 to 50 degrees Celsius. It can go up to 70-75 degrees when gaming. However, if it goes above that threshold, it means that your device is overheating and you need to get it checked.
Uninstall Recently Installed Windows Update
If you think that you started experiencing Windows 11 automatically rebooting after a Windows update, then it is likely that the update is the cause. If so, you must remove the update and then check if your system performs as it should.
Here are 3 ways to uninstall Windows 11 updates.
Uninstall Recently Installed Apps
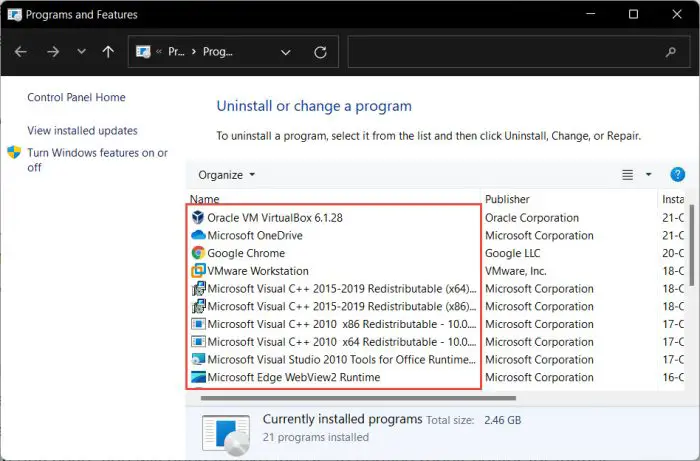
Similarly, if you recently installed any new apps or programs on your computer, they could also be the cause. Try uninstalling them to see if the issue resolves.
You can remove a program through Programs & Features page in Windows 11 by typing in appwiz.cpl in Run. From there, double-click on the app that you think might be causing the problem.
Restore Windows to an Earlier State
If none of the methods have worked so far, you can try restoring your PC to an earlier state when it is not rebooting automatically.
If you have created a system restore point earlier, you can restore it using this guide.
Faulty Power Supply Unit (PSU)
Even though your PC’s lights and fans are running, it does not mean that there can’t be anything wrong with the PSU. Insufficient voltage, current, or even over-power to the system’s hardware could cause it to reboot randomly. Therefore, test a new and functional PSU on your PC to know for sure whether it is the source of the problem or not.
Also, after plugging in the new PSU, let it be for another 5-10 mins so that all capacitors and the CMOS battery have been recharged.
FAQs
How do I stop Windows 11 from restarting automatically?
You can disable the auto-restart feature in Windows 11 by unchecking the option in the path: Settings >> System >> About >> Advanced System Settings >> Settings (Startup & Recovery) >> Automatically Restart (Disable)
Why does my PC keep restarting for no reason?
There can be a number of reasons for a computer to restart without notice. Some of the common reasons are:
Malware infection
Auto restart task scheduling
Faulty drivers (especially GPU drivers)
CPU overheating
Fast Startup is enabled
Faulty update/app

