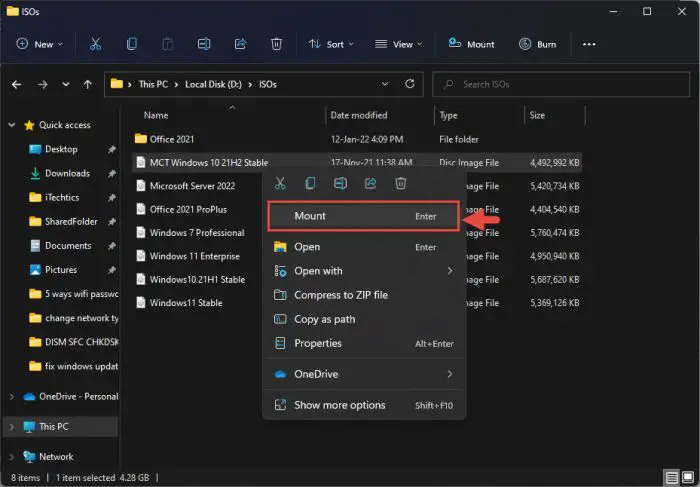
Windows 8.1, Windows 10, and Windows 11 can have the mount option for ISO files by default. You can just right-click any ISO file and select Mount from the context menu. Previously, it was done using third-party software, which would create additional virtual CD/DVD ROM drives in which the ISO files were virtually inserted. But now, Windows Explorer can create a virtual DVD ROM and automatically insert the ISO file.

Table of Contents
Quick Summary
Sometimes, a third-party application will mess up the default options, and the mount option will go missing in the Windows operating system. In this article, we’ll see how to fix the issue in Windows, which was messed up by a third-party app, or any file corruption.
Remember that the methods discussed in this post to add/restore the “Mount” option to the context menu work for both .ISO files and .IMG files.
Why is the Mount Option Missing in Windows?
There can be several reasons why the “Mount” option may be missing from an ISO’s context menu. First, check whether or not your Windows version supports mounting ISO files natively. For example, you need to use third-party software on Windows 7 in order to mount an ISO file, since it does not have the feature built-in.
However, operating systems released after Windows 7, like Windows 8, 8.1, 10, and 11, can mount the ISO natively. Windows 7 only included Burn Disk Image option, which could be used to create ISO files with the Universal Disk Format (UDF).
Another reason for the missing mount option is that perhaps the user accidentally changed the default mount ISO application when installing a third-party program like WinCDEmu, Daemon Tools, PowerISO, ImgBurn, or WinRAR.
If you do not have the mounting option in your context menu for an ISO file, you can follow the steps below to enable it. There are several ways to fix the issue.
Add Mount ISO Option to Context Menu using Settings App
Follow the steps below to select File Explorer as the default app for ISO and IMG files, which in turn will show the “Mount” option in the context menu when you right-click an IMG or ISO image:
-
Navigate to the following:
-
In Windows 11:
Settings app >> Apps >> Default Apps

-
In Windows 10:
Settings app >> Apps >> Default Apps >> Set defaults by apps
-
-
Click “Windows Disc Image Burner,” and then click “Manage.”
On Windows 11, you do not need to press the “Manage” button.

Click Windows Disc Image Burner -
Now, make sure “Windows Explorer” is selected as the default app for .img and .iso files. If not, click on the option and select it.

Set Windows Explorer as the default app for Windows Disc Image Burner
You can now mount ISO files and use this Windows feature.
Add Mount ISO Option to Context Menu using Command Prompt
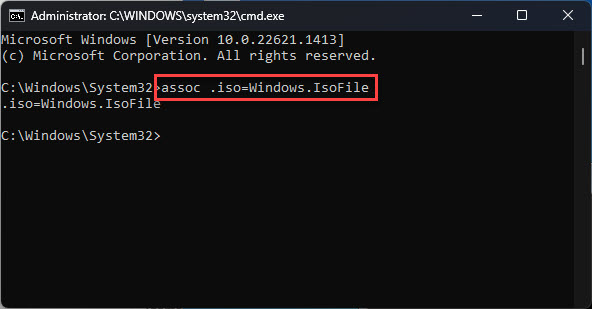
Another convenient method to restore the missing “Mount” option to the context menu for ISO files is through the command line. All you need to do is run the following command in an elevated Command Prompt and it will associate the relevant Windows Registry to the .ISO files:
assoc .iso=Windows.IsoFile
Note that this method is valid for Windows 8 and onwards, and not for Windows 7.
Add Mount ISO Option to Context Menu using Control Panel
Note: This method has been deprecated for Windows 10 and 11, as Microsoft has shifted the relevant controls to the Settings app from the Legacy Control Panel. However, it is still valid for Windows 7, 8, and 8.1.
Follow the steps below to add the “Mount” option to the context menu using the Control Panel:
-
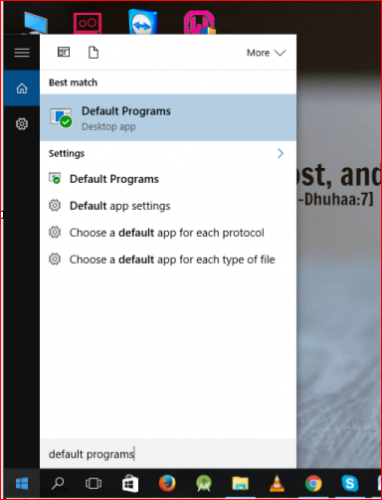
Go to the Start Menu and search for “Default program.”

Search for Default Programs -
Open the “Default program” and click on “Set your default programs.”

Set default programs from Control Panel -
Then select ”Windows disc image burner” from the left pane and click “Choose default app for this program.”

Select a default app for Windows Disc Image Burner from Control Panel -
Check the box with “Select All” and then click “Save.”

Select all file types -
The “Mount” option is now enabled in your system. You can check it by right-clicking any ISO file.

Mount option has been enabled in context menu
Fix Mount ISO Option Missing using Windows Registry
You can also restore the missing option from the context menu using Windows Registry. Simply download the file below and run the Registry file to restore all default options.
 Associate ISO/IMG Files With Windows Explorer (5.4 KiB, 328 hits)
Note: Incorrect configuration of key values in the system’s registry could damage your operating system. Please create a system restore point before continuing. Use our top selection of disk imaging and backup software to avoid losing data or your operating system.
This is a simple Registry hack that will associate .iso and .img file extensions with Windows.IsoFile file type. Alongside this, it will make the following changes in order:
- Link the “.iso” and “.img” file extensions to the “Windows.IsoFile” file type.
- Create a “Windows.IsoFile” file type, name it “Disc Image File”, and set its friendly type name to a Unicode string that points to “SystemRoot” in shell32.dll.
- Set the “Windows.IsoFile” file type icon to an icon resource in shell32.dll.
- Add a “mount” context menu option for the “Windows.IsoFile” file type.
- Set the “mount” context menu option to open explorer.exe with the file path as an argument.
- Set the “tabsets” key’s “selection” value to 0x704.
Closing Words
Although there are other file formats available on the internet, such as DMG, that are not natively supported by Windows. Thankfully, ISO and IMG files are very commonly used, and thus Microsoft decided to support these image files. For that reason, users can directly mount such images to their PCs and can use them, without any third-party applications.


7 comments
Chris
Thanks Mike. Sorry author. Article is useless for Windows 10.
Ralph
Option does not work 100% I can mount the .ISO after following “Mikes” correct steps.
I can then install the software, but when I go to run it, even though the .iso is still mounted and in explorer/ This PC, the program says it cannot find the disc.
So problem not fixed if MS can’t mount .ISO so the mounted .ISO can be found by the software that is installed from the mounted, and left mounted, .ISO.
Need fix for that problem.
PS. Damon tools and WinCDEmu both have same issue…
Running Win 10 1903 Ent, 32 bit in VM to run old educational learning software.
Mark
Why is every single solution to this in Google supplying this garbage incorrect info? Just wasted half an hour trying this crap before I found Mikes comments with the actual answer…
Mike
This article is worthless doesn’t work at all.
If you want to mount an ISO simply do this.
right-click the iso, and select properties in the menu.
Under Opens with, select Change to change the file association
select Windows Explorer
After that you will have the Mount Icon back
Gwen
Thanks, this worked for me too.
manjj
thanks, this solved issue.
Hunk
Windows disc image burner is NOT an option in Default Programs…