When you create a new account, that account is part of a group. If this is the first account after a clean OS installation, then that user account will be part of the Administrators group by default. If this is not the first account, it will be assigned to the Users group.
Regardless of which default groups, you can change which users are part of which groups. There are multiple methods to add them to a group, as well as remove them. Moreover, an account can be part of more than one user group.
This article discusses several methods to add a user account to any user group, and how to remove it as well.
Table of Contents
Local vs Global Users and Groups
Local Users and Groups are the user accounts and then groups on a local PC whose privileges are only limited to that computer. Whereas Global Users and Groups are user accounts and groups whose rights and privileges are valid through a domain.
Global Users and Groups are created in the Active Directory Users and Computers on a Windows Server, which are defined for the entire domain. A global user account is usually part of a global user group that can be used to sign into any PC as long as it is part of the domain. However, a local user account can only be used to log into the same PC.
But what is the purpose of these groups?
Purpose of User Groups
Groups are used to define and manage the rights and privileges of the user accounts within them. You can add or remove a user account from a group to grant or revoke certain access, implement certain policies, define their roles, etc.
The following categories briefly describe the different types of groups usually created:
- Groups to segregate different departments within an organization.
- Groups to grant limited access to applications and tools.
- Groups to assign certain roles to individual user accounts.
These types of groups are usually global groups that cover the entire organization’s work domain.
However, in the case of local groups, the following groups can be found by default on a Windows 10/11 PC right out of the box:
- Access Control Assistance Operators
- Administrators
- Backup Operators
- Cryptographic Operators
- Device Owners
- Distributed COM Users
- Event Log Readers
- Guests
- Hyper-V Administrators
- IIS_IUSRS
- Network Configuration Operators
- Performance Log Users
- Performance Monitor Users
- Power Users
- Remote Desktop Users
- Remote Management Users
- Replicator
- System Managed Accounts Group
- Users
Each of the local user groups assigned different privileges to the user accounts inside of them.
Let us now discuss how to add a user account to a group.
How to Add a User Account to a Group
From the Local Users and Groups/Computer Management Console
Microsoft Management Consoles come preinstalled in Windows to control and manage the different OS components. 2 of these are the Local Users and Groups Console and the Computer Management Console. Both of these can be used to add a user to a group.
Before we proceed, let us inform you that these consoles have a folder where all users are listed, and another folder where the groups are listed. You can add a user account to a group from the users folder as well as through the groups folder.
-
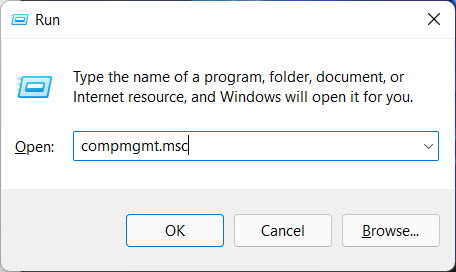
To begin, open either the Local Users and Groups Console or the Computer Management Console by typing either of the following in the Run Command box:
For Local Users and Groups Console:
lusrmgr.msc

Open Local Users and Groups Console For Computer Management Console:
compmgmt.msc

Open Computer Management Console -
Now you must choose whether you want to add a user account to a group from the Users folder or the Groups folder.
-
From the Users Folder
-
Navigate to the following:
From Local Users and Groups:
Users
From Computer Management:
Local Users and Groups >> Users
-
Here, double-click on the user account that you want to add to a group from the middle pane.

Open user from Users folder -
From the Popup Properties window, switch to the Member of tab, then click Add.

Add to group -
In the popup, type in the name of the user group and then click Check names.

Check names -
You will now see the Fully Qualified Domain Name (FQDN) of the user account. Once confirmed, click OK.

Confirm complete group name -
Back in the Properties window, you will see that the user account is now a member of the new group. Click Apply and OK.

Apply changes
The account has been added to a group successfully.
If you wish to remove this account from the group, simply click on the group in the Member of tab in the Properties window, then click Remove, and apply the changes.

Remove account from group -
-
From the Groups Folder
-
Navigate to the following:
From Local Users and Groups:
Groups
From Computer Management:
Local Users and Groups >> Groups
-
Here, double-click on the group you want to add the user to from the middle pane.

Open group from Groups folder -
From the Popup Properties window, click Add.

Add new user -
Now enter the name of the user account you want to add and click Check names.

Check name of account -
You will now see the FQDN of the account. Click Ok.

Confirm account name -
Now back in the Properties window, you will see that the user account has been added to the group. Click Apply and Ok to save the changes

Apply changes
The account will now be added to the group.
If you wish to remove an account, simply select the account and click Remove, then apply the changes.

Remove account from group -
-
From Command Prompt
If you prefer the Command Line Interface (CLI), here are the steps to add a user account to a group in Windows:
-
Now use the following cmdlet to add a user account to a group while replacing Group and User with the name of the group you want to add the user to, and the user account name you want to add, respectively.
net localgroup "Group" "User" /add
User added successfully
The user will now be added to the stated group.
You can also remove a user account from the group using the Command Prompt. Simply use the following cmdlet to do so while replacing Group and User as when adding the account to the group:
net localgroup "Group" "User" /delete
From Windows PowerShell
Perform these steps to add a user account to a group using Windows PowerShell:
-
Now use the following cmdlet to add a user account to a group while replacing “Group” and “User” with the name of the group you want to add the user to, and the user account name you want to add, respectively.
Add-LocalGroupMember -Group "Group" -Member "User"
User added successfully
The user will now be added to the stated group.
You can also remove a user account from the group using PowerShell. Simply use the following cmdlet to do so while replacing “Group” and “User” as when adding the account to the group:
Remove-LocalGroupMember -Group "Group" -Member "User"
Closing Words
As we already mentioned, the groups define what roles and privileges each user within has. Groups can control whether a user is allowed access to any specific apps or tools, whether they are allowed to initiate Remote Desktop protocols, which shared folders they have access to and which are blocked, etc.
Therefore, regardless if a user account is local or global, we suggest that you add them to groups very carefully, and do not give them permissions more than they desire.


