Key Points
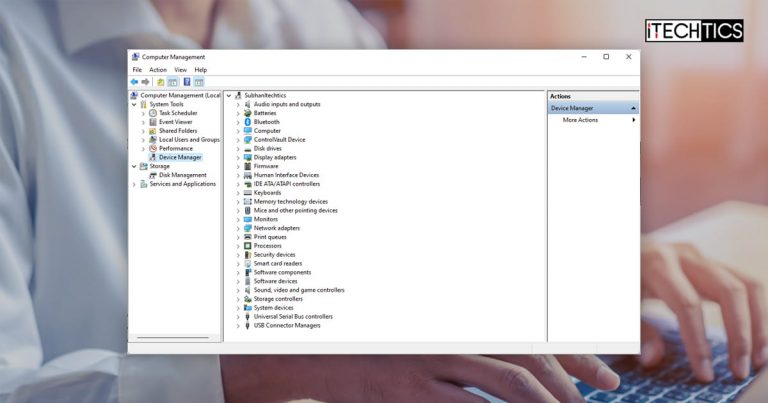
- Computer Management Console is one of many management consoles that comes preinstalled in the Windows OS and allows IT pros to access management tools, including Task Scheduler, Event Viewer, Device Manager, Local users and groups interface, etc.
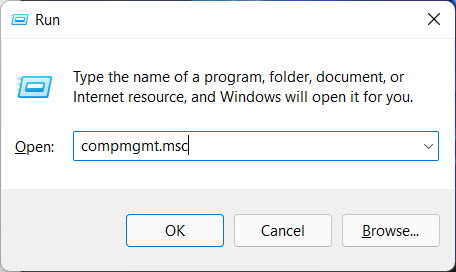
- Press the Windows Key + R to open the Run Command box, then run the command “compmgmt.msc” to launch the Computer Management Console.
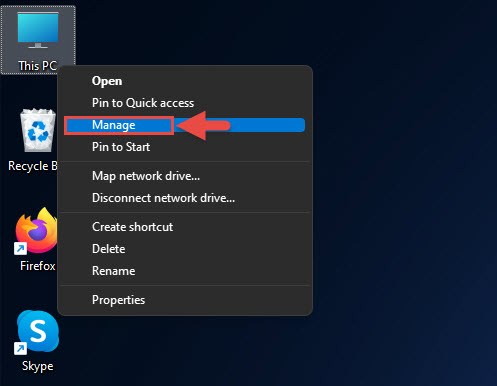
- Alternatively, press Windows key + E, right-click “This PC,” and click Manage to open the Computer Management Console.
Windows comes with built-in management consoles and Control Panel files that can be used for quick access to manage your operating system. One of these consoles is the Computer Management Console (compmgmt.msc). This console is especially useful for system administrators, as it allows them to manage administrative components of the OS.
Table of Contents
What is Compmgmt.msc?
The .msc file extension is used to open Microsoft Management Console files to perform administrative tasks on a computer. The Compmgmt.msc management console combines multiple management consoles into a single interface that can be used to manage all components of the computer. For example, Compmgmt.msc features Task Scheduler, Event Viewer, Device Manager, Disk Management, Services Management Console, etc.
The Computer Management Console is the go-to place for system administrators to control the maximum components of a computer from a single interface.
The Computer Management Console can be used for a lot of different tasks, which include, but are not limited to:
- Manage and create scheduled tasks.
- View critical system events for troubleshooting purposes.
- Managed shared folders and permissions.
- Manage users and groups.
- Manage all drivers.
- Manage storage devices and partitions.
In this post, you will find eight different methods to open the computer management console, from which you can choose the one you prefer or use it according to your situation.
How to Access Computer Management Console
Open compmgmt.msc from Run dialog
One of the most convenient methods to access the Computer Management Console is through the Run dialog box in Windows. Run is a tiny utility in Windows that allows you to open any app or program by its name if it is included in the Windows directory.
Simply open the Run box using the Windows Key + R shortcut keys, and then enter the following, which is the name of the file for the Computer Management Console.
compmgmt.msc
Open compmgmt.msc using Task Manager
Since the Run box basically creates a new task, you can also do the same from the Task Manager.
-
Press the CTRL + Shift + Esc shortcut keys to open the Task Manager.
-
Click “Run new task.”

Run new task in Task Manager -
In the “Create new task” dialog box, run the following command:
compmgmt.msc
Optional: Check the “Create this task with administrative privileges” option if needed.

Launch the Computer Management Console from the Task Manager
The Computer Management Console will now run.
Open compmgmt.msc using Windows Search
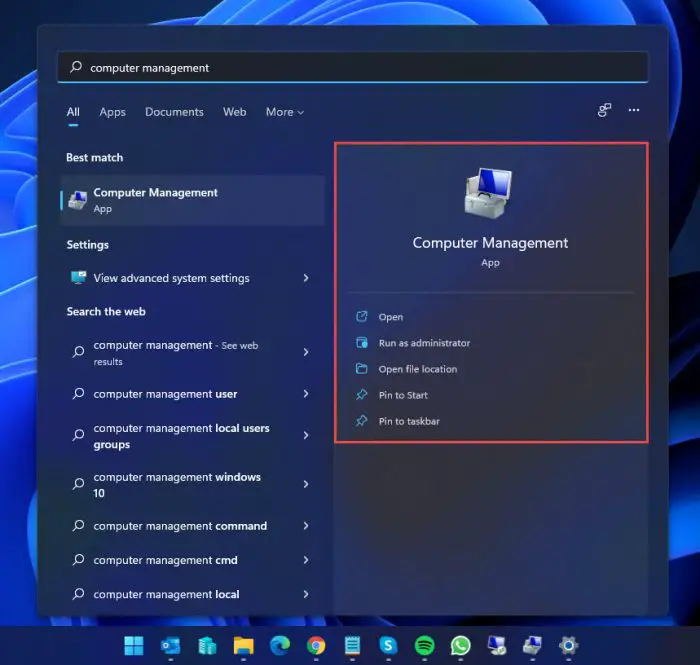
You can also open the Computer Management Console by searching for it through the Windows Search box.
Type in “computer management” in the search box, and you can open the Console from there. You can also choose to run it with administrative rights by clicking Run as administrator.
Open compmgmt.msc from Power User Menu
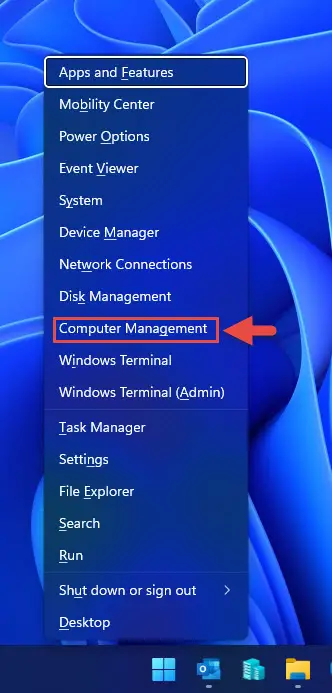
The Power User menu pops up when you press the Windows Key + X simultaneously or right-click on the Start button from the Taskbar in Windows. This menu also contains a direct link to open the Computer Management Console.
Open compmgmt.msc from Control Panel
You can also access the Computer Management Console from the Control Panel. This method would be preferred by the users who are already inside the Control Panel and want to quickly open the Console. Follow the steps below to open the Computer Management Console using the Control Panel:
-
Press the Windows Key + R to open the Run Command box.
-
Run the following to launch the Control Panel:
control

Open the Control Panel -
Click “System and Security“.

Open System and Security settings in Control Panel -
Click “Windows Tools“.

Open Windows tools The “Windows Tools” window will now open.
-
Double-click “Computer Management.”

Open the Computer Management console from the Control Panel
This will now open the Computer Management Console.
Open compmgmt.msc using File Explorer
Another way to access the Computer Management Console is through File Explorer. Open up Windows Explorer using the Windows Key + E shortcut keys, then right-click on “This PC” on the left navigation page. Then click Manage from the context menu to open up the Console.
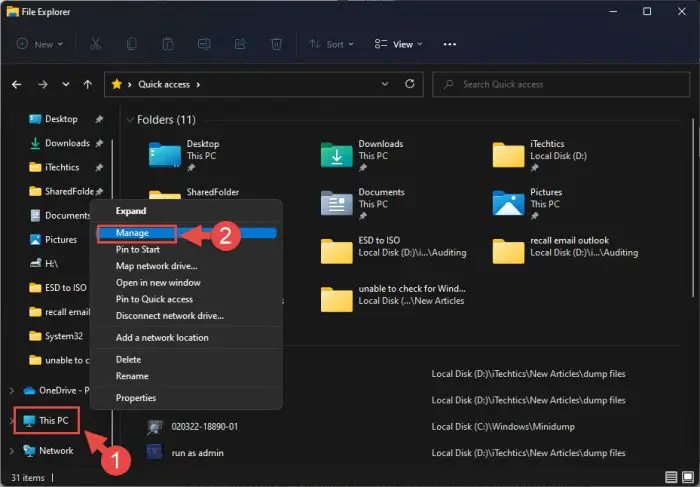
Alternatively, you can also open the Console by right-clicking “This PC” if available on your desktop.
Open compmgmt.msc using Command Prompt and PowerShell
To open the Computer Management Console from either the Command Prompt or Windows PowerShell, simply enter the following command:
compmgmt.msc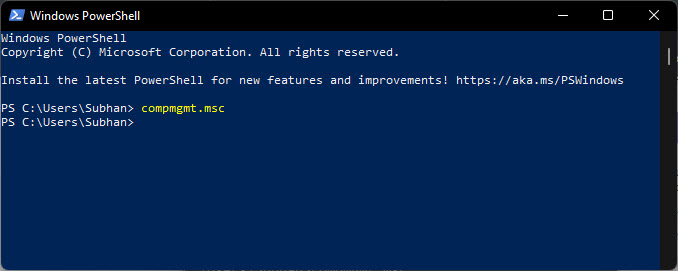

Create Shortcut to open compmgmt.msc
You can also create a shortcut directly onto your desktop using which you can instantly access the Computer Management Console. Perform the following steps to create a shortcut:
-
Right-click on a blank space on the desktop, expand New, and then click Shortcut.

Create a new shortcut The shortcut creation wizard will now launch.
-
Type in the following in the text field and click Next:
compmgmt.msc

Enter computer management console shortcode in the shortcut wizard -
Now enter a name for the shortcut and click Finish.

Name the shortcut
You will now see a new shortcut on your desktop using which you can access the Computer Management Console quickly.
These are all the methods you can use to open this useful console in Windows.
Open Computer Management Console remotely
If you are a system administrator, you can also use the option to open the Computer Management Console of another computer on your network remotely from your own PC. Here is how:
Note: This method requires Remote Desktop Connection to be enabled on the remote PC.
-
Open the computer management console with any of the above methods.
-
Click Action from the menu at the top of the Console, and then click “Connect to another computer.”

Connect compmgmt.msc with another PC -
In the “Select Computer” window, enter the name or IP address of the computer you want to connect to, and click OK.

Enter IP address or name of remote PC
You will now be connected to the remote computer’s Management Console, and any changes you make here will be applied to that PC. However, some controls are eliminated while using the Computer Management Console remotely.

Closing Words
The Computer Management Console (compmgmt.msc) is a nifty tool if you know which of its components is used for what purpose. Even if you are not a sysadmin, we suggest you try it out and see for yourself how this tool can be useful for so many purposes.
The components inside this Console can also be accessed individually. To learn how to access them and what each of them does, read our post on the top Management Consoles for Windows.




1 comment
imran
Not showing contents in Groups and Users. Don’t know why but i can not use this to add user as local admin.