Ever since the launch of Windows XP, Microsoft has included a feature in all Windows operating systems known as “Program Compatibility Assistant.” This feature is responsible for monitoring and fixing issues with all other apps and programs so that they are installed, or uninstalled, correctly and can be used on your current Windows version.
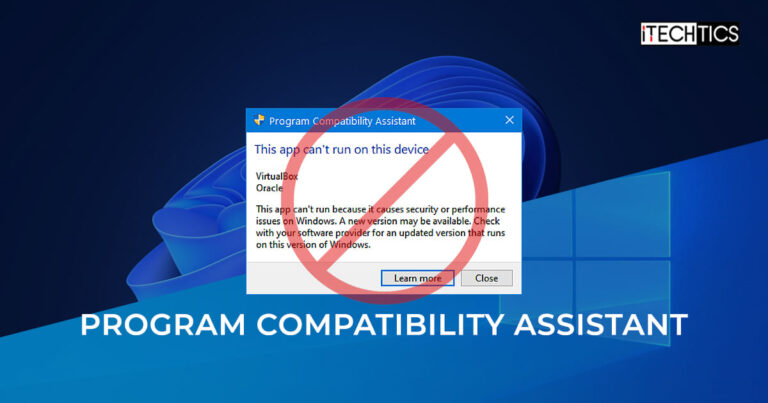
The purpose of this program is for the end users to be able to run older apps and programs, designed for previous operating systems, on their updated OS. When a compatibility issue is detected, sometimes a user is prompted to “Install using compatibility settings” or continue without making any changes. However, at other times, a prompt is given stating “This app can’t run on this device,” even though the app was installed successfully, and the app cannot start because of the Program Compatibility Assistant.
In this article, we show you four methods to safely disable the Program Compatibility Assistant in order to run the app successfully.
Table of Contents
On This Page
What is Program Compatibility Assistant (PCA) and How Does it Work?
The Program Compatibility Assistant is a Windows feature that helps users run older applications and software on modern Windows versions. Therefore, if an app is designed on an older Windows version and still hasn’t been updated for newer versions, then you can run the app in compatibility mode (by selecting the older OS) and it should work just fine.
When a user launches an app, PCA monitors the app and looks for any indications that there may be a known compatibility problem. It then offers the user a chance to apply a recommended fix that will make the app work more smoothly.
PCA then tracks the app once more after a fix has been applied. After applying a compatibility repair, PCA reverts the fix if the app still fails to launch. After that, PCA stops tracking the particular app indefinitely.
The PCA does not always interfere when trying to run an app. It only suggests a fix or tells that the app cannot run on this particular device when one of the following scenarios occurs:
- The app fails to install or uninstall.
- The app fails to run with a Windows version check message.
- App fails to launch due to administrative privilege issues.
- App crashes due to specific memory problems.
- App fails due to mismatched system files.
- App fails due to Unhandled Errors on 64-bit Windows.
- App fails while attempting to delete protected non-Windows files.
- App fails while attempting to modify Windows files.
- App fails due to using 8 or 16-bit color modes.
- App fails due to graphics and display issues.
- App fails to declare DPI awareness.
- App fails due to missing Windows features.
- App fails due to unsigned drivers on 64-bit Windows.
- Tracking apps installed through compatibility settings.
- App fails to launch installers or updates.
- App installers that need to run with administrative privilege.
- Legacy Control Panel applets that need to run with administrative privilege.
The most common reason for an app to encounter a compatibility error is when it fails to install successfully. While the Program Compatibility Assistant is monitoring an installation, it notices that the name of the app has not been included in the Windows Programs and Features list. If so, the PCA error is shown to the user to take action, if one is possible.
When to Disable Program Compatibility Assistant
Although the PCA is there to help to run unsupported applications designed for older operating systems, you still might need to disable it if the problematic app can still run. Sometimes, an application runs perfectly on your current OS but the PCA blocks it claiming compatibility issues. In such instances, it is wise to disable the Program Compatibility Assistant.
However, how do you know when an issue is occurring because of the PCA? Well, PCA can throw different error messages when it detects an issue with an app. Every prompt is different for the type of issue it detects.
Here is a list of possible prompts that you may see:
-
This app can't run on this device

This app can’t run o this device error -
The program might not have installed correctly.

The program might not have been installed correctly error prompt -
This program requires Windows XX or Windows X to run. Installation will terminate now.

The program requires a different OS to run error -
This program might not have run correctly

The program did not run correctly error prompt -
This program needs to run with administrative privilege. It will terminate now.

The program needs to run as an administrator error -
This program might require administrator privileges

The program may require elevated privileges to run error -
A sigitally signed driver is required

A signed driver is needed prompt
These are the usual error prompts you may see when an issue occurs because of the Program Compatibility Assistant. This is when you know you need to disable the PCA.
Note: It is recommended that you first apply the fix, run the program in compatibility mode, and disable PCA only as a last resort.
After applying a fix recommended by PCA, you will see the following question appear:
Did the program run correctly?

This prompt shows up after the program has run. If it worked fine, you can click “Yes, this program worked correctly.” However, if it didn’t, you can click “No, troubleshoot this program” to run the PCA troubleshooter.
Alternatively, you can continue to disable the PCA altogether. Here are 4 methods to do it.
Disable Program Compatibility Assistant (PCA) in Windows
Disable Program Compatibility Assistant from Services Console
One method to disable PCA is by turning off the PCA service. Use the following steps to disable PCA from Windows Services:
-
Open the Services Console by typing in “services.msc” in the Run Command box.

Open the Services Console -
Right-click “Program Compatibility Assistant Service” and click “Properties.”

Open Program Compatibility Assistant service properties -
In the Properties window, click Stop, and then select Disabled from the drop-down menu in front of Startup Type. Click Apply and Ok when done.

Stop and disable the Program Compatibility Assistant service
The Program Compatibility Assitant will now be disabled.
In case you need to enable it again in the future, all you need to do is selected “Automatic (Delayed Start)” from the drop-down menu in front of Startup Type in the Properties of “Program Compatibility Assistant Service,” and then click Start.
Disable Program Compatibility Assistant using Group Policy
Another method to disable PCA is from the Group Policy Editor. Here is how:
Note: This method will not work if you are connected to a domain and a policy is applied by the sysadmin.
-
Open the Group Policy Editor by typing in “gpedit.msc” in the Run Command box.

Open the Group Policy Editor -
Navigate to the following from the left pane:
Computer Configuration >> Administrative Templates >> Windows Components >> Application Compatibility
-
Double-click the policy “Turn off Program Compatibility Assistant” on the right.

Turn off PCA Group Policy -
Select “Enabled,” and then click Apply and Ok.

Disable Program Compatibility Assistant from Group Policy Editor -
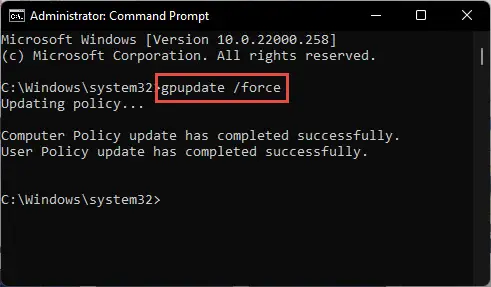
Now run the following cmdlet in an elevated Command Prompt to enforce the policy changes.
GPUpdate /Force
Enforce policy changes
The PCA will now be disabled. In case you need to re-enable it, set the “Turn off Program Compatibility Assistant” to either Not Configured or Disabled.
Disable Program Compatibility Assistant from Windows Registry
If your computer is joined to a domain, or the methods shared above did not disable PCA, then you can apply the following method to disable PCA from the Windows Registry.
Note: Misconfiguration of critical values in the system’s registry could be fatal for your operating system. Therefore, we insist that you create a system restore point or a complete system image backup before proceeding forward with the process.
You can also use our top selection of disk imaging and backup software so you never lose your data or operating system again.
-
Open the Registry Editor by typing in “regedit” in the Run Command box.

Open the Registry Editor -
Paste the following in the navigation bar for quick navigation:
Computer\HKEY_LOCAL_MACHINE\SOFTWARE\Policies\Microsoft\Windows

Navigate to the Windows key -
Right-click the “Windows” key, expand New, and then click Key. Name this key “AppCompat“.

Create the AppCompat key inside the Windows key -
Now right-click the AppCompat key, expand New, and click DWORD (32-bit) Value. Name this DWORD “DisablePCA“.
Note: The AppCompat key and the DisablePCA DWORD will already exist if you have made changes to the Program Compatibility Assistant Group Policy discussed in the section above.

Create the DisablePCA DWORD -
Set the Value Data from the “DisablePCA” DWORD to 1.

Set Value Data for DIsablePCA to 1 -
Restart the computer for the changes to take effect.
Once the computer reboots, PCA should be disabled.
To re-enable it, change the Value Data for the “DisablePCA” DWORD to 0, or delete the DWORD completely.

Disable Program Compatibility Assistant using Third-Party Software
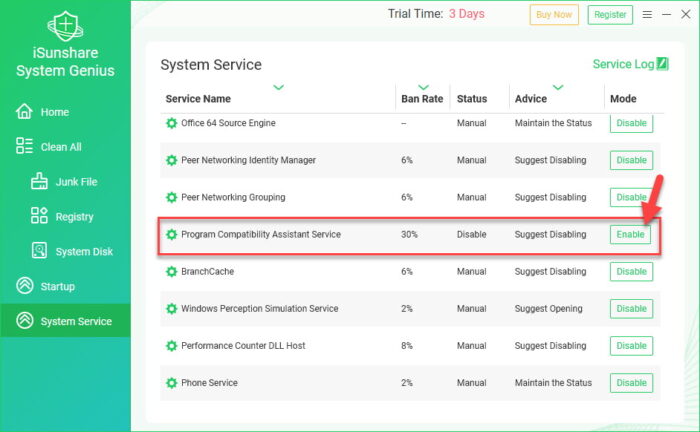
Another method to disable the Program Compatibility Assistant is using third-party software. System Genius by iSunshare can be used to control Windows services, amongst other features. Using this software, you can disable the Program Compatibility Assistant Service.
Note that this is paid software with a 3-day free trial period.
Here is how to use System Genius to disable PCA:
-
Download and install System Genius.
-
Run the application and switch to the “System Service” tab.

Open the System Service tab in the System Genius software -
Search for the “Program Compatibility Assistant Service” and click Disable in front of it.

Disable the Program Compatibility Assistant Service using System Genius
That’s it! PCA will now be disabled until you manually re-enable it.
To enable PCA again, all you need to do is click Enable in front of the service inside the System Genius software.

Closing Thoughts
The Program Compatibility Assistant is there to provide user convenience. It allows you to run incompatible and old apps and programs on your modern Windows version. However, that is not always the case. Sometimes, it considers compatible software as incompatible as well. This is when you should ideally disable the feature.
This article lists four methods to disable the aforementioned Windows feature. Do not worry; you can re-enable it just easily when needed.


