If you are encountering the “The sign-in method you’re trying to use isn’t allowed” on a computer, a system administrator has likely prevented you from accessing that particular PC. They may have their reasons for it, but now how do you sign into it?
The mentioned error message can occur when attempting one of the two sign-in scenarios:
- You’re trying to log in with a Guest account on a Windows 11 or Windows 10 PC.
- You’re trying to log in on a Windows Server with an account that is not a domain administrator.
The error message that you may come across is:
The sign-in method you are trying to use isn’t allowed. Try a different sign-in method or contact your system or network administrator.
In this article, we show you how to bypass this error message simply by making changes to certain Group Policies.
Table of Contents
Why the Error Occurs
“The sign-in method you’re trying to use isn’t allowed” error occurs when a sysadmin has restricted a specific user or an entire user group from accessing a computer. This policy can be applied on individual computers, as well as the computer that has been joined to a domain.
Two policies control sign-in behavior:
- Allow log on locally
- Deny log on locally
In both of these Group Policies, the user or group is defined that should be allowed to log on, or restricted. Note that the “Deny log on locally” policy has precedence over the “Allow log on locally” policy. Therefore, if a user account has been added to both policies, the user won’t be allowed to sign in, and you will see the aforementioned error message.
Further ahead in this article, we are going to show you how to modify both of these policies to gain access to the computer. Note that these methods will only work if you have access to the local administrator account (on a Windows client PC) or the Domain Controller (in the case of Windows Server). Otherwise, you may want to connect with your domain administrator.
Fix the Disallowed Sign-In Method Error
Allow User to Log On Locally
The first thing you must do is add the user to the Group Policy “Allow log on locally.” The methods for this are slightly different on a Windows client computer and a Windows Server.
Allow User to Log On Locally on Windows 10, 11
Use the following steps to allow the user to successfully sign in on a Windows client computer:
-
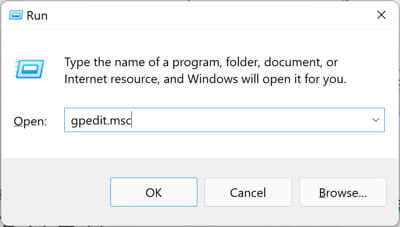
Open the Group Policy Editor by typing in “gpedit.msc” in the Run Command box.

Open the Group Policy Editor -
Navigate to the following from the left pane:
Computer Configuration >> Windows Settings >> Security Settings >> Local Policies >> User Rights Assignment
-
Open the policy “Allow log on locally.”

Allow log on locally group policy Here, you will find all the users and groups that are allowed to log in to the computer.
-
If you find that your user account is not added, click “Add User or Group.”

Add user to allow access -
In the popup window, click Advanced.

Open advanced user-finding options -
Now click “Find Now.”
This will populate all of the users and groups in the list below.

Find and populate all users and groups -
Double-click the user/group you want to add, and then click “Ok” on the remaining windows.
This will add the selected user or group to the “allow” list.

A user has been allowed to sign in locally -
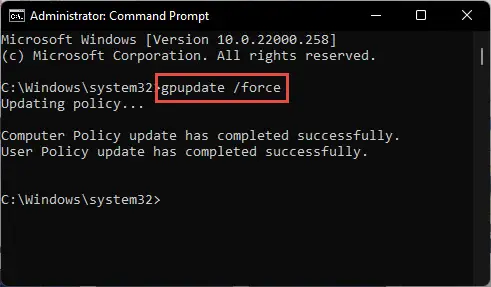
Close the Group Policy Editor and run the following command in an elevated Command Prompt to enforce the policy changes:
GPUpdate /Force
Enforce policy changes Alternatively, you can restart the computer instead.
Allow User to Log On Locally on Windows Server
-
Open the Group Policy Management Console (GPMC) by typing in “gpmc.msc” in the Run Command box.

Open the Group Policy Management Console -
Navigate to the following from the left pane:
Forest: [ForestName] >> Domains >> [DomainName] >> Group Policy Objects
-
Here, right-click “Default Domain Controllers Policy” and then click “Edit” from the context menu.

Edit Domain Controller policies The Group Policy Editor will now open.
-
Navigate to the following from the left pane:
Computer Configuration >> Policies >> windows Settings >> Security Settings >> Local Policies >> User Rights Management
-
Open the policy “Allow log on locally.”
In this window, you will find all the users and groups that are allowed to log in to the server.
-
If you find that your user account is not added, click “Add User or Group.”

Add user to allow access on server -
Click “Browse” and then click “Advanced.”

Open advanced user-finding options -
Now click “Find Now.”
This will populate all of the users and groups in the list below

Find and populate all users and groups -
Double-click the user/account that you want to allow to sign into the Server, and then continue to click “Ok” on all the windows to save the changes.
-
Close the Group Policy Editor and the Group Policy Management Console, and run the following command in an elevated Command Prompt to enforce the policy changes:
GPUpdate /Force
Enforce updated group policies
This covers adding the user to the allowed list. However, we still have to check and ensure that the user is not on the deny list.
Remove User from the Deny Logon List
Remove User from Deny Log on Locally on Windows 10, 11
-
Open the Group Policy Editor by typing in “gpedit.msc” in the Run Command box.

Open the Group Policy Editor -
Navigate to the following from the left pane:
Computer Configuration >> Windows Settings >> Security Settings >> Local Policies >> User Rights Assignment
-
Open the policy “Deny log on locally.”

Deny log on locally group policy Here, you will find all the users and groups that are denied logging in to the computer.
-
If you find that your user account is listed, select it and then click “Remove.”

Remove user from deny login list As you can see from the image above, the “Guest” account is denied access to log into the computer. This is the default Windows 10/11 setting.
-
Now click Apply and Ok.
-
Close the Group Policy Editor and run the following command in an elevated Command Prompt to enforce the policy changes:
GPUpdate /Force
Enforce policy changes Alternatively, you can restart the computer instead.
Remove User from Deny Log on Locally on Windows Server
-
Open the Group Policy Management Console (GPMC) by typing in “gpmc.msc” in the Run Command box.

Open the Group Policy Management Console -
Navigate to the following from the left pane:
Forest: [ForestName] >> Domains >> [DomainName] >> Group Policy Objects
-
Here, right-click “Default Domain Controllers Policy” and then click “Edit” from the context menu.

Edit Domain Controller policies The Group Policy Editor will now open.
-
Navigate to the following from the left pane:
Computer Configuration >> Policies >> windows Settings >> Security Settings >> Local Policies >> User Rights Management
-
Open the policy “Deny log on locally.”
In this window, you will find all the users and groups that are denied access to log in to the server.
-
If you find that your user account is mentioned in the list, select it and then click “Remove.”

Remove user from deny login list on Server -
Click Apply and Ok.
-
Close the Group Policy Editor and the Group Policy Management Console, and run the following command in an elevated Command Prompt to enforce the policy changes:
GPUpdate /Force
Enforce group policies
Performing the given steps above, whether on a Windows 10/11 PC or a Windows Server, you should now be able to sign into the account without encountering the “The sign-in method you’re trying to use isn’t allowed” error message.
However, if these didn’t work, there are a few other things you may want to consider to fix the issue.
Disable Antivirus Software
Antivirus can block a user from signing in, especially if the computer is connected to a domain. In such an instance, you need to disable this antivirus software and check if it fixes the issue.
Learn how to disable Windows Defender (Windows Security).
Closing Thoughts
The error “The sign-in method you are trying to use isn’t allowed” is encountered when trying to log in using a Guest account on a Windows client PC, or attempting to sign in on a Domain Controller with an account without domain administrative privileges. Regardless, you can still sign into the PCusin the very same account by making changes to the Group Policies, as discussed in this post.
In this article, we have shown how to allow a user to sign into a PC if they are restricted, on both Windows 10/11 PCs and Windows Servers.


