

Most modern devices use both the IPv4 and the IPv6 IP assignment technologies, so if an IP address is assigned by a router using either one of these, the device will connect to the internet successfully. However, this often occurs in an error when the IPv6 connectivity shows “No internet access” or “No network access.”
This error can occur even if both the computer and the router support Internet Protocol version 6. It can occur for several reasons, all of which can be addressed, and you can connect to the network again.
This guide provides the solutions to fix the “No network/internet access” error on a Windows computer.
Table of Contents
What causes “No network access” error
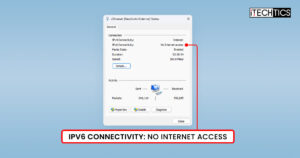
There can be several reasons for your device not being able to connect to the network and showing the “No network access” error, especially in front of the IPv6 field inside the Network Connections applet.

Here are a few common reasons for this error to occur:
- A temporary issue with the network card or the router could hinder the connectivity protocol handshake. This can usually be resolved with a simple restart.
- Outdated or corrupted device drivers can often lead to network connectivity issues.
- The firewall or antivirus software can potentially block network connections that are not trusted, preventing an IP address allotment from that particular network.
- The network’s HT mode could be wrongly configured, making the adapter and the router incompatible.
Regardless of the reason, the following solutions below should fix the “No network error” and connect you to the network seamlessly.
Fix the IPv6 “No Network/Internet Access” error
The fixes provided below cater to most reasons for a faulty network connection. Perform them in the given chronological order and check which one resolves the “No network access” error for you. But before performing some of the advanced troubleshooting techniques, I recommend beginning with some pre-troubleshooting.
Pre-troubleshooting
To begin, start by restarting both your computer and the router. Sometimes, the Windows services responsible for making a network connection malfunction, and an adapter or a computer restart usually fixes that.
Additionally, it may be possible that your router has been active for a long time, and a restart refreshes its firmware and services. Moreover, the issue can also be between your router and the Internet Service Provider’s (ISP) connection, which can also be resolved by a reboot.
Once this is done, and the IPv6 still doesn’t receive an address, then proceed to perform the remaining solutions below.
Run the Network and Internet troubleshooter
Both Windows 10 and Windows 11 come with preinstalled troubleshooters that automatically scan and detect any common issues. If detected, they also suggest possible fixes, which can be applied at the click of a button.
One such troubleshooter is the “Network and Internet” troubleshooter. Run this troubleshooter and see if it fixes the problem using these steps:
-
Press the Windows Key + i to open the Settings app.
-
Click System.
-
Click Troubleshoot.

Open the Troubleshoot settings page -
Click “Other troubleshooters.”

Access other troubleshooters -
Click “Run” in front of “Network and Internet.”

Run the Network and Internet troubleshooter Note: If you are on Windows 11, this will open the “Get Help” app. In the case of Windows 10, proceed with the on-screen instructions and perform the recommended solutions in case a fault is found.
-
If the “Get Help” app opens, it will scan for any anomalies and provide possible fixes. Apply the fixes as suggested.

Perform possible solutions by the troubleshooter/Get Help app


Update the network driver
Device drivers help the hardware function as it should. An outdated or corrupted network driver can cause the associated hardware to malfunction, possibly resulting in the “No network access” error for IPv6. Therefore, if you have not recently installed an update, use the following steps to update the network driver:
Note: For this method to work, your device must be online. Therefore, it is recommended that you connect to an alternate router, or connect via the LAN cable. Additionally, you can also download the driver for your device using another PC and then update it manually.
-
Press the Windows key + R to open the Run Command box.
-
Type in “devmgmt.msc” and press Enter to launch the Device Management Console.
-
Click “Network adapters” to expand it.

Expand Network adapters -
Right-click on the wireless network adapter and then click “Update driver.”

Update wireless network adapter driver -
From the update wizard, click “Search automatically for drivers.”

Search for drivers automatically The wizard will now search for driver updates online and install it if one is available.
-
[Conditional] If a driver update is not available, try reinstalling the current driver.

After performing the steps above, check to see if the problem has been resolved. If not, continue to perform the remaining solutions below.
Restart the Winsock and TCP/IP Stack
Restarting the Winsock and the TCP/IP stack often resolves the issues relating to network connectivity.
Winsock allows Windows apps and programs to connect to the internet through TCP/IP, and the Transmission Control Protocol/Internet Protocol (TCP/IP) is responsible for carrying packets from one source to its destination target. If either of these faces an issue, you likely encounter a connectivity error.
Use the following steps to restart these items:
-
Press the Windows Key + R to open the Run Command box.
-
Type in “cmd” and press CTRL + Shift + Enter to launch an elevated Command Prompt.
-
Execute the following command to reset Winsock:
netsh winsock reset catalog
Reset Winsock -
Next, run this command to reset the IPv6 settings:
netsh int ipv6 reset reset.log
Reset IPv6 settings -
Now restart the computer.


Once the computer restarts, check to see if the IPv6 status has now changed and you can connect to the network.
Disable the IP Helper service
IP Helper is a Windows service that uses IPv6 transition technology to give your device a tunnel connection. You might be able to resolve the issue by disabling the IP Helper service. Here is how:
-
Press the Windows key + R to open the Run Command box.
-
Type in “services.msc” and press Enter to open the Services console.
-
Right-click the “IP Helper” service and then click Properties.

Open IP Helper properties -
From the “Startup type” drop-down menu, select Disabled. Click Stop, and then click Apply and OK.

Disable the IP Helper service


After performing these steps, check to see if the “No network access” error has been mitigated from the IPv6 connection.
Disable Windows Firewall
The Windows Firewall could be preventing your device from connecting to a network. Try disabling your firewall (temporarily) and see if it resolves the issue:
-
Press the Windows Key + R to open the Run Command box.
-
Type in “firewall.cpl” and press Enter to open the firewall applet.
-
Click “Turn Windows Defender Firewall on or off” from the left.

Manage Windows firewall -
Select “Turn off Windows Defender Firewall” under every network profile visible, then click “OK.”

Turn off firewall


After disabling the firewall, check to see if it fixes the error.
Disable third-party antivirus
Third-party antivirus software can block internet connections that they think may be malicious or unsecure. Therefore, try disabling any antivirus that is installed on your PC, and check if IPv6 can establish a connection successfully.
In such an instance, you need to disable this antivirus software and check if it fixes the issue. If it does, then you need to change your antivirus or at least its configuration settings
Learn how to disable Windows Defender (Windows Security).
Change HT mode
The HT mode, or the wireless mode defines the channel bandwidth, supported data rates, or Throughput mode of a device. Incompatible HT modes on the router and the device can prevent a successful connection and is a possible reason for the IPv6 “No internet access” error.
Use the following steps to change your adapter’s HT mode and check if it fixes the issue. To be sure, we suggest circling through all the HT modes available to confirm which one is compatible with the router:
-
Press the Windows Key + R to open the Run Command box.
-
Type in “ncpa.cpl” to open the Network Connections applet.
-
Right-click the wireless network adapter and click Properties.

Open the wireless network adapter properties -
In the Properties window, click Configure.

Configure the network adapter -
Switch to the Advanced tab.
-
Select “Wireless mode” from the left, and then select a different HT mode value from the drop-down menu.

Change the HT mode -
Click OK and restart the computer for the changes to take effect.

When the computer restarts, check to see if you are now able to connect to the internet using IPv6. If not, repeat the steps above and pick a different HT mode.
Adjust IPv6 settings from router
If none of the solutions have worked so far, make sure that your router supports IPv6 connections. Even if it doesn’t, make sure that the option is enabled by logging into the router.
Access the router’s portal by entering its IP address in a browser, and then use administrative credentials to log in. Once inside, make sure that the IPv6 option is selected and enabled. Turn the setting to “Auto Detect” or “Auto-Config”, whichever option is available.
Once configured, restart the router and the device for a successful IPv6 connection to be established.
Ending words
The IPv6 status displaying “No internet access” signifies that the router has not assigned an IP address to the device using the IPv6 protocol. This can be due to different reasons like the router does not support the IPv6 protocol or an issue with the device preventing it from connecting to the network.
This post provides a step-by-step guide on fixing the “No network access” error on a Windows PC, regardless of the cause.


