The deployment of multiple Windows ISO images becomes easier if you have a custom ISO image with all the changes you want to do after installing Windows.. You no longer need to deploy your ISO images beforehand and then make the necessary changes on each device, since the ISO images can be edited directly.
This article explains how you can add and remove Windows components before performing a fresh installation of Windows with that ISO image. It’s especially helpful for IT administrators who frequently upgrade their systems and software.
We had previously discussed slipstreaming in one of our posts. Slipstreaming is a process to integrate update packages released by Microsoft to existing ISO images so that one does not need to download an entire ISO package again, and simply update their existing one and use it for deployment.
Whereas the MSMG Toolkit that we are going to be using here is used to customize the existing packages and components within an ISO image or to add more standalone components.
Let’s talk about the MSMG Toolkit in more detail and its benefits.
Table of Contents
What is MSMG Toolkit
MSMG Toolkit is a command-line utility used to manipulate ISO, WIM, and ESD image files in all sorts of ways. It can be used for conversion, adding and removing components, creating bootable devices, etc. Today, we are going to be using this handy utility to add and remove Windows components so it becomes lightweight and bloat-free.

The MSMG Toolkit does not require you to learn any extra or complicated cmdlets. Rather, it is a system based on actions and their corresponding numbers. For example, simply select a number alongside the actions mentioned in the main menu in the image above. For example, if I want to select a source, I shall enter 1 and press Enter.
There are several advantages of using MSMG Toolkit, especially for those that regularly need to install OS on a number of devices. First, the changes made to the image will be replicated across all devices the image is used on. Thus, you will no longer be required to perform the same actions after deploying the image on each individual machine, saving both time and additional unnecessary effort.
You are also saving space on the system partition by removing bloatware (components that are not required) and simultaneously upgrading the ISO image by integrating additional add-ons such as feature packs, Windows updates, drivers, etc.
Having said that, in comparison, there is no downside to using MSMG Toolkit, except for the fact that you may require to spend some time performing the task of adding and removing components. But in reality, you will be saving it by not performing the same tasks on each device you deploy the image on.
Now let us discuss each item on the menu and what its function is. At this point, we would like you to understand that not only one item from the menu needs to be accessed to perform a task.
For example, if we wish to optimize an ISO image, we first need to select the source (1), integrate (2) or remove (3) components, or maybe both. We must apply (5) the changes and then save the customized image to a target (6) location. Thus, most of the menus need to be accessed one after the other.
Source

From the Source menu, you need to select the image you want to work on. For that, the image or its extracted content needs to be pasted/moved to a dedicated folder. This will be discussed in detail further down the article while performing the task.
Integrate
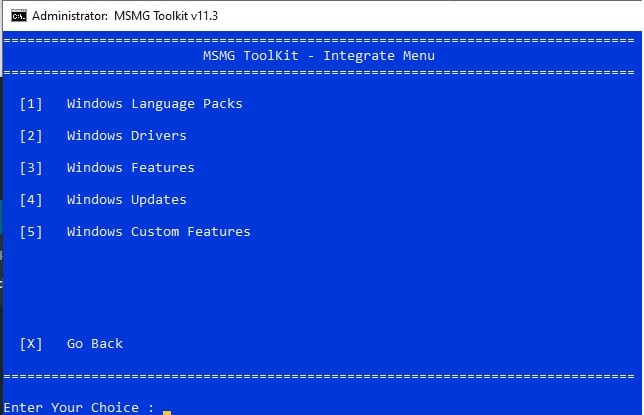
You can integrate content into the image from the Integrate menu, as you can see in the image above. Each type of component first needs to be moved to its dedicated and respective location first, which will be discussed further down the article.
Remove
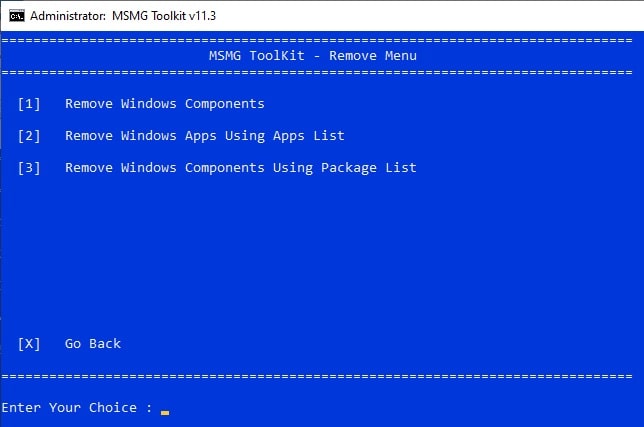
From the Remove menu, you can remove existing components from the image, such as Windows components and Windows applications.
Customize
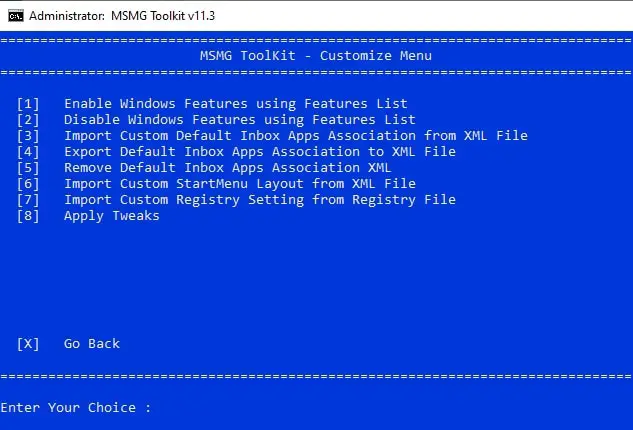
From the Customize menu, you can enable or disable Windows features as well as import or export system registries and other settings. This way, you can pre-enabled or remove the settings that are not required by the end-user.
Apply
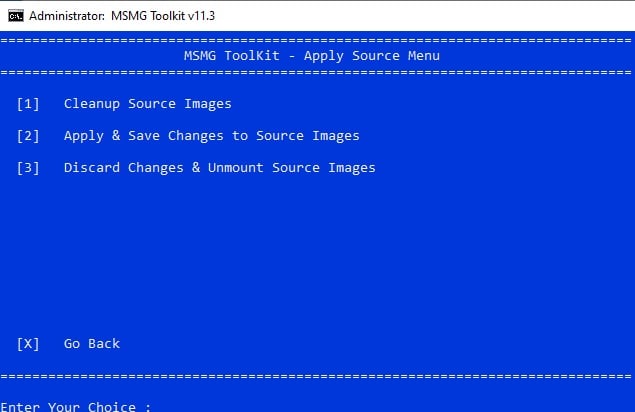
Once all of the customizations and changes are made, it is now time to apply the changes to the new image through the Apply menu. This will save any changes made and dismount the image.
Target

The Target menu is from where you can create an ISO image or a bootable device using the new customizations.
Tools

The Tools menu can be used to customize the MSMG CLI itself or customize the new image that has been created, such as change its name, convert it, or merge it with another image, etc.
Now that you understand what each of the menus within MSMG Toolkit is for, let’s proceed to adding and removing Windows components.
How to add or remove Windows components from ISO images using MSMG Toolkit
To begin, you must initially have an ISO image you wish to customize. If you do not have one, refer to this guide to download any version of Windows 10.
Note: We strongly suggest that you create a system restore point before proceeding further as any incorrect manipulation could turn fatal for your own device’s OS.
Now follow the steps below to customize your ISO image as per your requirement.
Selecting the source
You must first select the source, which is the ISO image that you want to manipulate. Follow the steps below to initialize the process:
- Download the MSMG Toolkit by clicking here.
- Once downloaded, extract the zip file from any location of your preference. Ensure that the drive has ample extra space.
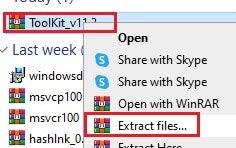
- Now copy the ISO image you want to manipulate and paste it into the ISO folder in the extracted MSMG Toolkit.

- Once pasted, run the MSMG Toolkit by double-clicking Start.cmd.

- When it runs, you will encounter a screen like the one below with the End User License Agreement (EULA). Press “A” on your keyboard to accept it.

- The toolkit will then automatically set some environment path variables. Press any key to continue.

- You will now be on the main menu. Press 1 and select Source.

- Now press 3 to extract the ISO image from the ISO folder and into the DVD folder.

- In the next window, enter the exact name of the ISO image that you have pasted and want to manipulate and press Enter. This step may take a while. Once it is done, you will see a “Press any key to continue” prompt. Do so.

- You will now be back on the main menu. Enter 1 again to select Source, and then press 1 to Select Source from <DVD> Folder.

- If prompted with another page to “Select Source Images,” enter the corresponding number of the version of Windows you want to manipulate, as in the example below:

- You will now be asked whether you want to mount Windows Setup Boot Image and Windows Recovery Image. Enter Y twice to mount them both. The mounting process will now begin and this step may take a few minutes to complete. If it is, press any key to continue.

You will now be back on the main menu. It is now time to proceed to manipulate the source using the guide provided for each element below.
Integrate components
Since there are several options in the Integrate menu, we will only be discussing one: Windows Updates. You can perform other operations using the same logic.
- From the main menu, enter 2 and go to Integrate menu.

- Now enter 4 and go to Windows Updates menu.

- You will now be prompted with a warning. Enter Y to proceed.

- You must now copy the updates into the Updates folder (in the complete correct path) within the extracted MSMG Toolkit folder. Below is an example of the complete correct path:

To download Windows updates, refer to Microsoft Update Catalog. - Once copied, go back to the toolkit and enter 1 to select Integrate Windows Updates.

- As soon as you press 1, the toolkit will start integrating the update(s).

Once done, press any key to continue.
You can now continue to integrate other components as well if you require using the same process as above.
Remove components
Opposite to integrating components, you can also remove them. Follow the steps below:
- Enter 3 and select Remove from the main menu.

- On the next screen, press 1 to select “Remove Windows components.”

- Press 1 again to select “Select Windows Components.”

- On the next screen, select what you want to remove. We selected “(7) Windows apps.”

- A long list of components will now be listed. Enter the corresponding number for the component you wish to remove and press enter.

- Repeat the last step to select all the components you want to remove. The ones removed will be prefixed with the “-” instead of the “+” sign.

- When done, enter X and press enter to return to the previous menu. Keep pressing X until you reach the main menu.
This guide should help you remove any number of components from the image. It is important to note that they have not yet been deleted, but will be when you apply the changes, which will be done near the end of the process.
Customize ISO image
To customize the existing features in the image, follow the guide below. In this example, we will be making a few tweaks to the image.
- Press 4 to enter the Customize menu.

- Now press 8 to select Apply tweaks.

- In the next menu, press the associated alphabet to perform a system tweak.

- The toolkit will then apply the tweaks. Repeat the last step to make as many tweaks as required.
- When done, press X twice to go back to the main menu.
You have now successfully made the changes that were required. Remember that each sub-menu will have different options you can choose from, so choose wisely.
Apply changes
It is now time to apply all of the changes that you have made so far.
- Click 5 to select Apply.

- Now press 2 to save the changes made and apply them to the source image.

- You will then be asked if you want to clean up the image and wish to trim the OS editions that have not been selected. Press Y both times. The MSMG toolkit will then begin to save the changes. This step may take a few minutes.

- Once done, press any key to continue.
The changes have been applied and saved. However, there is still work to do. You must now create a new image from this customized image. For that, proceed to the next step.
Save to target
It is now time to create a new ISO image, or directly a bootable device of this new customized ISO image. We will be creating a simple ISO image in the example below.
- Press 6 to select Target from the main menu.

- Now press 1 to make an ISO image.

- You will now be asked for the details of the image you want to create. Fill them out as done in the image below:

- The toolkit will now begin creating the ISO image. This step may take a few minutes to complete. Once done, press any key to continue.
The new image created can be found in the same ISO folder where you had initially pasted the original ISO file in.

Closing words
MSMG Toolkit is a great utility to have, especially for system administrators. If you do not have a Windows Deployment Server (WDS) in your organization, this toolkit might be the next best thing for you.
You can use it to upgrade existing ISO images without having to download the latest ones and then deploy them with the required settings pre-configured.




2 comments
Star
This is great, but I am not seeing any resource that will give indications for ERROR messages on running the program. EG ” Extraction Failed.” No idea how to solve this.
Sanjay
Hi Shubhan,
You dig very well and comeup with precious cream.wonderful job you did.