

Key Points
- OpenSSH for Windows allows you to securely access remote computers with Windows-native tools using the command line interface.
- To install OpenSSH Client and Server on Windows, go to Settings > System > Optional features > View features, search for “OpenSSH“, and continue to install the components.
Windows users normally use the Remote Desktop Protocol to access other Windows devices remotely. As RDP offers a remote graphical user interface (GUI), it is a convenient method for remote access. However, it offers limited functionality, especially if you are a sysadmin. For that purpose, some people prefer to use the Secure Socket Shell (SSH) protocol.
SSH provides a command-line interface to remote computers and servers, and therefore, a more granular control over them. Previously, we used third-party apps like “PuTTY” and “MobaXterm” to develop an SSH connection with the remote devices. However, Microsoft has made a Windows-native SSH client available which can be used instead.
OpenSSH for Windows is a Feature on Demand (FoD) add-on for the Windows operating system. This means that although it is free, it is not installed by default, and needs to be installed manually. If you install it, you can use the SSH protocol through the native command line to access and control the remote computers, provided that your user account has the required privileges.
This guide will show you how to install and use OpenSSH for Windows. These will work on both Windows 11 and Windows 10 (version 1809 and above). Using this guide, you can install both OpenSSH Client and OpenSSH Server in a few easy steps.
Table of Contents
What is OpenSSH
The Secure Socket Shell, or Secure Shell is a networking protocol that allows a remote connection with another device securely. SSH uses a client-server model to communicate with remote computers and ensures data integrity through encryption. It uses multiple layers of the OSI reference model to make sure that the communicated data between the devices is secure.
Originally, OpenSSH was a tool used for remote connection with other devices which comes preinstalled in Linux-based operating systems. Since it is an open-source utility, it has been modified for other platforms, including Windows.
Microsoft has now made “OpenSSH for Windows” available that you can install with a small update package.
Before installing OpenSSH, your system needs to meet a few requirements.
Requirements for OpenSSH for Windows
Before proceeding to install either OpenSSH Client or Server, you must make sure that your PC satisfies the prerequisites, which are:
- OS should be Windows 10 version 1809 or later.
- The PowerShell version should be 5.1 or above
- The user account must be a member of the Administrators group.
To check the OS version, run the following command in the Run Command box:
WinVerTo check the PowerShell version, run the following command in PowerShell:
$PSVersionTable.PSVersionTo check if your user is a member of the Administrators group, run the following command in PowerShell. If it returns “True“, it means that you are a member of the Administrator group.
(New-Object Security.Principal.WindowsPrincipal([Security.Principal.WindowsIdentity]::GetCurrent())).IsInRole([Security.Principal.WindowsBuiltInRole]::Administrator)Once you have made sure that your PC satisfies these requirements, you may continue to install OpenSSH Client, OpenSSH Server, or both.
Install OpenSSH on Windows
Implement the following steps to install OpenSSH on your Windows computer to access it remotely. Optionally, you can also install “OpenSSH Server” to access this device from another PC using the SSH protocol.
-
Press the Windows key + i to open the Settings app.
-
Click System.
-
Go to “Optional Features“.

Open the optional features settings page -
Click “View features“.

View optional features -
Search for “OpenSSH“.
-
Select “OpenSSH Client” and optionally, “OpenSSH Server“, and then click Next.

Select OpenSSH Client and Server -
Click Install.

Install OpenSSH Client and Server on Windows


After performing these steps, OpenSSH Client (and Server) will be installed on your computer.
Note: These features can take some time to install.
Alternative to the steps above, you can also run the following command in an elevated PowerShell instance to install OpenSSH for Windows:
Get-WindowsCapability -Online | Where-Object Name -like 'OpenSSH*'This command will install both OpenSSH Client and OpenSSH Server.
Using OpenSSH Client for Windows
Once OpenSSH Client for Windows has been installed, you can begin using it to connect with remote PCs on the network. Of course, OpenSSH has to be configured on the remote PC first, the method for which has been given below in this post.
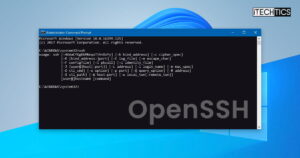
First, confirm that it has been installed successfully by running the following command in Command Prompt:
ssh
Once confirmed, you can access a remote PC on the network which has SSH configured using this command:
ssh [Username]@[ServerName]
Note: You may be asked for user credentials if connecting for the first time.
Note that the command above will try to connect to the remote device using the default port, which is 22. If you want to use a different port, then you will need to use this command instead:
ssh [Username]@[ServerName] -p [PortNumber]
Configuring OpenSSH Server for Windows
If you have installed the OpenSSH Server on your Windows PC, you will need to configure it before you can connect to this PC using the SSH protocol.
Configuring the OpenSSH server can be a bit thicker. You need to make sure that it is allowed through the firewall and the proper ports. Therefore, it involves a few steps. Here is what you need to do:
-
First, run the following command in an elevated PowerShell to run the “sshd” service automatically.
Set-Service -Name sshd -StartupType 'Automatic' -
Now start the service with this command:
Start-Service sshd -
Now use the following command to ensure that the SSH server is running and waiting for the connections on port 22:
netstat -na| find ":22" -
Now ensure that the Windows Defender Firewall allows inbound connections to Windows through the TCP port 22 with this command:
Get-NetFirewallRule -Name *OpenSSH-Server* |select Name, DisplayName, Description, Enabled
Confirm rules for SSH server connection -
[Conditional] If you find that the rule is missing or disabled, run the following command to create a new inbound rule:
New-NetFirewallRule -Name sshd -DisplayName 'OpenSSH Server (sshd)' -Enabled True -Direction Inbound -Protocol TCP -Action Allow -LocalPort 22 -
To change the default rules for the SSH connection, run the following command in PowerShell which will open the respective OpenSSH file in Notepad:
start-process notepad C:\Programdata\ssh\sshd_config -
Make the necessary changes in the file to manage the permissions, and then save the file using the CTRL + S shortcut keys.
Here are a few examples of the rules:
- Deny domain user:
DenyUsers itt\administrator@192.168.10.10 - Allow a domain group:
AllowGroups itt\sshadmins - Allow local groups:
AllowGroups Administrators

Manage SSH permissions - Deny domain user:
-
After making the changes, run the following command in PowerShell:
restart-service sshd


After performing the steps above, you should be able to connect to this PC using the SSH protocol. For that purpose, use the command ssh [Username]@[ServerName] as discussed above.
Conclusion
With SSH, you do not need to perform a long string of operations to perform a simple task. Instead, you can access it with Windows-native OpenSSH and continue to manage the remote PC using commands. This makes OpenSSH for Windows an excellent utility for network and system administrators.


