Microsoft has just released a stable version of Windows 11. Many Windows 10 users have already upgraded to Windows 11 Insider Preview. If you are one of these people and would like to switch to Windows 11 stable instead of the Dev or Insider Preview channels, please follow this article.
Table of Contents
How to switch from Windows 11 Insider build to Windows 11 Stable build
Here are the steps necessary to switch from an Insider build to a stable build of Windows 11:
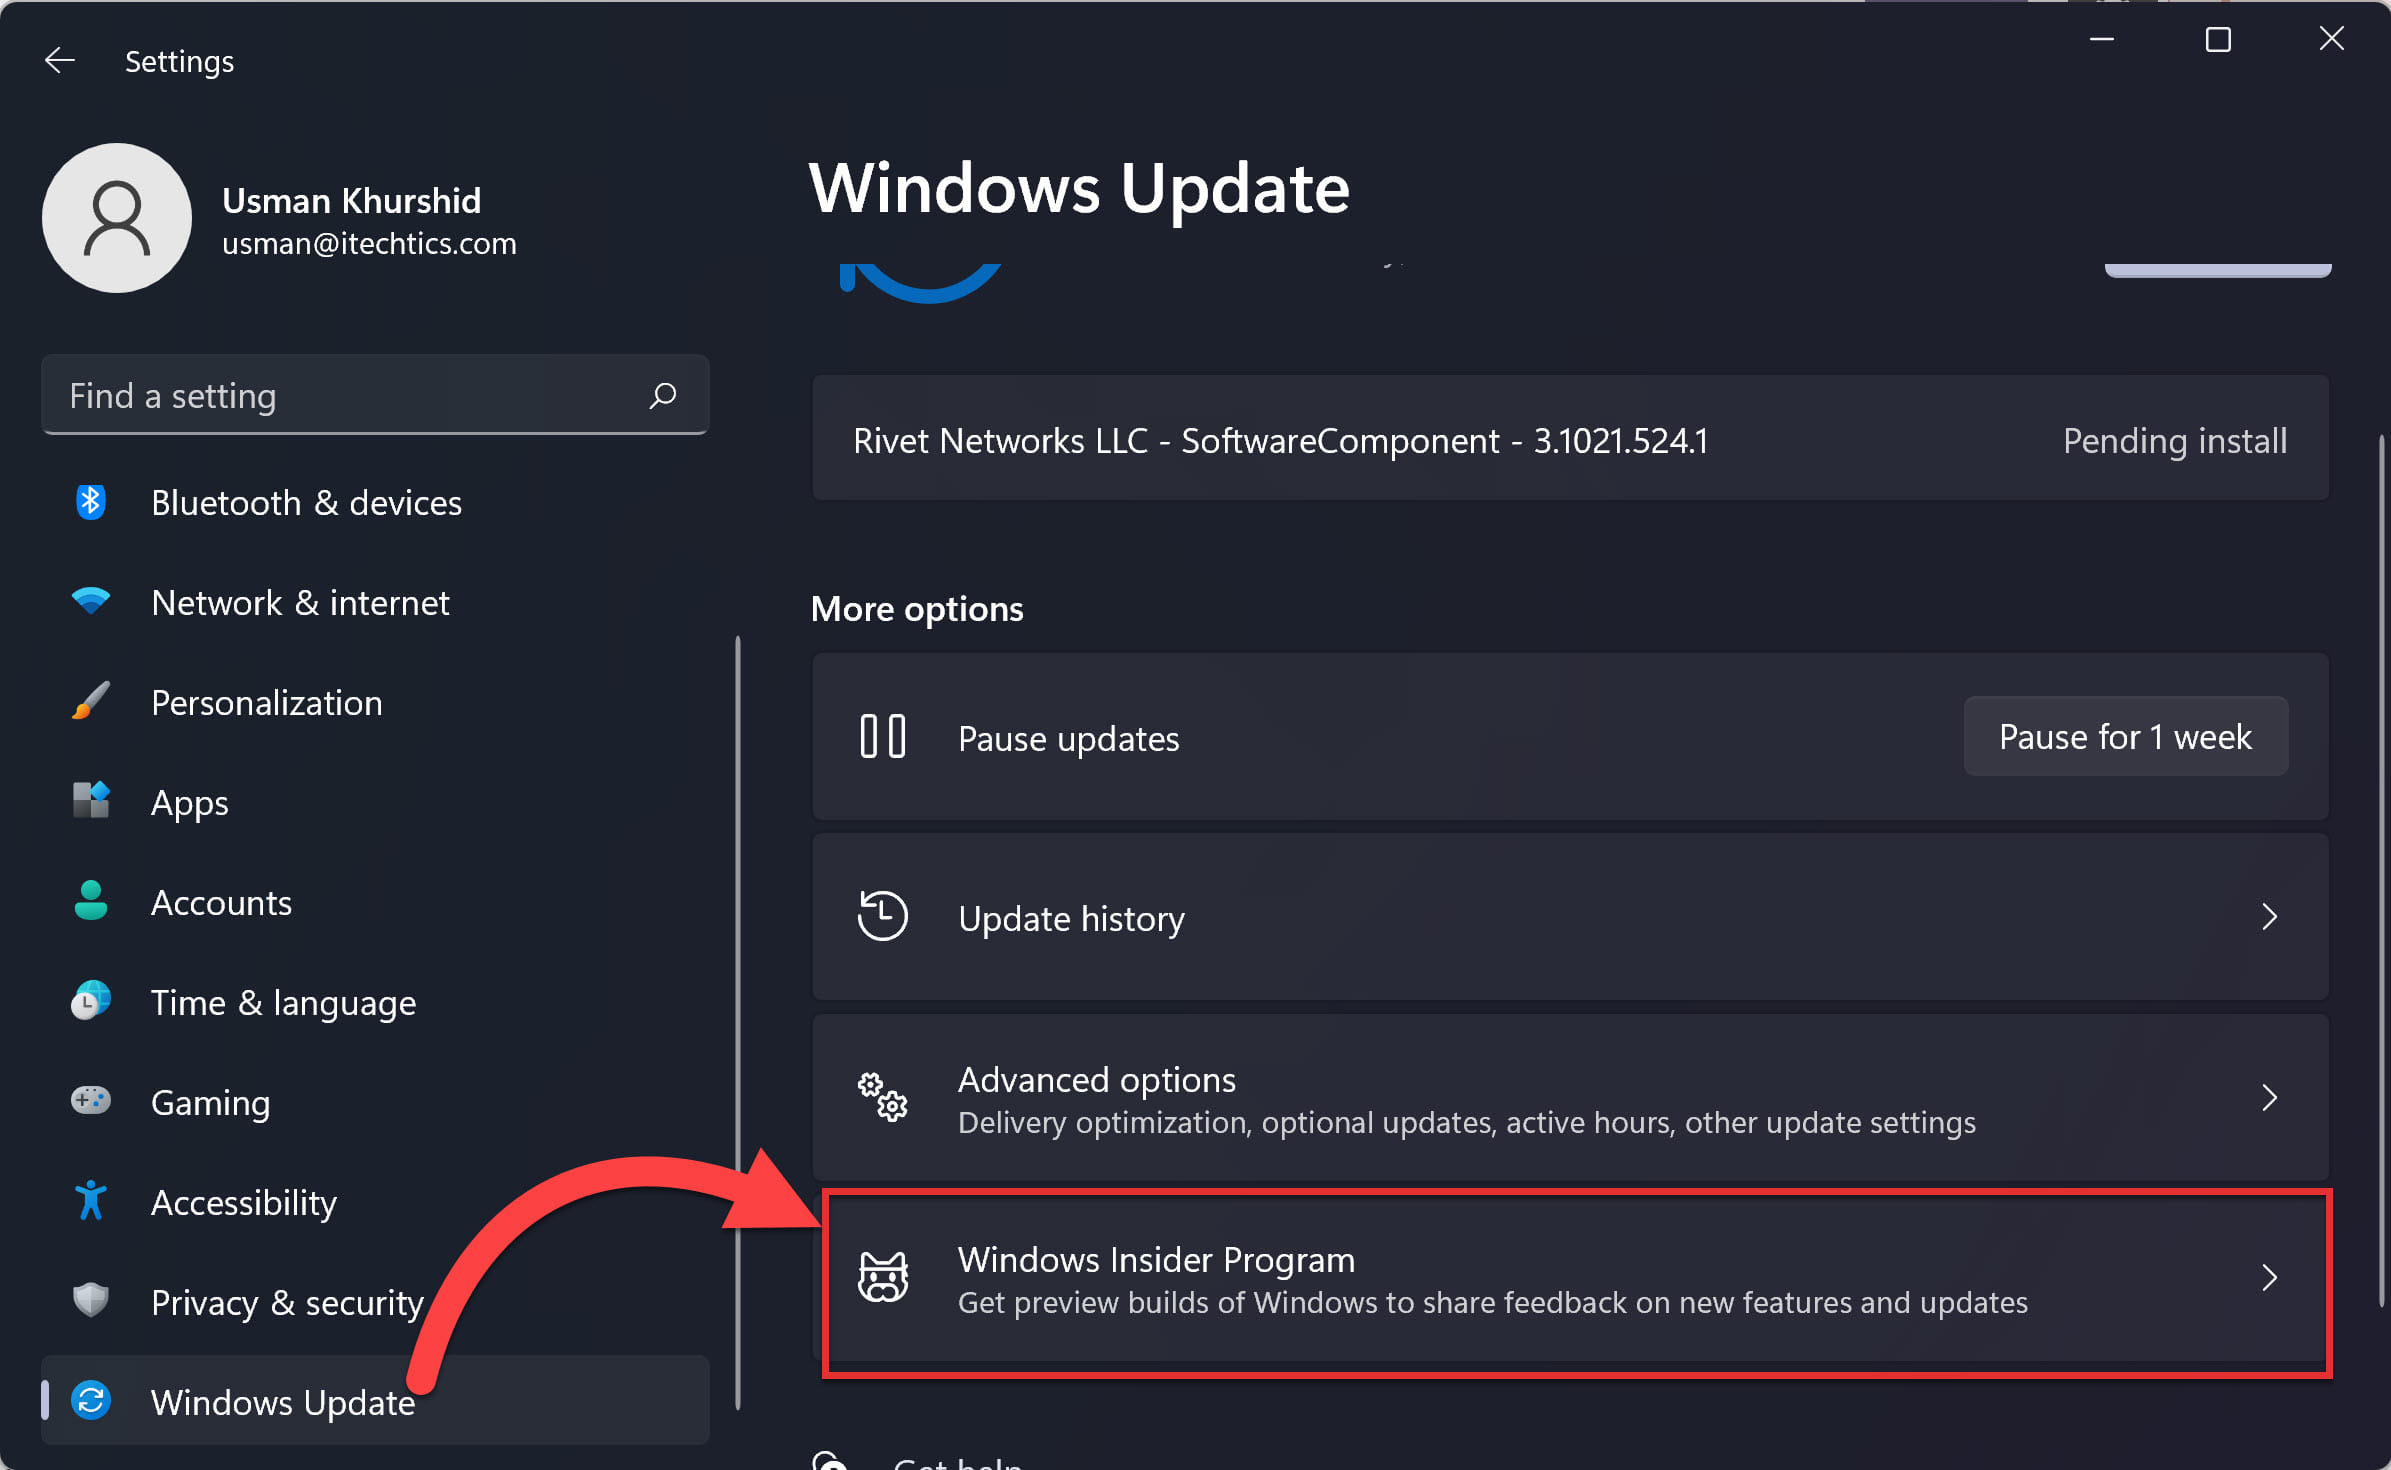
- Use the Windows key + i keyboard shortcut or click on the Start Menu –> Settings to open Windows settings.
- On the left hand menu pane, select the Windows Update menu item.

- Click on the Windows Insider Program in the right hand pane.

- Select Stop getting preview builds from the next screen.

- Here you will have two options:
- Unenroll this device when the next version of Windows releases
- Unenroll this device immediately

- You can choose either option to switch from Insider Preview to a stable build of Windows 11, but the results will be different.
First, let’s examine each option in depth and then decide which one to select.
Unenroll this device when the next version of Windows releases
If you are a member of the beta or release preview ring, you will have the option to enable this feature. With this option, Windows will not stop receiving new updates immediately, but will wait for the next public release of Windows 11.
Users who have enabled this option will no longer receive preview builds on their devices once the next major release of Windows is released to the public.
The caveat with this option is that you will not be able to uninstall the Windows 11 Insider build immediately, but you will have to wait until the next major release of the Operating System.
Only two major versions of Windows 11 are expected to be released each year. In this case, you may have to wait up to 6 months before you are able to install the stable version of Windows on your computer.
Unenroll this device immediately
Essentially, this option requires you to reinstall Windows 11 on your computer. This also implies that all your settings and data will be lost during the reinstallation process.
It is only recommended if the system does not have data on it and you are only using it for testing purposes.
In any case, you should backup your data completely before proceeding and perform a clean installation of Windows 11.
To clean install Windows 11, you will need to download Windows 11 ISO, create a bootable media and then do the installation.
How to leave Windows Insider When Using Windows Domain
You will need to complete an additional step if your computer is part of a Windows domain and you are connected to the Windows Insider program at the Domain level.
To leave the Windows Insider Program, click this link. Log in using your domain administrator email address.
Click on the Leave the program now button to unregister your organization from the Windows Insider Program. Using Insider Previews in your organization is disabled when you unregister.
What if the Switch to Stable build option is greyed out?
The option Unenroll this device when the next version of Windows releases is only available for Beta and Release Preview builds of Windows 11. If you are on the Dev channel, you will not have this option available to you. The only option available to you will be to clean install Windows 11.
An alternative method is to first switch from Dev to Beta and then use this option when it is enabled.
Follow the steps below to move from Dev to Beta:
- Open the Windows Registry Editor (Run –> regedit)
- Go to the following path:
HKEY_LOCAL_MACHINE\SOFTWARE\Microsoft\WindowsSelfHost\UI\Selection - In the right-hand pane, open UIBranch.
- Set its value to Beta.
- Now go to the following Registry path:
HKEY_LOCAL_MACHINE\SOFTWARE\Microsoft\WindowsSelfHost\Applicability - In the right-hand pane, open BranchName.
- Set its value to Beta.
- Restart the computer.

Windows will be tricked into enabling the option once you make the changes in the registry. Select the appropriate option to move out of Beta by following the instructions discussed above.
I hope this will make it easier for you to install the stable build of Windows 11. Both options have been discussed, for beta and insider previews, as well as for the developer channel. What is your experience with rolling back to the stable version?


2 comments
Ethan
i have had beta insider preview of 22H2 since August. windows update won’t let me replace the preivew of 22H2 with the public 22H2 even though the settings and this article says it should
Peter
unfortunately these steps to leave the DEV RS branch didn’t work for me :(