When it comes to troubleshooting, the Windows operating system has several built-in troubleshooters and multiple command-line utilities to get things up and running again. But what to do when you are unable to boot into Windows entirely? In that case, you can boot into safe mode or run the Windows Preinstallation Environment (WinPE).
The WinPE, or WindowsPE, is a command-line-based lightweight version of a Windows environment that runs on your RAM and does not require a hard drive. Its base version needs only 512 MBs of RAM to run, which can go up depending on the optional features you add.
That said, Microsoft does not provide the Windows Preinstallation Environment on a plate. Instead, you must create it yourself for the specific type of Windows version you want to troubleshoot or perform any actions on.
Today, we are going to give you the complete details and guidelines on what WinPE is, and how to create a bootable USB flash drive so you can become an IT professional.
Table of Contents
What is Windows Preinstallation Environment
The Windows Preinstallation Environment, or WindowsPE, is a miniature version of an executable Windows which runs on your system’s memory. It can be used to troubleshoot, deploy, and service a Windows image without booting into the Windows itself.
Note that WindowsPE provides a command-line interface, so it is only useful if you know the cmdlets to put into the Command Line Interface (CLI) to perform your desired action.
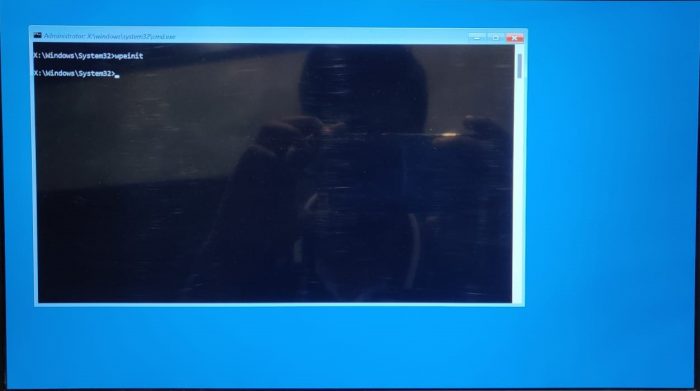
The Windows Preinstallation Environment looks like this:

Uses of Windows Preinstallation Environment (WinPE)
The WinPE is not only used for troubleshooting purposes but also provides other functionality. It can be used for the following list of actions:
- Set up the hard drive before installing Windows.
- Install Windows through apps or scripts from a network or a local drive.
- Capture and apply Windows images.
- Modify the Windows operating system while it’s not running.
- Set up automatic recovery tools.
- Recover data from unbootable devices.
- Add your own custom shell or GUI to automate the above-mentioned tasks.
Let us now continue to show you how to create a Windows Preinstallation Environment and then boot from it.
How to Create Windows Preinstallation Environment (WinPE)
Before we begin creating a WindowsPE bootable USB drive, there are a few things you might need beforehand:
- A USB drive – will be formatted and all data will be lost.
- Another PC (technician PC) in case you are unable to boot into your Windows PC that you want to troubleshoot. Note that the technician PC needs to be of the same Windows version.
- An active internet connection on the PC which will be used to create the WinPE bootable flash drive to perform downloads where required.
Ensure that you have these things before we proceed.
Furthermore, creating a bootable WinPE drive requires a few steps, some of which are optional. We have divided these steps into the following headings to make things less complicated:
- Install Windows Assessment and Deployment Kit (ADK) and WinPE Add-on.
- Create WinPE working files.
- (Optional) Customize WinPE to add optional features, like language packs, etc. This requires some additional steps:
- Mount boot.wim file.
- Add features.
- Commit and dismount the boot.wim file.
- Create a bootable WinPE USB flash drive.
- (Conditional) Convert USB to MBR (if in GPT) and format it.
- Install WinPE to the USB drive.
Note that these steps need to be performed in the chronological order given in the list above.
Install Windows ADK and WinPE Add-On
Firstly, you will need to install Windows Assessment and Deployment Kit (ADK) and WinPE Add-on on the computer you are using to create the WinPE USB flash drive. These are a collection of tools and features that you can combine to prepare, assess and launch image-based large-scale Windows deployments and perform other functions.
Note: If you are using Windows 10 version 1803 or earlier, then you only need to install Windows ADK since it already contains WinPE. However, if you are creating WinPE for Windows 10 version 1809 or later (including Windows 11), then you must install the WinPE Add-on separately, as given in the guide below
To confirm your Windows version, type in winver in the Run Command box.
Follow these steps to install Windows ADK and WinPE Add-on:
-
Start by downloading Windows ADK and WinPE Add-on for your Windows version from the direct download links given in this post.
-
When downloaded, run the “adksetup” file.
-
The Windows ADK wizard will now launch. On the first screen, select “Install the Windows Assessment and Deployment Kit to this computer” and click Next.

Install ADK for this computer -
Now select your privacy preference and click Next.

Select privacy terms -
Accept the license agreement.

Accept license agreement -
Now select the “Deployment Tools” feature (while unchecking all others since they are not required) and click Install.

Install ADK deployment tools -
The selected feature will now install. When it does, close the wizard.

Close ADK installer -
Now run the “adkwinpesetup” file for WinPE that you downloaded earlier.
-
The WinPE setup will now run. Select “Install the Windows Assessment and Deployment Kit Windows Preinstallation Environment Add-ons to this computer” and click Next.

Install WinPE Addons on current computer -
Now select your privacy preference and click Next.

Select privacy terms -
Accept the license agreement.

Accept license agreement -
Now select the “Windows Preinstallation Environment (Windows PE)” feature and click Install.

Install WinPE -
The selected feature will now install. When it does, close the wizard.

Close WinPE installer
You have now successfully installed Windows ADK and the WindowsPE Add-on. It is now to move on to the next part of the process.
Create Windows Preinstallation Environment Working Files
You must now create a working set of WindowsPE files on your PC. These files can be considered a copy of the same OS you are creating the bootable WinPE USB flash drive on.
Note: These files are later used to create the bootable WindowsPE USB drive. If needed, these can also be customized to add more features to the WinPE.
To create these working files, the CopyPE cmdlet is used in Deployment and Imaging Tools Environment having the following syntax:
Copype [Architecture] [WorkingFilesDirectory]Note that [Architecture] and [WorkingFilesDirectory] are variables that need to be changed in accordance with what bit architecture your PC has and where you wish to create the WinPE working files directory/folder, respectively. Here are the details for these variables:
-
[Architecture]
Possible values:
- amd64 – For AMD and Intel’s 64-bit BIOS or 64-bit UEFI-based systems.
- x86 – For 32-bit UEFI, 32-bit BIOS, or 64-bit BIOS-based systems.
- arm – for 32-bit ARM-based systems only.
- arm64 – for 64-bit ARM-based systems only.
-
[WorkingFilesDirectory]
This is the complete path to a folder inside which you will create the working files.
Note: This directory cannot exist beforehand or the process will end here. This needs to be a new folder that will be automatically created after executing the CopyPE command.
Now use these steps to create the WindowsPE working files:
-
Search for Deployment and Imaging Tools Environment in the search box or the Start menu, right-click it, and then click Run as administrator.

Run Deployment and Imaging Tools as admin -
Now run the CopyPE cmdlet as discussed above while entering the correct values.
CopyPE [Architecture] [WorkingFilesDirectory]Since we have Intel’s 64-bit architecture, we entered “amd64” and created the working files directory in the root of the C drive.

Create WindowsPE working files
This should now successfully create the working files inside the given directly in the cmdlet. You can use File Explorer to confirm this.
You should find the following 3 directories inside that folder:
- fwfiles
- media
- mount

You may now skip the next step of customizing the WindowsPE and proceed to create a bootable WindowsPE USB drive or add optional components if needed.
Customize Windows Preinstallation Environment
Before proceeding to create a bootable WindowsPE, you can make customizations to it. Of course, this is optional.
The WindowsPE is created in the English language by default. However, you can add optional components to it, such as language packs, Windows updates, PowerShell tools, etc.
This can be achieved by mounting the boot.wim file which is located at the following location inside the WindowsPE working files directory, and then making changes to it:
[WorkingFilesDirectory]\media\sources
Moreover, the .CAB files needed to install these optional components and languages are now available on your computer that were downloaded when you installed the “WindowsPE Add-on” for ADK earlier. There are available at the following path:
C:\Program Files (x86)\Windows Kits\10\Assessment and Deployment Kit\Windows Preinstallation Environment\amd64\WinPE_OCs
Note: “Amd64” can also be replaced with “arm64” if it fits your architecture.
Now follow these steps to make customizations to the WindowsPE:
-
Create a new directory using either File Explorer, an elevated Command Prompt, or the Deployment and Imaging Tools Environment CLI. Use the following cmdlet to create a new directory/folder using either CLIs:
Replace [PathToMountDirectory] with the complete path and folder name where you want to create the directory.
md [PathToMountDirectory]
Create new directory to mount Boot wim -
Now use the following cmdlet in either Command Prompt or Deployment and Imaging Tools Environment to mount the boot.wim file:
Replace PathToBootFile with the complete path to the boot.wim file (as discussed above) and PathToMountDirectory with the complete path to the newly-created directory in the last step above.
DISM /Mount-Wim /WimFile:"PathToBootFile.wim" /Index:1 /MountDir:"PathToMountDirectory"
Mount boot.wim file -
The boot.wim file will now be mounted successfully. It is now time to make changes to it as you need. To add the optional components or language packs, use this command:
Replace PathToMountDirectory where the boot.wim file is now mounted, and PathToCabFile with the complete path of the CAB file for the optional component you wish to install.
DISM /Image:"PathToMountDirectory" /Add-Package /PackagePath="PathToCabFile.CAB"In this example, we have installed the French language pack.

Add language pack to WinPE You can repeat this step to add more optional features.
-
When you have made the changes, it is then time to save the changes and unmount the wim file. To do so, run the following cmdlet:
Replace PathToMountDirectory where the boot.wim file is mounted.
DISM /Unmount-wim /MountDir:"PathToMountDirectory" /Commit
Commit and dismount boot wim
You have now successfully made the optional changes to the Windows Preinstallation Environment which have been saved. It is now time to use the updated WindowsPE working files to make a bootable USB drive.
Create Bootable Windows Preinstallation Environment USB Flash Drive
Now, you must create a bootable USB drive using the WindowsPE working files. This is done using the MakeWinPEMEdia cmdlet, which has the following syntax:
MakeWinPEMedia [/UFD | /ISO] [/f] [WorkingFilesDirectory] [USBDriveLetter]:The /UFD switch is used to specify a USB flash drive, whereas the /ISO switch identifies a .ISO file. You can only choose one. the /F switch is optional and used to suppress any confirmation messages.
Before we do this, we must first format the USB flash drive. Although the MakeWinPEMedia cmdlet automatically formats the drive, it often runs into errors when it is in the GPT format, and not in MBR. Therefore, we recommend that you preformat the USB flash drive in MBR format.
Follow these steps to format the USB flash drive to avoid running into errors, and then install the WindowsPE onto the USB:
Note: The following can be performed in either an elevated Command Prompt of the Deployment and Imaging Tools Environment.
-
Plug in the USB flash drive and then enter the drive management tool by running the following command:
diskpart -
Now run the following cmdlet to list down the details of the available disks:
list disk -
Now select the USB disk (by matching its size) by entering its disk number instead of the hash symbol in this cmdlet:
select disk #
Select disk to format -
Now run the following cmdlets in the chronological order given to convert and format the USB drive:
Replace RandomName with any name for the volume and USBDriveLetter with the drive letter that you want to assign to the USB flash drive.
clean
convert MBR
create partition primary
format fs=fat32 quick label="RandomName"
assign letter=USBDriveLetter
exit
Convert disk to MBR and format The USB flash drive is now formatted. It is now time to install the WindowsPE onto the USB.
-
Run the following cmdlet while replacing the necessary variables with the correct values to install the WindowsPE on the USB using the WinPE working files.
Replace [WorkingFilesDirectory] with the complete math of the WindowsPE working files, and [USBDriveLetter] with the drive letter that you assigned to the USB flash drive while formatting it.
MakeWinPEMedia /UFD [WorkingFilesDirectory] [USBDriveLetter]:
Create bootable USB for WinPE If you did not use the /F switch, then you will be asked to confirm the formatting of the USB drive. Enter Y.
This concludes the process of creating a Windows Preinstallation Environment successfully. Now, all that is left is to boot from it.
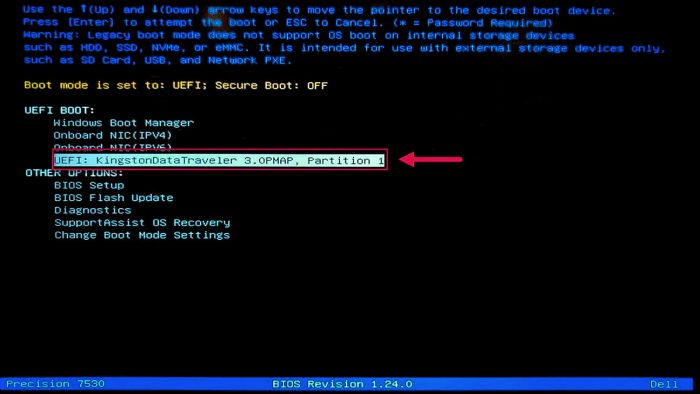
You can now boot into the WindowsPE by attaching it to the computer and then using the “One Time Boot Menu” to boot from the USB.

Limitations of Windows Preinstallation Environment
As you would already know by now, WindowsPE is not an alternative to regular Windows installation. Not only does it lack many of the mainstream features, but it is also programmed to reboot automatically after 72 hours so that it cannot be used in production environments.
The rebooting duration cannot be changed, and all data is lost after it reboots, which means that you have to start over all the tasks.
Moreover, WindowsPE doesn’t support the following:
- File server or Terminal Server use.
- Joining a network domain.
- Connecting to an IPv4 network from Windows PE on an IPv6 network.
- Remote Desktop.
- .MSI installation files.
- Booting from a path that contains non-English characters.
- Running 64-bit apps on the 32-bit version of WindowsPE.
- Adding bundled app packages through DISM (.appxbundle packages).
Closing Thoughts
The method of creating Windows 11 or Windows 10 Preinstallation Environment is the same. However, if you wish to launch Windows Setup in WindowsPE for Windows 11, you must install the WinPE-WMI and WinPE-SecureSetup optional components, otherwise, you may encounter errors stating that you do not meet the minimum hardware requirements.
That said, having a USB flash drive ready with WinPE can be a blessing since you do not know when your system might crash. You can also use the same USB drive to store backups of your OS (using Backup and Restore) alongside WinPE and then use those images to restore your working OS image.


