Key Points
- Test Mode allows execution of custom code and installation of unsigned drivers.
- To enable Windows Test Mode, disable Secure Boot and run the command “bcdedit.exe -set TestSigning On” in Command Prompt, or go to WinRE > Troubleshoot > Advanced options > Startup Settings, and Disable driver signature enforcement.
- To exit Test Mode and remove the watermark, run the command “bcdedit.exe -set TestSigning Off” in the Command Prompt.
The Windows operating system has several built-in checks in place to make sure that unauthorized software and pieces of code cannot run without proper safety nets. This prevents malicious code and malware from corrupting your system.
Normally, if you try executing an unsigned piece of code or driver, it will be blocked as Windows will not be able to detect the (digitally) signing authority. However, the Windows “Test mode” allows users to run and install unsigned and unauthorized software.
If you are a developer who needs constant testing of your custom code, then you can benefit from this post by learning how to activate it. Or, if you are seeing the “Test Mode” watermark on your desktop and want to remove it, then you can see how to disable and exit the Test Mode using the steps given below.
Table of Contents
What is Test Mode in Windows
The Test Mode is a Windows testing environment that bypasses all security checks and allows users to perform any action without scrutinization. This mode is normally used by developers that allow them to run unsigned and raw code without the Windows security checks interrupting it. Another purpose the Test Mode serves is installing unsigned drivers which otherwise would not be allowed by the Windows OS.
Although useful, it is advised not to use the Windows Test Mode in production environments as it leaves the computer vulnerable to malicious software and attacks.
The test Mode was introduced in Windows 7 and has been a part of all Windows operating systems after that, including Windows 8, 8.1, 10, and 11.
How to enable Test Mode in Windows
The Test Mode in Windows can be enabled by disabling the Driver Signature Enforcement. A driver signature ensures that the software is from a verified and allowed source/manufacturer, and is therefore safe to run on the computer. Disabling this feature will automatically enable the Test Mode.
Here are two ways to enable the Windows Test Mode.
Enable Test Mode from Command Prompt
-
Press the Windows key + R to launch the Run Command box.
-
Type in “cmd” and press CTRL + Shift + Enter to launch an elevated Command Prompt.
-
Execute the following command in the Command Prompt:
bcdedit.exe -set TESTSIGNING ON
Enable test mode from Command Prompt Note: If you encounter the “An error has occurred setting the element data. The value is protected by Secure Boot policy and cannot be modified or deleted” error, you must disable Secure Boot and rerun the command.
-
Restart the computer.
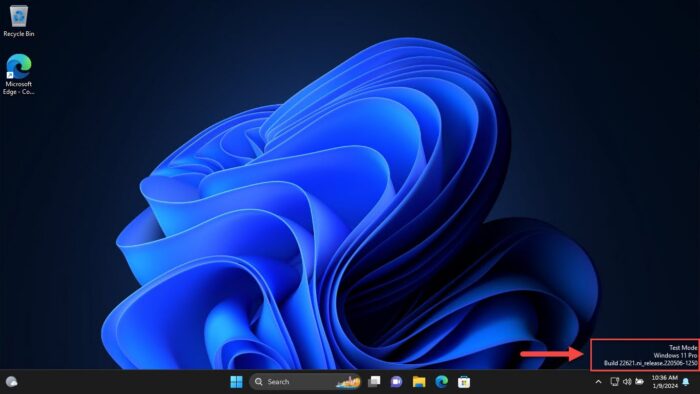
When the computer restarts, you’ll notice the “Test Mode” watermark in the bottom-right corner of the desktop.

You may now continue to perform your testing. When done, you may exit the Windows Test Mode using the steps given below.
Enable Test Mode from Settings
-
Press the Windows Key + i to open the Settings app.
-
Go to System > Recovery.
-
Click “Restart now” in front of “Advanced startup.”

Restart into Advanced Startup -
When asked for confirmation, click “Restart now” again.

Confirm restart The computer will now boot into the Windows Recovery Environment (WinRE).
-
Click Troubleshoot.

Select Troubleshoot from WinRE -
Now click “Advanced options.”

-
Now click “Startup settings.”

-
Click Restart.

Restart the computer The device will now restart again. This time, you will be presented with a list of options you can choose from by using the function keys on the keyboard (F1-F9).
-
Press the function key corresponding with “Disable drive signature enforcement” (F7).

Disable driver signature enforcement
The computer will now restart and you will see the “Test Mode” watermark at the bottom of the screen.
This concludes the two methods to enter the Test Mode on a Windows computer. Note that there are other methods to disable driver signature enforcement (from Group Policy and Advanced Boot Menu). However, those methods do not activate the Test Mode since not all requirements are met.
Once you are done testing your software or code, I recommend turning off Safe Mode to restore the computer’s security integrity.
Disable Windows Test Mode (Remove Test Mode watermark)
Use the following steps to exit the Test Mode on a Windows PC:
-
Press the Windows key + R to open the Run Command box.
-
Type in “cmd” and press CTRL + Shift + Enter launch Command Prompt with administrative rights.
-
Now run the following 2 commands one after the other:
Bcdedit.exe -set loadoptions ENABLE_INTEGRITY_CHECKS
Bcdedit.exe -set TESTSIGNING OFF
Turn off Windows Testing Mode -
Restart the computer for the changes to take effect.
When the computer restarts, you’ll notice that the “Test Mode” watermark has disappeared, and you will no longer be allowed to run unverified code or install unsigned drivers.
Takeaway
If you haven’t noticed already, the Windows “Test Mode” is simply allowing it to run unsigned code and software, and involves the same steps and processes that are needed to manage Driver Signature Enforcement. Therefore, it can be concluded that disabling the said feature enables the Test Mode, and vice versa.
That said, not all methods that apply to disabling Driver Signature Enforcement will enable the Test Mode, or show its watermark. Only the methods given above can be used to enable or disable it.
Note that we do not recommend disabling Secure Boot or keeping the Test Mode enabled for prolonged periods, as it leaves your PC vulnerable to cyber threats. Therefore, it is recommended that you restore your default PC settings as soon as you are done with your testing.


