
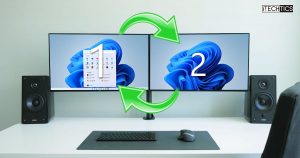
Having a dual monitor setup is always a productivity boost. Thankfully, the Windows operating system natively allows users to manage primary and secondary monitors without having to use third-party software.
When the first display device is connected to a Windows 11/10 PC, it automatically becomes the primary display monitor. This means it will host your desktop, as well as all other windows that you have open. When more monitors are connected, they are then detected as the secondary monitor, tertiary, etc.
This article guides you through multiple ways to change the primary monitor on your Windows PC, and also how to align them according to your actual setup. For example, if your dial-monitor setup is placed on top of each other, you can adjust them so. This will allow you to move your mouse cursor and windows up and down (instead of sideways) to move between the two displays.
Table of Contents
Changing your primary display will allow you to select which display device hosts your main content. If you have 3 displays connected and are aligned in a horizontal series, you can set your middle screen to be the primary display.
Change Primary Monitor in Windows 11
Follow these steps to change your primary monitor if you are using Windows 11:
-
Navigate to the following: This will open the Display Settings menu. (Press the Windows key + I buttons to open Settings directly).
Settings app >> System >> Display
-
Click the Identify button, which displays a number on each screen to identify which screen is primary, secondary, etc.

Identify screens -
Now click on the screen number you want to make primary.

Select screen -
Now expand “Multiple displays” and then check the box next to “Make this my main display.”

Make it the primary display


The selected monitor will now be your primary display. When the “Make this my main display” option is grayed out – this means the selected monitor is already your primary one.

If you have a dedicated NVidia graphics card, you can also change the primary monitor in Windows 11 or Windows 10 using the NVidia Control Panel.
Change Primary Monitor in Windows 10
If you are using Windows 10, then follow these steps to change your primary monitor:
-
Navigate to the following:
Settings app >> System >> Display
-
Now select the monitor that you want to make primary, then scroll down and check the box next to “Make this my main display” under Multiple displays.

Change primary display in Windows 10

Similar to Windows 11, the option will then be grayed out and the selected monitor will become your primary display.
The methods we have discussed up until now are the Windows native methods that allow you to change your primary monitor. However, if you are a fan of the Windows command line, then the following methods might be your cup of tea.
How to Change Primary Monitor from Command Prompt in Windows
To change your primary monitor using Command Prompt, you must use third-party command-line tools.
Using NirSoft NirCmd
NirCmd is a command-line tool that allows you to perform multiple tasks directly from the Command Prompt, which otherwise is not possible. Here are the steps to change your primary display using this tool:
-
To start with, download the NirCmd tool from the given link and then extract its contents into a separate folder.
-
Now open Command Prompt with administrative privileges and then navigate to the extracted folder directory using this cmdlet. Replace PathToFolder with the complete path to the extract NirCmd folder.
cd /d PathToFolder
Change directory -
Now use the following cmdlet to change your primary monitor while replacing Integer with the display identifier of the monitor you want to set as your primary display.
nircmd.exe setprimarydisplay IntegerNote: The Integer used in the command line will not be the same as the one you see on your displays when you identify the monitors. This is because while using the command line, the monitor indexes (identifiers) are changed.
In our case, the Integer “10” sets the secondary monitor as the primary, and the Integer “9” sets the first monitor as primary. You may have to adapt the hit-and-trial method to check which monitor is configured as primary.

Change primary monitor using NirCmd
When the correct identifier is used, you will notice that your display kind of zooms out and then zooms back in, signifying a change in the display settings. However, you must confirm which monitor has been configured as the primary display.
Using NirSoft MultiMonitorTool
MultiMonitorTool is another command-line tool used to manage your display settings. Follow these steps to use the MultiMonitorTool to change your primary monitor:
-
Start by downloading MultiMonitorTool and then extract its content into a separate folder.
-
Now open Command Prompt with administrative privileges and then navigate to the extracted folder directory using this cmdlet. Replace PathToFolder with the complete path to extract MultiMonitorTool folder.
cd /d PathToFolder
Change directory -
Now use the following cmdlet to change your primary monitor while replacing Integer with the display identifier of the monitor you want to set as your primary display.
MultiMonitorTool.exe /SetPrimary IntegerNote: Similar to NirCmd, you will have to perform the hit-and-trial method while changing the Integer value to identify the correct index for the monitor you wish to set as the primary display.

Change primary monitor using MultiMonitorTool
This will now change your primary display as you can see that the screen zooms out and then zooms back in, which signifies a change in your display settings. However, you will still need to confirm that the correct monitor has been configured as your primary display.
How to Change Display Orientation in Windows
Display orientation is the way your monitors are aligned. If you have only two monitors connected, they could be side-by-side, or in the top-and-bottom orientation. If more than two monitors are connected, they can be aligned in any way!
Furthermore, as it happens with many of us, it could be possible that you drag the mouse cursor from the left end of your screen onto the second monitor, which is placed on its right side.
You can manage your screen’s orientation with respect to one another so your computer knows in which direction the other displays are correctly configured.
-
To change the orientation of the displays, navigate to the following:
Settings app >> System >> Display
-
Here, hold down your screen and then drag it into a different position that is identical to your real monitor setup.

Drag and drop the screens to adjust the orientation -
Once the settings are done, click Apply to save the changes.

Apply settings


You can now move across your multiple displays in the direction in which they are aligned.
If you encounter any errors while setting up your primary monitor and have any tips for us, you can always ask us in the comments section below.
Frequently Asked Questions
How to shift a window from one monitor to the other?
If a window opens on the wrong monitor when you have multiple displays connected, you can simply switch it to the right one using the Windows Key + Shift + Left/Right Arrow Key shortcut keys to shift it to the previous or next display device.
How to fix the new window opens on the wrong monitor?
To open a window on the correct monitor, you must set it as the primary display device. To do so, go to Settings app >> System >> Display, select the monitor you want to set as the primary display, then check the box next to “Make this my main display.”
How do I check which monitors are primary and secondary?
You can display the number on the screen to identify which monitor is primary, secondary, and so on. For the primary monitor, it will display “1,” for the secondary, it will display “2,” and so on.
To identify your displays, navigate to Settings app >> System >> Display then click Identify. This will show the indexes on your screen for almost 2 seconds.


1 comment
McRoberts
Hi. Thanks for this. I appreciate a lot. But what I actually want is how to set up a shortcut to quickly switch my main windows for my windows 11. I use a graphic tablet whose driver does not have this function. Thanks