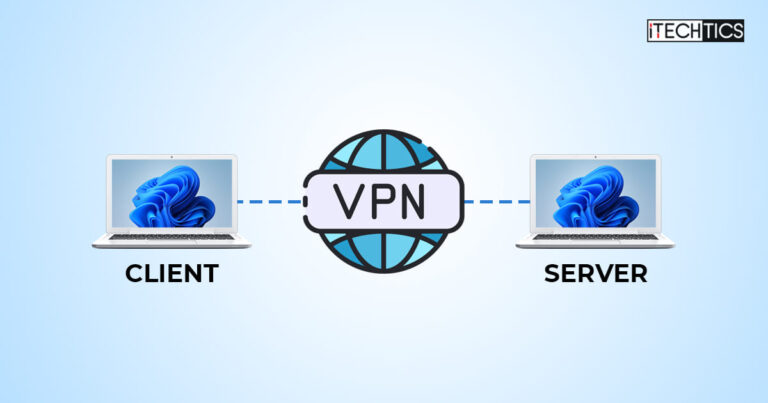
A Virtual Private Network (VPN) encapsulates your online traffic to secure it from digital threats. In other words, it extends your private network onto the public internet. If you are not familiar with the concept of VPNs, then this article is just what you need.
If you have ever used a third-party VPN service, like NordVPN or VyprVPN, you would know that it not only secures your data going back and forth, but also changes your geographic location. This is because you connect to a remote server using the third-party VPN service, and your public IP address is replaced by that of the server. Once connected to a remote server, a private network is established, making it seem like a private network entirely.
Using the same concept, you can make your Windows 11 computer into a VPN server. If you configure your computer as a VPN server, you can access it over the internet from anywhere in the world as if it was a part of your local network.
This is an excellent approach when you want to access your home computer from your workplace, or vice versa.
Table of Contents
On This Page
Setting up your Windows PC as a VPN server involves multiple steps and configurations at different levels of the local network. This article covers every step you need to perform to successfully configure your PC as a VPN server so that you can connect to it from anywhere in the world.
This sort of VPN server is also known as a “Public VPN server” – because it can be accessed by the public if given the correct credentials/digital certificates.
Learn how to set up a VPN connection instead.
Set Up Public VPN Server on Windows 11
There are multiple steps to configure a VPN server on a Windows computer, which comprise the following:
- Set a static IP address for the PC
- Finding your public IP address
- Configure DDNS (in case the public IP address is dynamic)
- Configure port forwarding on your router
- Set up a VPN server
- Allow VPN connections through the Windows Firewall
Note: Do not confuse setting up a VPN server with setting up a VPN connection. Although Windows natively supports VPN connections, it is used to connect to a remote VPN server. In this article, we are going to discuss how to create a VPN server so another computer can connect to it.
Set Static IP Address
By default, most routers are set to Dynamic Host Configuration Protocol (DHCP). This protocol automatically allots vacant IP addresses to all connected devices to avoid any IP conflict. However, in a further step down the article, we will require to forward a port onto the IP address of this target PC. For that, we need the IP address of this machine to be static, i.e. not continuously changing.
Therefore, we must set a static IP address for this right now. Before we do that, let us see what the current IP address of the machine is so that we allocate the same static IP address to avoid an IP address conflict with any of the other devices on the network.
Find Current Local IP Address
To identify the current allotted IP address, open Command Prompt and run the following cmdlet:
ipconfig /allThis command will display all the IP configurations of all network ports on the PC, including virtual ones.
You need to look for the “IPv4 address” under the network adapter that is connected to the router, it may be wired or wireless. In our case, we are using Wi-Fi to connect to the router:

In the image above, the IP of our target PC is 192.168.55.125. We will be assigning the same IP address manually to make it static.
We suggest that you do not close the Command Prompt as some information will be needed from this window.
Configure Static IP Address
To configure a static IP address on a Windows 11 PC, use these steps:
-
Open the Network Connections applet by typing in “ncpa.cpl” in the Run Command box.

Open the Network Connections applet -
Right-click the network adapter connected to the router and click “Properties.”

Open network adapter properties -
Select “Internet Protocol version 4 (TCP/IPv4)” and then click “Properties” again.

Open IPv4 properties -
Select “Use the following IP address” and then fill out the given fields:
- IP address: As noted in the Command Prompt above.
- Subnet mask: Should be automatically filled, or as noted in the Command Prompt above.
- Default gateway: IP address of the router, or as noted in the Command Prompt above.
- Preferred DNS server: As noted in the Command Prompt above
- Alternate DNS server: As noted in the Command Prompt above

Set static DNS settings -
Click Ok on the windows to save and close them.
You have now successfully set up a static IP address on your computer. Make sure that you are still connected to the internet to ensure that all configurations are done correctly.
You can also set a static IP address and DNS server using the command line.
Finding Public IP Address
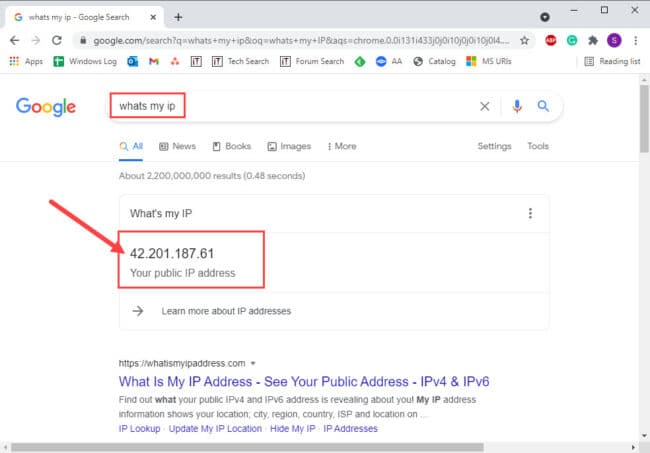
The public IP address is provided by your Internet Service Provider (ISP). You can check your public IP address via command line, or simply type in “What’s my IP address” on Google’s website to find out.

This IP address will be needed when establishing a VPN connection to this VPN server.
Usually, this IP is static. But often ISPs tend to provide dynamic public IP addresses which change from time to time. If that is the case, you need to contact your ISP and ask for a static IP address, which may cost a little extra as these IP addresses are primarily reserved for businesses.
Alternatively, you can also configure the Dynamic Domain Name System (DDNS) on your router to assign your router a name it will track regardless of the change in the public IP address. Note that this only requires to be done if your public IP address keeps changing.
Configure DDNS on Router
Dynamic DNS keeps track of your changing public IP address and works like a regular Domain Name Server. The name you set for the domain will keep still while the public IP address keeps changing. This will be required when further configuring the VPN server.
Note: Not all routers have this option. Please check whether the setting is supported on your router via the manufacturer’s website.
-
Enter the IP address of the router’s interface into a web browser‘s Omnibox.
This IP address is usually found on the back of the router unless explicitly changed.

Access the router’s console -
Log into the console.
The credentials are usually available on the back of the router, if not changed by a net admin.
-
Look for “DDNS configuration.”
This setting is usually under Network Application, but each router can have its own different layout.
-
Configure the DDNS settings according to your requirements and set a name for the domain.
Remember the domain name as it will be required when you are connecting to this VPN server remotely.

Configure DDNS on router -
Apply and save the changes.
Configure Port Forwarding
Network ports are used by Windows services and applications to send and receive data over the network. When accessing a networked device over the public internet, the router needs to understand which port to forward the incoming traffic on, as one router may have many internally connected devices.
You must forward the port for “Point to Point Tunneling Protocol (PPTP)” to Port number 1723.
Use the following steps to perform port forwarding on your router:
-
Enter the IP address of the router’s interface into a web browser‘s Omnibox and log in using the admin credentials.
-
Look for “Port forwarding” or “Port mapping” settings within the router.
These are usually found under Forward Rules.
-
Now make the following configurations:
- Enable port mapping: Check
- Type: Application
- Application: PPTP
- Mapping Name: Enter any name for the rule
- Internal host: IP address of the computer to configure as VPN server
- Protocol: TCP
- Internal port: 1723
- External port: 1723
-
Once these configurations are done, save/apply the changes and restart the router.
Set Up VPN Server on Windows
It is now time to configure the Windows 11 PC to be used as a VPN server. Up until now, all of the steps were prerequisites to allow the VPN server to be accessible.
Use the following steps to create a VPN server on the Windows PC:
-
Open the Network Connections applet by typing in “ncpa.cpl” in the Run Command box.

Open the Network Connections applet -
Please the Alt key from the keyboard to expand the menu, and then click “New Incoming Connection.”

Create a new incoming connection rule -
Select the user account to grant connection permissions and click Next.

Select user account -
Check the box next to “Through the Internet” and click Next.

Allow connection through the internet -
Now select “Internet Protocol Version 4 (TCP/IPv4)” and click Properties.

Open IPv4 properties -
Check the box next to “Allow callers to access my local area network.”
-
Select “Specify IP address” and then provide the IP address range for the incoming connections. Then, click Ok.

Set incoming connection’s IP address range -
Click “Allow access.”
-
When configured, click Close.
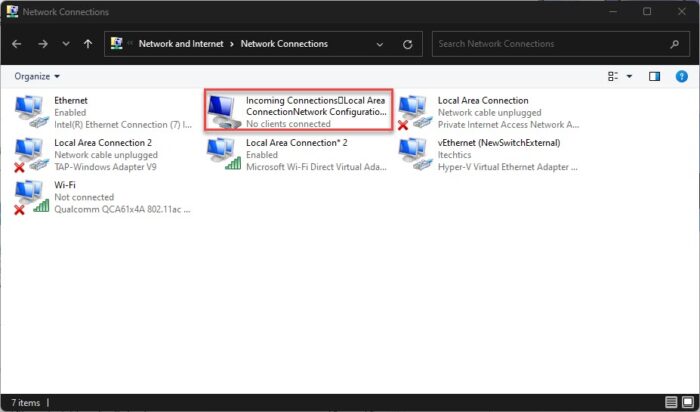
The VPN server will now be created. As you will notice, a new (virtual) network adapter will appear in the Network Connections applet. However, our work is not one yet. There are still some configurations that need to be made.

Allow VPN through Firewall
The local Windows Firewall is blocking ports by default. You must allow a remote VPN connection through the firewall to be able to connect to the VPN server remotely.
-
Open the Firewall applet by typing in “firewall.cpl” in the Run Command box.

Open Windows Firewall -
Click “Allow an app through Windows Defender Firewall” on the left.

Allow app through Windows Firewall -
Click “Change settings.”

Change firewall settings -
Check that both Private and Public network types are selected in front of “Routing and Remote Access,” and then click Ok.

Allow routing and remote access through firewall
Now, the Windows 11 VPN server will be able to receive connections remotely from other computers over the internet.
Connecting to the Windows VPN Server
The VPN server is now set for the connection. Now, you can connect to it using the built-in VPN client on a Windows computer. Learn how to establish a VPN connection on a Windows 11 computer.
Note that you will need to use the public IP address to establish the remote VPN connection to this server.
Closing Thoughts
This article covers how to set up a Windows computer as a VPN server to connect to it remotely from any location in the world. This approach not only allows you to connect to a remote PC over the internet but also secures your communication with it. Any data being transferred to and from the VPN server will now be secure over the public internet.
If you are a sysadmin who has set up multiple Virtual Machines (VMs) on a server at their office, you can set up the host computer as a VPN server and then access the VMs from your home without compromising your cyber security.


