
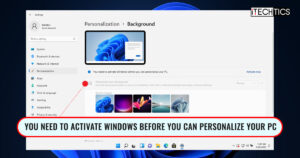

By default, when either Windows 10 or 11 is not activated, you are not allowed to make any personalization to it. If you open the Personalization tab in the Settings app, you will notice that some options have been grayed out, and an intimation stating the following:
You need to activate Windows before you can personalize your PC.

On the personalization page, the following items cannot be personalized without activating Windows:
- Change Windows theme
- Change Desktop background
- Apply Accent colors
- Enable Dark Mode (Light theme is applied by default)
- Touch keyboard
- Change Fonts
However, the following items can be personalized even when Windows is not activated:
- Lock screen
- Start Menu
- Taskbar
That said, there is a workaround you can perform that allows you to change your computer’s theme to any custom theme without having to activate the operating system. This post discusses 2 methods you can adopt to bypass this issue and then apply a custom third-party theme. Of course, the theme will need to be downloaded separately.
Note: This does not allow you to change anything else, nor can you apply other Windows themes preinstalled in the OS. You can only apply downloaded themes from .themepack packages.
Table of Contents
How to Change Theme Without Windows 11/10 Activation
-
If you are not yet looking to activate the Windows operating system, but want to change its themes, you need to perform the following tasks:
- Disable the operating system from blocking you from changing the theme.
- Apply the new theme from a third party .themepack package.
There are 2 methods to unblock Windows from preventing you from changing the themes. Pick the one that suits your preferences.
-
Using Group Policy Editor
Follow the given steps below to allow the OS to change the theme without activating it:
Note: The Home editions of Windows do not come with the Group Policy Editor preinstalled. Learn how to install it on Windows 11 or Windows 10.
-
Open the Group Policy Editor by typing in gpedit.msc in the Run Command box.

Open Group Policy Editor -
Now navigate to the following using the left pane:
User Configuration >> Administrative Templates >> Control Panel >> Personalization
-
Here, double-click on the policy “Prevent changing theme” in the right pane to open its properties.

Double-click the policy -
From the Properties window, select the Disabled radio button, then click Apply and Ok.

Select Disabled -
Now click Editor and launch the Command Prompt with administrative rights.
-
Run the following cmdlet to implement the changes.
gpupdate /force
Run cmdlet in elevated Command Prompt
You should now be able to change the themes on your Windows computer. Refer to the guide given below to download and apply a custom theme.
However, if you want to revert the settings to their default state in the future, simply return to the “Prevent changing theme” policy and select the Not Configured option.
-
-
Using Windows Registry Editor
Another method to allow the OS to change your theme without activating Windows is by manually making changes to the Windows Registry. Here is how:
Note: Misconfiguration of critical values in the system’s registry could be fatal for your operating system. Therefore, we insist that you create a system restore point before proceeding forward with the process.
-
Open the Windows Registry Editor by typing in regedit in the Run Command box.

Open Registry Editor -
Now paste the following into the address bar at the top for quick navigation:
Computer\HKEY_CURRENT_USER\SOFTWARE\Microsoft\Windows\CurrentVersion\Policies

Enter for quick navigation -
Here, right-click on the Policies key in the left pane, expand New, then click Key.

Create new Key Name this new Key “Explorer.”
-
Now right-click the Explorer key from the left pane, expand New, then click DWORD (32-bit) Value.

Create new DWORD Name this new DWORD “NoThemesTab.”
-
Leave the default value of the DWORD (which is 0) and restart the computer for the changes to take effect.
Once the computer reboots, you can now proceed to apply any custom theme downloaded from the internet.
However, if you wish to revert these changes in the future, simply delete the DWORD created in step 4 above and restart the PC.

Delete the DWORD -


How to Apply Custom Windows Themes
Once you are done with the steps above, you can now apply custom themes to your PC without having to activate the OS.
All you need to do is download the theme package which will have the extension “.themepack.” Once downloaded, apply the theme by double-clicking it.

Listed below are the websites we recommend for downloading custom theme packs:
- Microsoft Desktop Themes
- Themepack (third-party)
- Windows Themepack (third-party)
Closing Words
Personalizing your PC does not affect its performance, but you can still get it done while waiting for your Windows product license. It makes your PC more fun to use, especially if you are a gamer, or obsessed with a digital character.


2 comments
coldreactive
These don’t work anymore in 23H2 on Windows 11 Pro, I just tried it in a VirtualBox.
techguy
it does not work in windows 11 24H2 (beta) anymore