

Key Points
- UAC can be disabled from the Control Panel, Windows Registry, Group Policy, Command Prompt, and Windows PowerShell.
- Disable UAC from Command Prompt: reg.exe ADD HKLM\SOFTWARE\Microsoft\Windows\CurrentVersion\Policies\System /v EnableLUA /t REG_DWORD /d 0 /f
- Disable UAC from Control Panel by going to Control Panel >> User Accounts >> User Accounts >> Change User Account Control settings >> Drag slider to “Never Notify”
The Windows operating system is vulnerable to outside threats and unauthorized access, which is why it includes a User Account Control (UAC) feature.
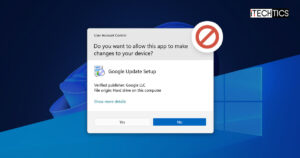
Even if you are not aware of what UAC is, you must certainly have come across it if you are a Windows user. Ever seen that annoying confirmation dialog box that asks for administrative permission when you’re installing an app, running a setup, or uninstalling anything? That is the UAC prompt.
If it is getting too annoying for you and want to disable the UAC prompt, this article lists all the methods to do so on Windows 11. But before we show you how to do it, let us learn what it is, and whether it should be turned off or not.
Table of Contents
What is User Account Control (UAC)
 1")
The UAC is a Windows security feature that prevents the unauthorized execution of apps and processes with administrative privileges and also prevents malicious software from running on your computer.
When an app or a program is making changes to your computer, a popup emerges asking for user consent, as in the image above.
In simpler words, it is just an extra precautionary measure by Windows to ensure that no task is run without the user’s consent, and thus, you are prompted with a dialog box for confirmation.
Is it Safe to Disable UAC?
Now that we know the role of UAC, disabling UAC is not the smart choice. Although most tasks performed by the end user, like installing or uninstalling an app, are done with complete consciousness, a UAC prompt gives a second chance to the user to reconsider their action.
Not only that but any malicious action performed by software or piece of code could also be blocked by the UAC. Additionally, any occurrences happening in the background would be highlighted and brought to the user’s attention with the help of the UAC prompt.
Therefore, we recommend that you do not disable the UAC, and only do it when it is necessary. After that, you can re-enable it.
UAC Security Levels
If you read ahead, you will find that the UAC has different security levels. each of those security levels defines how the UAC will work, when the end user will be prompted with a UAC, and when the prompt will not be generated.
Here are the details of the 4 security levels of UAC:
-
Always notify
A UAC prompt will appear when an app or a program tries to make changes to your system. It will also notify you when you try to change Windows settings. Additionally, it freezes background tasks until the user responds.
-
Notify me only when apps try to make changes to my computer
This is the default Windows UAC level and only notifies you when an app tries to install or make changes to your PC. It also freezes background tasks until you respond.
-
Notify me only when apps try to make changes to my computer (do not dim my desktop)
This option will display the UAC prompt but it does not freeze the background tasks, nor does it dim the desktop.
-
Never notify
Selecting this option completely disables the UAC. No prompts will pop up.
Let us now continue to see the different methods to disable UAC when needed.
Disable UAC on Windows
Disable UAC from Control Panel
The following steps allow you to disable the UAC from the Control Panel:
-
Press Windows Key + R to open the Run Command box.
-
Type in “Control” and press Enter to open the Control Panel.
-
Click “User Accounts.”
 2")
Open User Account settings in Control Panel -
Click “User Accounts” again.
 3")
Click “User Accounts” again -
Click “Change User Account Control settings.”
 4")
Change UAC settings from Control Panel -
Drag the slider on the left to the bottom and click Ok.
 5")
Disable UAC from the Control Panel -
[Conditional] If UAC was already enabled, you will be prompted with a UAC. Click Yes.
 2")
 3")
 4")
 5")
UAC will now be disabled.
If you want to re-enable it again, simply return the slider inside the “Change User Account Control settings” page to its original UAC security level.
 6")
Disable UAC from Group Policy Editor
To disable the UAC prompts from the Group Policy editor, use these steps:
-
Press Windows Key + R to open the Run Command box.
-
Type in “gpedit.msc” and press Enter to open the Group Policy Editor.
-
Navigate to the following path from the left side of the Group Policy Editor:
Local Computer Policy > Computer Configuration > Windows Settings > Security Settings > Local Policies > Security Options
-
Double-click the policy “User Account Control: Run all administrators in Admin Approval Mode” in the right pane.
 7")
Open UAC Group Policy -
Select “Disabled” and then click Apply and Ok.
 8")
Disable UAC from Group Policy Editor -
Now press Windows Key + R again and type in “CMD“, then press CTRL + Shift + Enter to open the Command Prompt with elevated rights.
-
Execute the following command to implement the changes in the Group Policy Editor:
GPUpdate /Force 9")
Apply Group Policy changes
 7")
 8")
UAC will now be disabled.
However, if you want to enable it again, return to the “User Account Control: Run all administrators in Admin Approval Mode” Group Policy and enable it.
Disable UAC from Registry Editor
You can also disable the UAC from the Windows Registry Editor. Here is how:
Note: Misconfiguration of critical values in the system’s registry could be fatal for your operating system. Therefore, we insist that you create a system restore point or a complete system image backup before proceeding forward with the process.
You can also use our top selection of disk imaging and backup software so you never lose your data or operating system again.
-
Press Windows Key + R to open the Run Command box.
-
Type in “regedit” and press Enter to open the Registry editor.
-
Navigate to the following path from the left pane:
Computer\HKEY_LOCAL_MACHINE\SOFTWARE\Microsoft\Windows\CurrentVersion\Policies\System
-
Double-click the DWORD “EnableLUA.”
 10")
Open the EnableLUA DWORD in Windows Registry -
Change the Value Data to 0 and click Ok.
 11")
Disable UAC from Windows Registry -
Restart the computer.
 10")
 11")
Once the computer restarts, you will notice that the UAC has been disabled.
To re-enable it, return to the System key using the Registry Editor, double-click the DWORD “EnableLUA,” and set its Value Data to 1.
Disable UAC from Command Prompt
If you are a fan of the Command Line Interface (CLI), then you can also disable UAC directly from the Command Prompt with a single command. Here are the steps to follow:
-
Press Windows Key + R to open the Run Command box.
-
Type in “CMD” and then press CTRL + Shift + Enter to open the Command Prompt with elevated rights.
-
Run the following command:
reg.exe ADD HKLM\SOFTWARE\Microsoft\Windows\CurrentVersion\Policies\System /v EnableLUA /t REG_DWORD /d 0 /f 12")
Disable UAC from Command Prompt -
Now restart the computer.
 12")
The steps above will make changes to the EnableLUA DWORD in the Windows Registry and disable UAC.
To re-enable UAC, run the following command in an elevated Command Prompt:
reg.exe ADD HKLM\SOFTWARE\Microsoft\Windows\CurrentVersion\Policies\System /v EnableLUA /t REG_DWORD /d 1 /fDisable UAC from Windows PowerShell
Similar to the Command Prompt, you can also disable UAC from PowerShell. Here is how:
-
Press Windows Key + R to open the Run Command box.
-
Type in “PowerShell” and then press CTRL + Shift + Enter to open PowerShell with elevated rights.
-
Run the following command:
Set-ItemProperty -Path REGISTRY::HKEY_LOCAL_MACHINE\Software\Microsoft\Windows\CurrentVersion\Policies\System -Name ConsentPromptBehaviorAdmin -Value 0 13")
Disable UAC from PowerShell -
Now restart the computer.
 13")
UAC will now be disabled when the computer restarts.
If you want to re-enable UAC, use this command in PowerShell:
Set-ItemProperty -Path REGISTRY::HKEY_LOCAL_MACHINE\Software\Microsoft\Windows\CurrentVersion\Policies\System -Name ConsentPromptBehaviorAdmin -Value 1These are all the methods you can disable (or enable) UAC on a Windows computer. Let us now show you how to do the same on a remote computer that is on the same network.
Disable UAC Remotely
You can disable the User Account Control on a remote computer as well using the Command Prompt. This method can be used by sysadmins to get the task done without having to leave their computer.
To disable UAC on a remote PC, we must use PsTools by SysInternals – which is a suite of command-line tools for the Windows operating system. Using the PsExec utility inside this suite, you can remote access the Command Prompt of the target PC and then run any command.
Use the following steps to disable UAC on a remote computer:
-
Start by downloading and extracting PsTools.
 14")
Extract PsTools -
Launch an elevated Command Prompt and use the
CDcmdlet to change the directory to the extracted folder:CD [PathToExtractedPsTools] 15")
Change directory to extracted PsTools folder -
Now use the following command syntax to connect to the remote computer:
PsExec -i \\[RemoteComputerName] -u [Username] -p [Password] cmdReplace [RemoteComputerName] with the name of the PC you want to connect to, [Username] with the account name, and [Password] with the account password. Make sure that the account you are logging in with has administrative rights.
 16")
Connect to remote PC using PsExec You will now be connected to the remote PC.
-
Now, use the following command to disable UAC on the remote PC:
reg.exe ADD HKLM\SOFTWARE\Microsoft\Windows\CurrentVersion\Policies\System /v EnableLUA /t REG_DWORD /d 0 /f 17")
Disable UAC on the remote computer -
Now run the following command to restart the remote PC:
Shutdown /r 18")
Restart the remote computer
 15")
 16")
 17")
 18")
When the remote computer restarts, UAC will be turned off.
To re-enable it, you will need to use the PsExec tool again. Connect to the remote computer again using the command given above, and then use this command to re-enable UAC:
reg.exe ADD HKLM\SOFTWARE\Microsoft\Windows\CurrentVersion\Policies\System /v EnableLUA /t REG_DWORD /d 1 /fNote that these are the exact same commands to disable or enable UAC on your local computer. This is because PsExec has launched a Command prompt instance on the remote computer and any commands running after establishing the connection will be on the remote PC.
Final Verdict
As mentioned earlier, it is not entirely safe to disable User Account Control. However, there are certain moments when it is absolutely necessary. That being said, we always recommend that you re-enable UAC when you no longer need it disabled.
This article lists multiple methods of disabling UAC on the local computer as well as on a remote computer on the same network.


