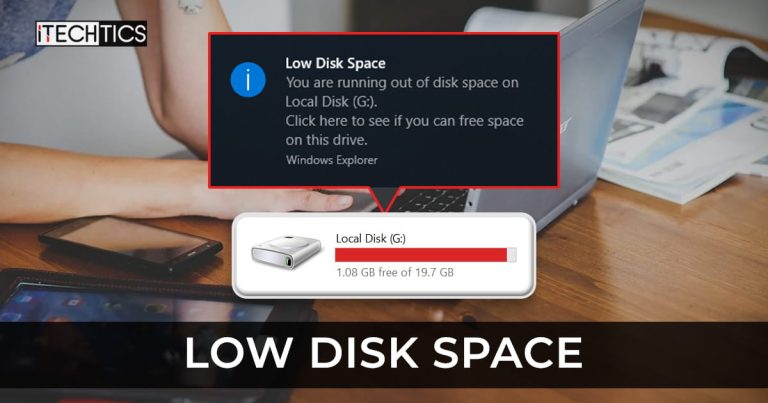
You may be annoyed by a continuous notification informing you that you are running low or out of storage space on a certain drive/volume on your Windows PC, which you might already be aware of. However, Windows is programmed to remind you after a periodic interval to prompt you to take the necessary action.
The Low Disk Space warning indicates to users that a specific drive on their Windows computer has run out of space. In order to avoid the warning message from appearing continually, the user must resolve this issue as soon as possible.
You can either free up space on the respective drive to free up space or switch off the notification entirely.
Table of Contents
You may see any of the following notifications in the tray on Windows 11 or Windows 10:
- You are running out of disk space on [drive]
- You are running very low on disk space on [drive]
- You have run out of disk space on [drive]
These are given according to the different amounts of free space on a particular volume. For example, you may be given a prompt “You are running out of disk space on [drive]” when your device reaches 200 MB of free space, and “You have run out of disk space on [drive]” when the drive is full entirely.
What is Low Disk Space Warning
Windows prompts its users of any changes to the operating system, or when certain action (by the user) needs to be taken. One of these prompts is a low disk space warning, which tells a user that they are either about to or have run out of free disk space on a certain volume.

If such a message appears, do not be concerned. Having a low disk space does not affect your computer unless it is for the operating system drive (usually labeled C:).

Low disk space on the boot drive not only affects the performance of your PC but the applications and programs may no longer behave as they should. Therefore, it is good practice to keep some free disk space on the OS drive.
Let us show you how you can create some storage space so that the notification popups go away.
Fix Low Disk Space Warning in Windows
You can perform the following tasks to free up space in your target volume. The top 4 tasks below are specifically for creating free space on your operating system drive (C drive).
Delete Temporary Files
Windows creates temporary files while performing certain tasks, most of which are automatically deleted once the task is completed. However, over time, the files left behind can build up to take a significant amount of space on your storage device. These files need to be deleted manually using the following steps:
- First, log into your PC from and administrator account.
- Now open the temporary files folder by typing in %temp% in Run.

- Now select all the items using the Ctrl + A shortcut keys and hit Del on your keyboard.
- If prompted with a UAC, click Continue.

- If any items cannot be deleted or require special permissions, check the box next to “Do this for all current items” in the dialog box, and then click Skip.

Empty Recycle Bin
The Recycle Bin stores your deleted data up to some time, which is still recoverable. This means that the data you think you have removed from your PC is still taking up some space on the storage device.
You can clear out your Recycle Bin to create some free space on the operating system drive.
To clear out the Recycle Bin, simply right-click on its icon on the desktop and click Empty Recycle Bin from the context menu.

Disable Hibernation Mode
The hibernation mode in Windows puts the computer to sleep while maintaining all your open data in a file called “hiberfil.sys.” This hidden file is stored in the boot drive, and disabling the hibernation mode will automatically remove the file.
The image below shows the size of the hiberfil.sys file on our PC:

Disabling this feature would automatically create almost 16 GB of free disk space on our boot drive.
To disable hibernation, launch the Command Prompt with administrative privileges and then paste the following command:
powercfg -h off

You will now find that some disk space has been freed up in the boot drive.
Shrink/Disable Pagefile
Pagefile is another hidden system file whose purpose is to compensate for any shortages of RAM. Occasionally, the data in your system’s memory takes refuge in the Pagefile, which is on your storage drive (volume C), which subsequently takes up a significant amount of space.
Although we do not suggest that you disable Pagefile entirely, since it is an important feature that contributes to the normal functionality of the operating system, it can still be done if absolutely necessary.
You can determine the optimal Pagefile size and then use the guide below to set it up, or disable it entirely.
- Navigate to the following:
Settings >> System >> About - Now scroll down and click Advanced System Settings in the Related Links section.

- In the System properties window, switch to the Advanced tab and then click on Settings under Performance.

- In the Performance Options window, switch to Advanced tab, and then click Change under Virtual memory.

- In the Virtual Memory window, uncheck the box next to “Automatically manage paging file size for all drives.” Once done, you should now be able to select Custom size and then enter the minimum and maximum values for the Pagefile size.
Alternatively, you can select the No paging file radio button to disable the feature entirely. Click Set and Ok when done.
- Now reboot your computer for the changes to take effect.
The following methods are valid for the operating system drive as well as the non-operating system drives.
Perform Disk Cleanup
Disk Cleanup is a built-in feature in Windows that wipes out any unnecessary data the system no longer requires, automatically. You can perform the steps below on the volume that is low on free disk space:
- Open File Explorer, then right-click on the volume with the low free disk space. Click Properties from the context menu.

- From the Properties window, click Disk Cleanup.

- From the Disk Cleanup window, check all the boxes under Files to delete and then click Clean up system files.

- In the next window, check all the file boxes under Files to delete again, and then click Ok.

- You will now be prompted for a confirmation. Click Delete Files.

- The deletion process will now begin and should only take a moment. When finished, close the Properties window.
Manually Delete Large Files
If you are still being prompted for low disk space, you can try and delete some of your data from the volume to free up some space.
Browse around with the affected volume and see if there is anything you can remove permanently. If you do find it, click on it and then use the Shift + Del shortcut keys to delete it permanently.
Editor’s note: One of the better ways to find large files, especially the ones taking the biggest amount of space, is to use a visual disk space analyzer. One of my favorite Disk space analysis tools is WinDirStat. You can also check out the best disk analysis tools here.
Extend Partition
Another way to get rid of the low disk space notification is by adding more space to the volume. This is known as extending an existing volume/partition.
Note that to extend the volume, you must either shrink another volume to create unallocated space or already have unallocated space on the disk.
Follow the steps below to extend the existing volume.
- Open the Disk Management console by typing in diskmgmt.msc in Run.
- Right-click on the volume you want to extend, and then click Extend volume from the context menu.

- The Extend Volume Wizard will now launch. On the first screen, click Next.

- On the next screen, enter the storage size you want to extend the volume by, and then click Next.

- Now click Finish.

You will see that the volume has been successfully extended.
If you do not have any unallocated disk space, you can choose to Shrink volume in step 2 above and use the free space of another volume and combine it with the full volume.
If you have tried all of these methods above and are still unable to get rid of the low disk space notification, then you may want to turn off the notification entirely, even when the disk drive is full.
How to Disable Low Disk Space Warning in Windows
If you are already aware that one or more volumes on your PC are almost full but do not want to perform any action, you can simply disable the notification so it won’t bug you anymore.
Note that the process involves changes to the Windows Registry, which can become a problem for your operating system if not done correctly. Therefore, we suggest that you create a system restore point before proceeding with the following steps:
- Open the Registry Editor by typing in regedit in Run.
- Now paste the following into the address bar at the top for quick navigation:
Computer\HKEY_CURRENT_USER\Software\Microsoft\Windows\CurrentVersion\Policies
- Now right-click Policies, expand New, and then click Key.

- Name this new key “Explorer.”
- Now right-click Explorer, expand New, and then click DWORD (32 bit) Value.

- Name this new DWORD “NoLowDiscSpaceChecks.” Note that Disc is with a C and not a K.
- Now double-click the new DWORD “NoLowDiscSpaceChecks” and set its Value Data to 1. Then click Ok.

- Now restart your computer for the changes to take effect.
You will now notice that there are no more prompts about low disk space on any volume when the computer boots back up.
Final Thoughts
Continuous notifications can become a pain in the neck. They do not allow you to focus on your actual work and also cover up a significant portion of the screen.
That said, it does not mean that you should not take action against low disk space, especially on the boot drive. Low disk space on the C drive means that there is less room for temporary files as well as Pagefile and Hibersys files to expand. This means that Windows will not be able to function properly if there is no more space available for it to put the critical system files.
This article is a part of our ongoing “Disk cleanup and optimization” series. Also see the following relevant articles:
- 13 tips on how to free up disk space on Windows 11/10
- Free up space on Windows using Compactor
- Enable and Disable reserved storage in Windows
- Clean up WinSxS folder to save space in Windows
- Fix File Explorer showing wrong disk space in drive properties
- Fix Extend Volume option grayed out in Windows 11/10
- How to cleanup the SoftwareDistribution folder
- Uninstall/remove old drivers from Windows
- Fix and disable Low Disk Space warning in Windows


