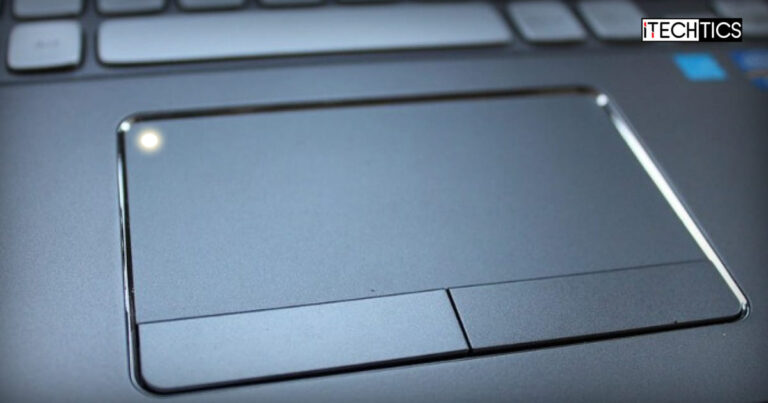
A touchpad is an input device, primarily found on laptops, that lets you interact with the device. Using the touchpad, you can interact with the computer using the mouse cursor, perform various gestures to perform different tasks, and much more on the touch-sensitive region.
Even on laptops, many users prefer using an external mouse instead of an integrated touchpad. In such cases, you may want to disable the touchpad to prevent it from accidental clicks and taps. At other times, you may want to disable it while watching a movie, or performing a task that does not require any interaction.
Most modern laptops support the feature of disabling or enabling the touchpad, regardless of the manufacturer.
In this article, we show you multiple ways to enable or disable a laptop’s touchpad as per your needs for convenient device usage. Most of the methods discussed in this article apply to laptops from all manufacturers, including HP, Dell, Lenovo, Acer, etc. Where one method might be missing, another may be present.
Additionally, Windows 10 and Windows 11 operating systems now also support unlocking the touchpad. So you can use the Windows-native method, even if your hardware lacks the feature.
Table of Contents
Table of Contents
Lock or Unlock the Touchpad
Enable or Disable Touchpad using Double-Tap
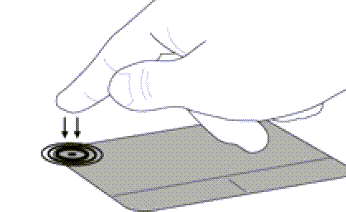
Most modern laptops have a Synaptics Touchpad which is a pointing device made by the company “Synaptics.” One of the qualities of a Synaptics Touchpad is its ability to lock or unlock itself quickly by double-tapping it on the correct location.
If you have a laptop with a small hole or an LED in the top-left corner of the touchpad, it is most likely a modern Synaptics Touchpad. These are usually available on HP laptops, but some other manufacturers have also adopted them.
To lock the touchpad, double-tap the top-left corner of the touchpad.

This will turn the touchpad’s light on, indicating that it has been locked.
If you want to unlock the touchpad, simply double-tap the touchpad again.
Note that not every laptop will have this feature. If your touchpad does not have it, then continue to lock or unlock the touchpad using the other methods given below.
Enable or Disable Touchpad using Keyboard Shortcut
Another method to quickly enable or disable the laptop touchpad is using the keyboard shortcut. Some laptop manufacturers provide the option to instantly enable or disable the built-in touchpad using the Function Key on the keyboard. If one of your Function Keys has an image like the following in its subscript, then it can be used to enable or disable the touchpad:

This symbol is usually available as a subscript of a Function Key. Toggle this feature by holding down the “Fn” key and then press the Function Key with the symbol to lock or unlock the touchpad.
Note that the symbol may be on different Function Keys depending on the laptop’s model. Moreover, some laptops may not even have this feature. In this case, you can adopt a different method to enable or disable the laptop’s touchpad.
Enable or Disable Touchpad in Windows 11, 10
As mentioned earlier, the Windows operating system now has built-in support to enable or disable a laptop’s touchpad. Therefore, even if you lack the ability to lock or unlock the touchpad by double-tapping it or using the keyboard shortcut, you can still get the job done.
Follow these steps to enable or disable the touchpad using the built-in Settings app in Windows:
-
Navigate to the following:
Settings app >> Bluetooth & devices >> Touchpad
-
Toggle the slider in front of “Touchpad” into the On position to enable it, or the Off position to disable it.

Enable or disable the touchpad from Settings app
Using this method, you can also configure your PC to automatically disable the touchpad but only when a mouse is connected. To do this, click on “Touchpad” to expand it, and then Uncheck the box next to “Leave touchpad on when a mouse is connected”.

Enable or Disable Touchpad using Proprietary Software
Many modern laptops come with proprietary software by the manufacturer to manage how your mouse and the touchpad behave. This application also can enable or disable the touchpad
If you have a Dell laptop, then perhaps this method to lock or unlock the touchpad might be more your speed, as some Dell laptops do not have the double-tap ability in the touchpad, nor do they have a keyboard shortcut for it.
Follow these steps to lock or unlock your device’s touchpad using the proprietary software:
-
Ensure that the latest touchpad drivers are installed.
You can find the latest drivers for the touchpad on your manufacturer’s website.
-
Go to the following:
Settings app >> Bluetooth & devices >> Touchpad
-
Click “More touchpad settings” under the Related Settings section.

Open more touchpad settings This will open the Mouse Properties applet.
-
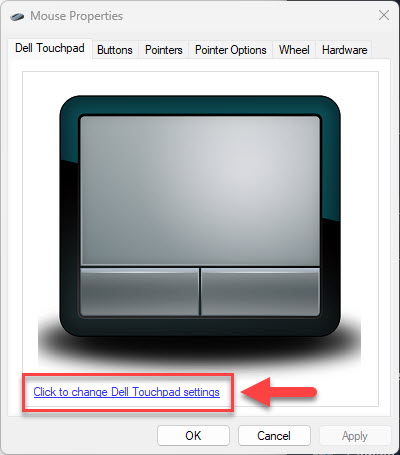
In the Touchpad tab (prefixed by the name of the laptop manufacturer), click “Click to change XXXX Touchpad settings.”

Click to change touchpad settings This will open the proprietary touchpad and mouse software. If one is not installed, you will be redirected to the Microsoft Store to download and install the app. Do so and then run the app.
-
From the proprietary touchpad app, you can now enable or disable the touchpad.

Enable or disable touchpad using Dell app
The steps above only need to be performed for the first time – to install the manufacturer’s proprietary app. Once it is installed on the system, you can directly open the application and manage your touchpad from there.
Enable or Disable Touchpad from Device Manager
Another method to enable or disable the laptop’s touchpad is from the Device Manager. Although this method is not recommended, you can adopt this method in case nothing else is working for you.
-
Open the Device Manager by typing in “devmgmt.msc” in the Run Command box.

Open the Device Manager -
Click “Human Interface Devices” to expand it.

Expand Human Interface Devices in the Device Manager -
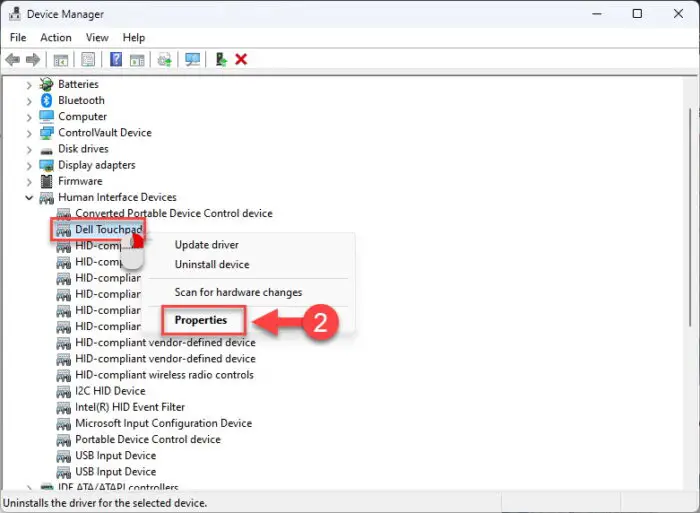
Right-click the touchpad device and then click Properties from the context menu.
The touchpad will have the name of the laptop manufacturer followed by “Touchpad,” as in the image below.

Open touchpad properties -
Switch to the Driver tab and then click “Disable Device.”

Disable touchpad from Device Manager
This will disable the touchpad. If you want to enable it in the future, repeat the steps above and then click “Enable Device” on the Driver tab.
Closing Thoughts
Even after years of innovation, some laptop models still lack the quick shortcuts to quickly lock or unlock the touchpad. For those laptops, you must use the Windows built-in enabling or disabling feature, their proprietary software, or manage the touchpad through the Device Manager – there is no other simpler way.
That said, this article lists all the methods that can be applied to enable or disable the laptop’s touchpad on demand.
Frequently Asked Questions (FAQs)
How to unlock the touchpad on an HP laptop?
HP laptops are usually integrated with a Synaptics Touchpad, which has a quick lock and unlocking feature. Double-tap in the top-left corner of the touchpad to try and unlock it. It should turn off the tiny LED light inside the touchpad on the top-left corner, indicating that the touchpad has been enabled.
How to disable or enable the touchpad on a Dell, or Lenovo laptop?
Most common Dell and Lenovo laptops lack a quick enabling or disabling feature for their touchpads. In these laptops, you can lock or unlock the touchpad through the Windows Settings app, which is the easiest method, or use their proprietary mouse management software.
How to disable or enable the touchpad on a Toshiba laptop?
The Toshiba laptops usually have a keyboard shortcut to enable or disable its touchpad. Press and hold the “Fn” key and then simultaneously press the F9 function key (or the function key with the touchpad symbol).


