Windows has a tendency to go haywire, as well as the applications installed on it. This can usually occur due to corrupted or missing application files, causing an app to behave abnormally, or not launch at all.
Windows applications such as Calculator, Calendar, Microsoft Office, or even third-party apps, can occasionally malfunction.
Today we will show you 3 ways to fix applications on your Windows 10 or Windows 11 computers without losing their data.
Here are some ways to repair apps in Windows:
Table of Contents
How to Repair Windows Applications
Repair apps from Windows Settings
Since the introduction of the Settings application in Windows, you can attempt to repair an installed app on your computer. However, not every application supports this feature, but most Microsoft Store apps (as well as some other apps) do.
Perform the following steps to repair an app using the Windows Settings app.
- Navigate to the following:
Settings app >> Apps >> Apps & features - Here, scroll down and look for the application that you want to repair. When found, click on the ellipses (3 dots) in front of the app and then click Advanced Options.

- Now scroll down the page and click Repair under the Reset section.

Windows will now attempt to repair the application without losing any data. Once the repair is complete, launch the app to see if the issue has been resolved.
Repair apps from Control Panel
Some applications come with their own repair tools, such as Microsoft Office, Microsoft Edge, etc. These apps can be repaired using the Control Panel. Here is how:
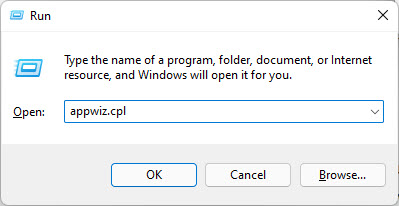
- Open the Programs & Features page in the Control Panel by typing in appwiz.cpl in Run.

- Here, right-click on the app that you want to repair and then click Change from the context menu.

Note: If you do not see the Change option, then the app cannot be repaired using the Control Panel. In that case, refer to the third solution given in the next section to fix the app. - The application wizard will now launch. Here, select the Repair option.

Note: If you do not find the Repair option in the wizard, then the app cannot be repaired using this method. Refer to the third solution given in the next section to fix the app. - Now follow the instructions in the wizard to repair the app.
Once repaired, check to see if the app is now running normally.
Repair apps using Command Prompt (MSIExec)
MSIExec is a command-line tool in Windows used to install, modify, and perform operations on Windows Installer. This tool, together with the Globally Unique Identifier (GUID) of the app, can be used to repair it.
This method involves determining the GUID of the app, which is done using the Windows Registry Editor. Misconfiguration of critical values in the system’s registry could be fatal for your operating system. Therefore, we insist that you create a system restore point before proceeding forward with the process.
Follow the steps given below to attempt to repair an application using MSIExec.
- Open the Windows Registry Editor by typing in regedit in the Run dialog box.

- Now paste the following into the navigation bar at the top for quick navigation:
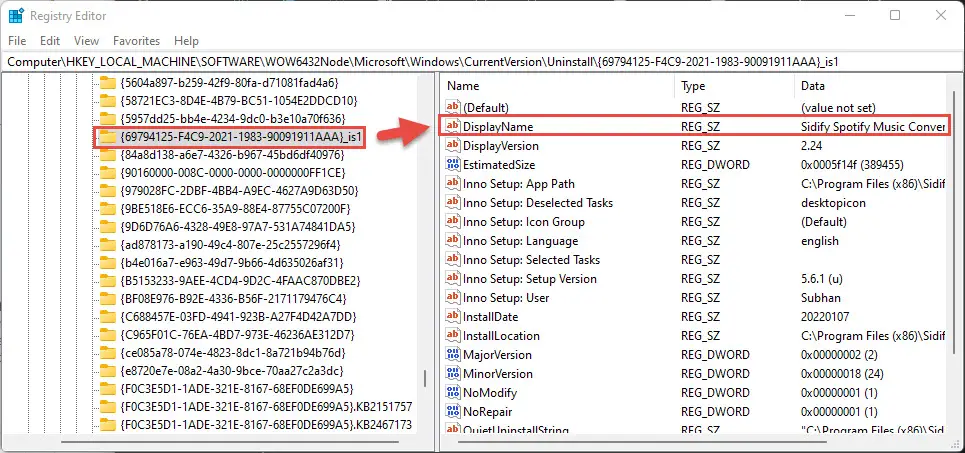
- Here, scroll between the Keys under Uninstall and look for the app that you want to repair. You can see the name of the app in front of the “DisplayName” value in the right pane.

- When found, copy and note the key name from the left pane. This is the GUID for the app.
- Now open Command Prompt with administrative rights.
- Use the following command to attempt to repair the app using its GUID. Replace the GUID in the cmdlet with the GUID of the app noted in step 4 above.
MSIExec.exe /fa GUID
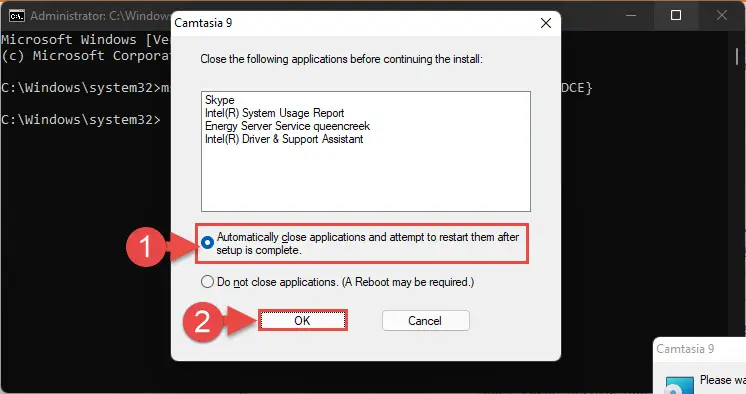
- You will now see a wizard trying to repair the app. If asked to close a few applications to repair the app, select “Automatically close applications and attempt to restart them after setup is complete” and click OK.

Note: You can also manually close the apps listed and then click OK. - The wizard will now continue to run to repair the app. When it finishes, you will be asked to reboot the computer. Click Yes.
When the computer restarts, check to see if the application has been repaired successfully.
Closing Words
Here at Itechtics, we are always finding ways to resolve IT-related issues in the best possible ways, which means not having to reinstall any hardware or software and find an actual fix using the most convenient methods.
The methods discussed in this post will repair your application(s) without losing any saved data within the app. However, in case these fail to work, then as a last resort, you may need to reinstall the app itself by initially uninstalling it.


