.NET is an integral part of the Windows operating system. It is needed to run some Windows applications, without which the app would become useless. If you are experiencing issues with .NET, seeing an error prompt asking you to install a specific version, or the app is failing to load, then your installed .NET Framework might need some fixing.
There are multiple ways you can find a corrupted or broken .NET Framework installation on your computer. In this post, we are going to show you all the methods.
Table of Contents
Repair .NET using .NET Framework Repair Tool
The first attempt in fixing any .NET-related issues is using the dedicated .NET Framework Repair Tool by Microsoft, whose name is self-explanatory. Let us show you how to repair .NET Framework on your Windows PC using this tool:
-
Start by downloading .NET Framework Repair Tool by clicking on the given link, and then click Download.

Download .NET Repair Tool -
Once downloaded, run the .EXE file. This will open the Microsoft .NET Framework Repair Tool wizard.
-
On the first screen, agree to the licensing terms and click Next.

Agree to license terms -
Now click Next again to apply any recommended changes by the tool.
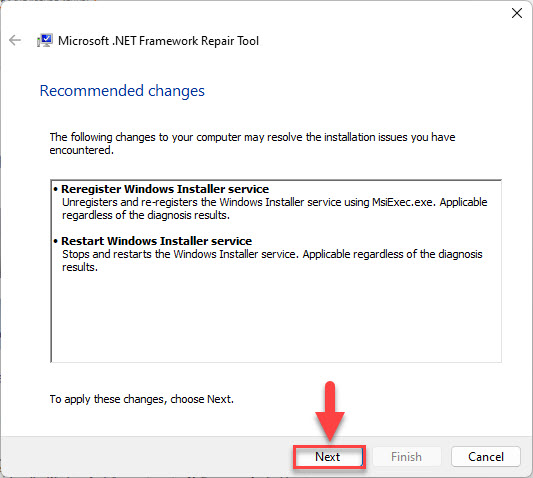
Apply changes -
Once the changes have been applied, click Finish to close the wizard.
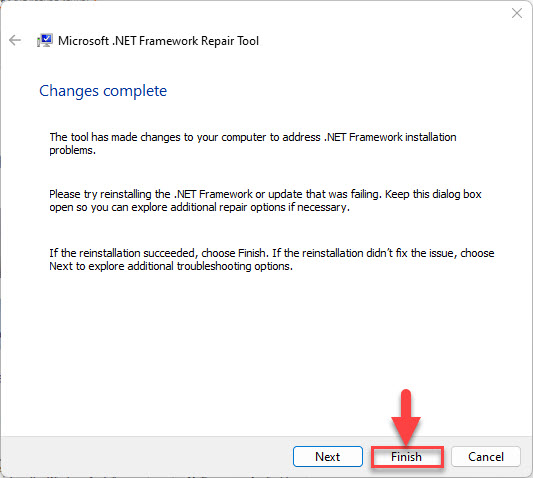
Close the wizard
Now, check to see if the issue you were experiencing has been resolved. If not, then there are a few other methods to repair .NET as well.
Repair .NET from Control Panel
Another method to repair a .NET installation is from the Programs and Features applet in Windows. Follow these steps to attempt to repair your .NET Framework from the Control Panel:
-
Open the Programs and Features applet by typing in appwiz.cpl in the Run Command box.
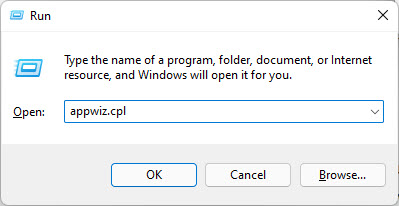
Open Programs and Features -
Here, right-click on the .NET installation causing you trouble and then click Change from the context menu.
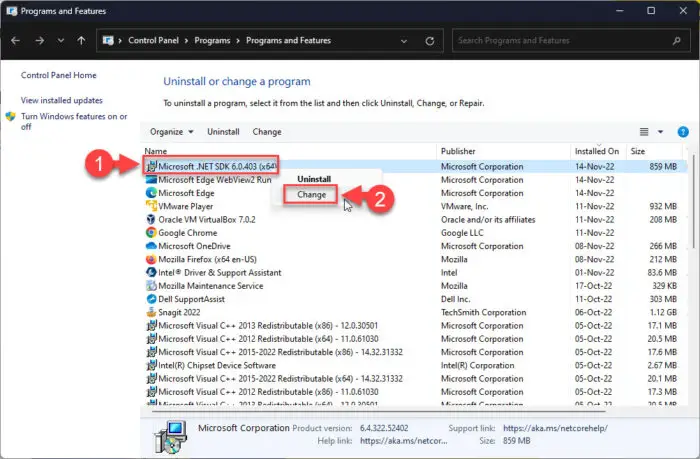
Change .NET installation -
You will now see a .NET wizard. Click Repair.

Repair .NET -
The wizard will now attempt to repair .NET. Once it completes, click Close.
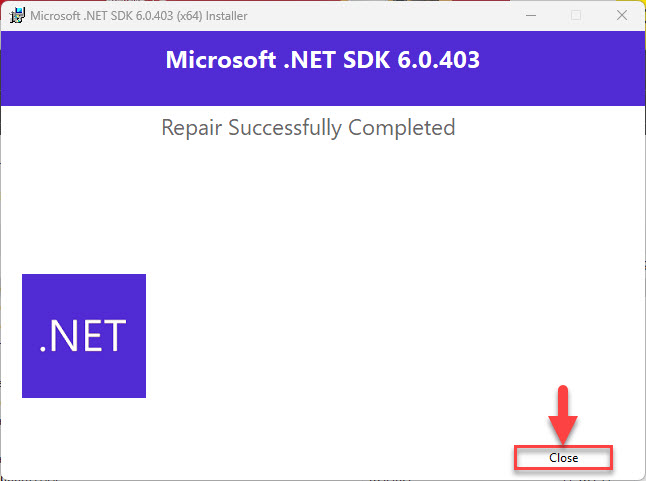
Close wizard
Now check to see if you are able to run the troublesome app.
Repair .NET by Re-Enabling it from Optional Features
If the methods discussed above did not fix the problem, then you may have to perform a clean install of .NET. This means that all you need to do is disable it, and then re-enable .NET from the Windows Optional Features applet.
-
Open the Optional Features applet by typing in optionalfeatures in the Run Command box.
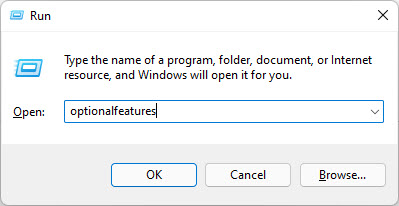
Open Optional Features applet -
From the window, uncheck the boxes next to the enabled .NET Framework versions and click Ok.

Turn off .NET optional features -
Once the features have been disabled, click Close. However, if you are asked to restart the computer, click Restart.

Close wizard -
Once the computer boots back up again, open the Optional Features applet again through the Run Command box.
-
From the window, check the boxes next to the .NET Frameworks again and click Ok.
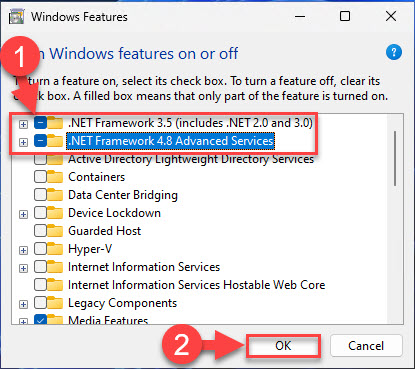
Re-enable .NET -
On the next window, click “Let Windows Update download the files for you.”
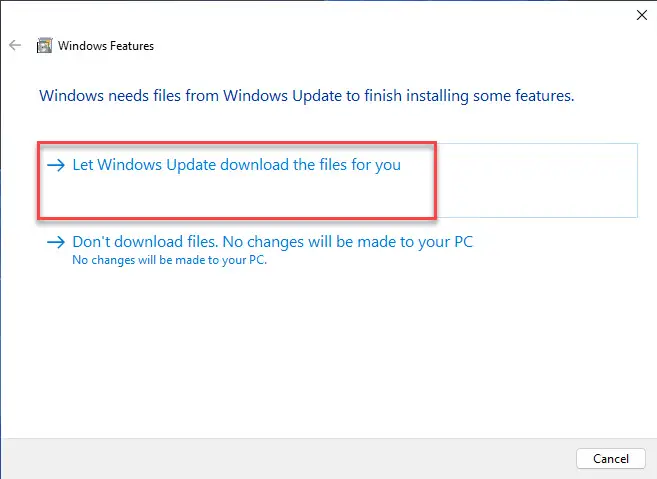
Install through Windows Update The wizard will now download new .NET files and install .NET Framework from scratch.
-
Once installed, click Close.

Close wizard
Now that you have performed a clean install of .NET, check to see if the problem you were previously experiencing persists. If it does, there is still another way to reinstall .NET using PowerShell.
Repair .NET by Reinstalling it from PowerShell
Reinstalling .NET is perhaps the last resort in fixing .NET Framework. This can be done using Windows PowerShell alone. Follow the given guide below to reinstall .NET Framework:
-
Run the following cmdlet in an elevated PowerShell instance to uninstall all versions of .NET.
Get-Package -Name “Microsoft .Net*” | Uninstall-PackageIf prompted to install Nuget, enter Y.

Uninstall .NET using PowerShell -
Now, run the following cmdlet to see which .NET versions are available to install. This will also show you their associated package IDs.
winget search Microsoft.DotNet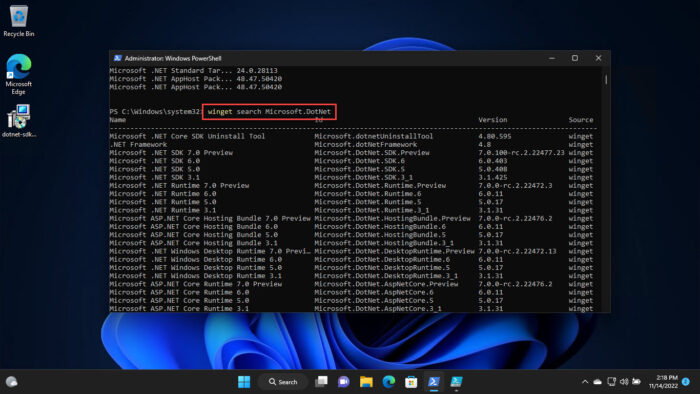
Check .NET version list -
Note down the ID of the .NET version that you want to install, and replace [PackageID] in the following cmdlet with the ID and run it in PowerShell:
winget install [PackageID]
Install .NET from PowerShell
Once PowerShell is reinstalled, your .NET issue should be resolved.
Closing Words
Microsoft .NET Framework can be corrupted when it is not installed properly or when critical system files are missing or corrupted. The methods shared above to fix it should work for fixing .NET. However, you can also run the System File Checker scan to attempt to repair system files, which in turn may also repair .NET.


