You may have had to create a shared folder on your computer so that content could be shared with other computers on the same network. This is not always safe as a shared folder can be accessed by anyone on the network.
However, you can also create a hidden shared folder, also known as “Administrative shares,” which increases the security of the shared content, as well as your machine. A hidden shared folder will ensure the shared directory is not visible to everyone on the network, only the people knowing the complete path can access it.
This article discusses how you can create a hidden shared folder and how to allow specific users to access it.
Table of Contents
Default Hidden Shares
Similar to the hidden shared folder we will learn to create, Windows automatically shares the entire hard disk with the domain administrators. These are shared with the drive letter, followed by the dollar ‘$’ sign. For example, “C$.”
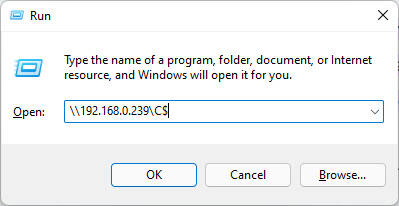
If you are an administrator on your network’s domain, you can access these drives by entering their complete path in the Run dialog box, by using either the machine’s name or IP address, followed by the drive letter, which in turn is followed by the dollar sign.
Let us now continue to show you how to create a hidden shared folder on a Windows computer.
Create a Hidden Shared Folder
Here’s how you can easily create a hidden shared folder:
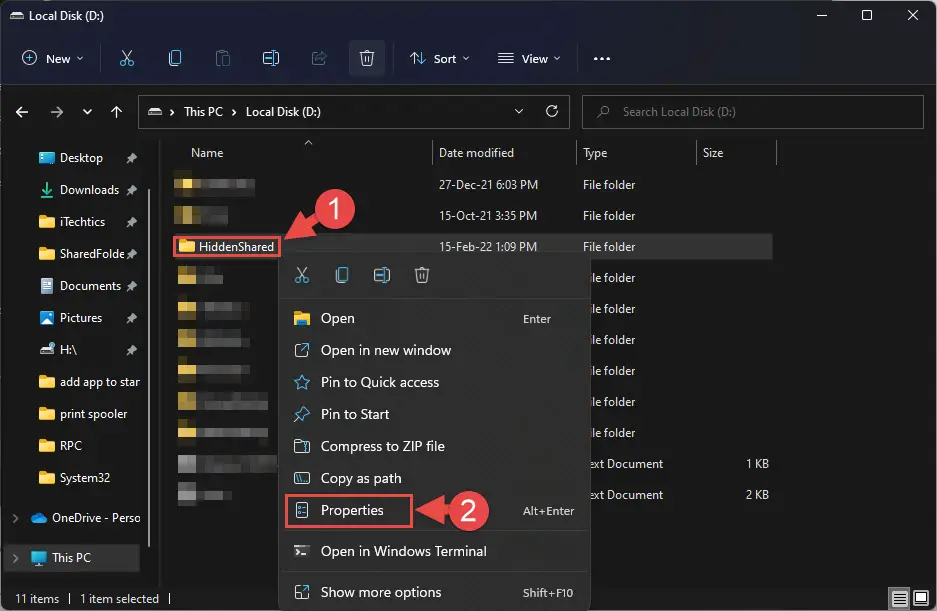
- Open File Explorer and navigate to the folder you want to share, or simply create a new folder.
- Right-click that folder, and then click Properties from the context menu.
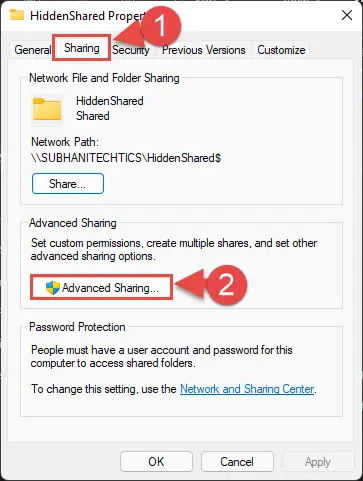
- From the Properties window, switch to the Sharing tab and click Advanced sharing.
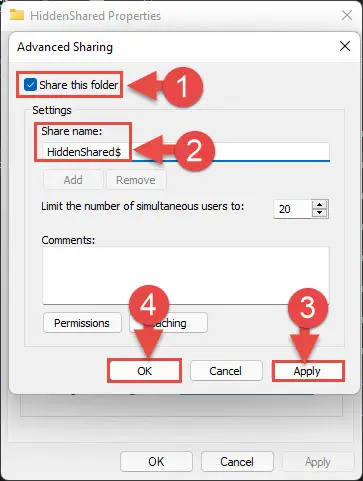
- In the Advanced Sharing window, check the box next to “Share this folder.” Then, add a dollar “$” sign in front of the Share name of the folder, then click Apply and Ok .
- Back in the Properties window, click Share.

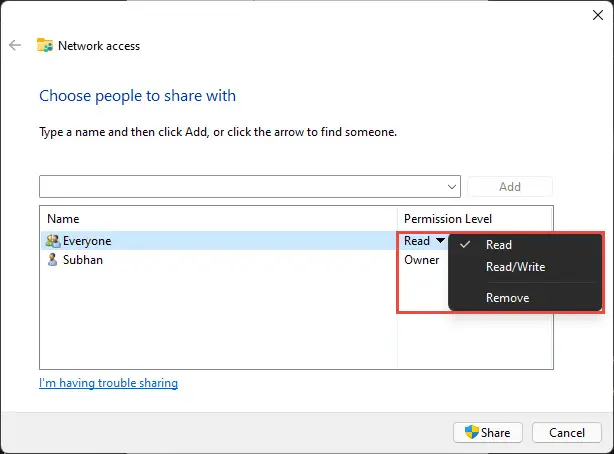
- From the Network Access window, select the user you want to share the folder with and click Add. In this example, we allow everyone to access this folder.

- Now expand the drop-down menu under “Permission Level” and select either of the following permissions to assign to this user:
- Once done, click the Share button at the bottom of the window.
You will now see a confirmation stating that the folder has been shared successfully. Click Done.
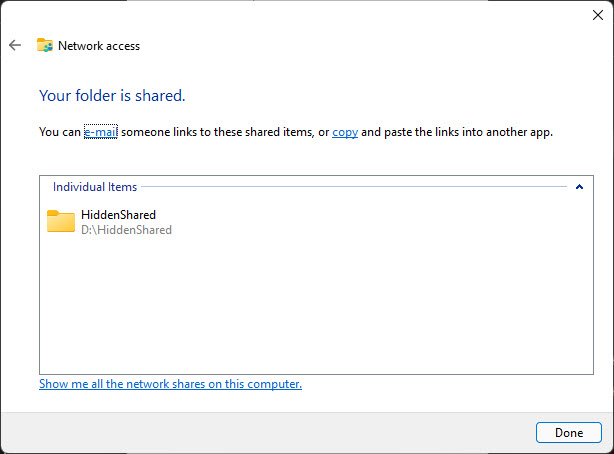
Now the user you have shared the hidden folder with can access the hidden folder.
How to Access Hidden Shared Folder
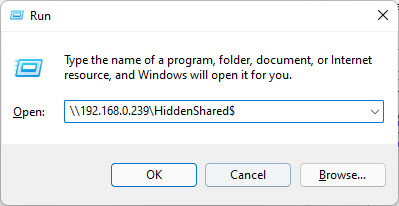
Once you have created an Administrative Share, the users that have been granted permission can access this folder the same as accessing a hidden drive through the Run dialog box as discussed earlier in this post.
The person wanting to access the hidden folder must now enter either the name or IP address of your machine followed by the name of the following, which is then followed by the dollar ‘$’ sign, as in the image below:
Closing Words
The method we have discussed above is valid for all Windows versions and editions.
Creating a hidden shared folder allows you to add another layer of security to your computer, as well as the content to be shared with people on your network. Furthermore, you can assign a complex name to the shared folder to ensure that only the people with whom you have shared the information can access the folder.

