
Both Windows 10 and 11 come with optional features that need to be manually enabled by the user when required. However, often, an active internet connection is required so that Windows can download the respective files via Windows Update and enable the feature. But what do you do when you do not have an internet connection on the PC, or your machine is sitting behind a proxy server that restricts access to Microsoft servers?
This post discusses 4 ways to still enable the optional features in Windows while offline.
Table of Contents
Error Code 0x8024402C
If you try and install a Windows optional feature without an internet connection, you will receive an error code 0x8024402C stating the following:
Windows couldn't complete the requested changes.

The changes couldn't be completed. Please reboot your computer and try again.
 1")
This occurs when you either do not have an internet connection to download the files required for the feature, or are blocked behind Windows Server Update Services (WSUS). In that case, follow the guide given in this post to successfully install the Windows feature(s) that you require.
Before we dig into the methods to enable the feature(s), let us understand how the task is achieved and what information may be required beforehand.
Windows Feature Source Files
As we mentioned, Windows downloads the source files for the respective features to enable them. However, these source files are already present in the installation media, such as an ISO file for Windows, in a folder named “SXS“. Unfortunately, these files are not moved to the local PC while installing Windows.
Within the installation media, the SXS folder can be found at the following path:
\\InstallationMedia\Sources\sxs
While offline, this folder is essential in installing the optional Windows features. Without the source files, you will not be able to install the feature(s).
How to Get Windows Feature Name
Two methods to enable Windows optional features while offline use the Command Line Interface (CLI). For these methods, you will need to know the technical names of the feature(s) that you wish to enable, as their technical names can defer from the ones shown in the “Turn Windows features on or off” window.
 2")
For that, launch Command Prompt with administrative privileges and paste the following command:
Dism /Online /Get-Features | More
This command will display the technical names of the features, as in the image below. If you are still confused about which name corresponds to which feature, a simple Google search would be helpful.
 3")
How to Enable Windows Features While Offline
Before you start with the given methods, make sure you have a valid installation media for the same Windows version you want to enable the feature on.
You can check your Windows edition and build number by typing in winver in Run.
Enable Windows Optional Features Using Command Prompt
Follow the steps below to enable Windows optional feature(s) when offline through Command Prompt:
- Mount the installation media to your computer and note down the associated drive letter. This will be called MediaDriveLetter, or MDL, for reference in the steps below.
 4")
- Now launch Command Prompt with administrative rights.
- Now use the following command to enable a Windows feature. Replace MDL with the corresponding drive letter for the mounted installation media and FName with the technical name of the feature you wish to enable.
Dism.exe /online /enable-feature /featurename:<em>FName</em> /All /Source:<em>MDL</em>:\Sources\sxs /LimitAccess 5")
The respective features will now be enabled. You can repeat step 3 to enable multiple optional features in Windows by replacing FName.
Alternatively, you can also copy the SXS folder from the installation media to a local drive and replace the path to the folder in step 3 above.
If you wish to disable the feature in the future, this can be done using the conventional method (through “Turn Windows features on or off” or by using the following command (Replace FName with the feature’s technical name):
Dism.exe /online /disable-feature /featurename:FName
 6")
Enable Windows Optional Features Using PowerShell
You can also achieve the same using Windows PowerShell. Here is how:
- Mount the installation media to your computer and note down the associated drive letter. This will be called MediaDriveLetter, or MDL, for reference in the steps below.
- Now launch PowerShell with administrative privileges.
- Use the following command to enable a Windows feature. Replace MDL with the corresponding drive letter for the mounted installation media and FName with the technical name of the feature you wish to enable.
Enable-WindowsOptionalFeature -Online -FeatureName <em>FName</em> -Source "<em>MDL</em>:Sources\sxs" 8")
The respective Windows feature will now be enabled. If you wish to disable it, use the following command while replacing FName with the technical name of the feature:
Disable-WindowsOptionalFeature -Online -FeatureName FName
Enable Windows Optional Features through Group Policy
If you are not comfortable using CLI, here is how to enable Windows optional feature(s) through the Graphical User Interface (GUI):
- Mount the installation media and then paste the SXS folder to a directory on your local system using File Explorer.
- Now open the Group Policy Editor by typing in gpedit.msc in Run.
- Navigate to the following through the left pane:
Local Computer Policy >> Computer Configuration >> Administrative Templates >> System - Here, in the right pane, double click the Group Policy “Specify settings for optional component installation and component repair.”
 9")
- From the Group Policy, select the Enabled radio button. In the Options section, enter the complete path for the SXS folder you have copied in Step 1 in the text field below “Alternate source file path.”
(Optional) You can also check the box next to “Never attempt to download payload from Windows Update” to always use this SXS folder for source files instead of downloading them from Windows Update. 10")
- Now click Apply and Ok to close the Group Policy configuration window.
- Now, for the changes to take effect, launch the Command Prompt with administrative privileges and paste the following command:
gpupdate /force 11")
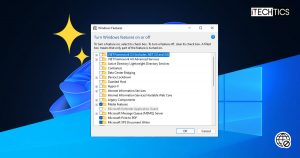
- Now proceed to “Turn Windows features on or off” and select the feature(s) you want to enable by checking the box beside them, and then click OK.
 12")
As you proceed with step 8, you may notice that Windows automatically detects the source files and enables the feature(s), rather than asking you whether to download the source files through Windows Update or cancel the process.
 13")
You can also disable the feature just as easily through the conventional method, with no additional steps required.
In the future, if you wish to download the source files through Windows Update (active internet connection required), you will need to return to the Group Policy and select the Disabled radio button.
Using Windows Registry
As with the Group Policy method above, you can also use Windows Registry to point your system towards the local SXS folder, instead of going on the internet for the source files. Here is how:
Misconfiguration of critical values in the system’s registry could be fatal for your operating system. Therefore, we insist that you create a system restore point before proceeding with the process.
- Mount the installation media and then paste the SXS folder to a directory on your local system using File Explorer.
- Now open the Registry Editor by typing in regedit in Run.
- Paste the following into the address bar at the top of the editor for quick navigation:
Computer\HKEY_LOCAL_Machine\SOFTWARE\Microsoft\Windows\CurrentVersion\Policies\Servicing 14")
- Now right-click Servicing, expand New from the context menu, and then click String Value.
 15")
- Name this String Value “LocalSourcePath.”
- Double-click LocalSourcePath and enter the complete path for the copied SXS folder in step 1 in the text field under Value Data. Click OK when done.
 16")
- Now proceed to “Turn Windows features on or off” and select the feature(s) you want to enable by checking the box beside them, and then click OK.
If you proceed with the last step, Windows will enable the optional feature(s) without asking to download through the Windows Update or aborting the operation entirely.
Furthermore, you can use the same menu to disable any enabled feature(s).
However, if you wish to download the source files through Windows Update (active internet connection required), you will need to return to the same location inside Windows Registry as in step 3 above, and delete the registry value LocalSourcePath.
 18")
Closing Words
In a corporate environment where hundreds of computers sit behind a proxy server, it is often found that Microsoft servers are blocked and WSUS is used to update Windows. In that case, you will need to use the SXS source files to install certain optional features.
If you have to enable such features on more than one PC, it is recommended that you place the SXS folder on a shared network drive, map it to each PC, and then provide the path for the SXS folder where required.


