It can be frustrating when your computer decides on the Wi-Fi band on its own without giving you the option to choose manually. If you experience the same issue and cannot find the “Preferred Band” option in the Wi-Fi Properties, don’t worry. It is a common error that many Windows users often encounter.
In this article, we will explore this problem and provide you with multiple solutions to restore the missing option.
Table of Contents
On This Page
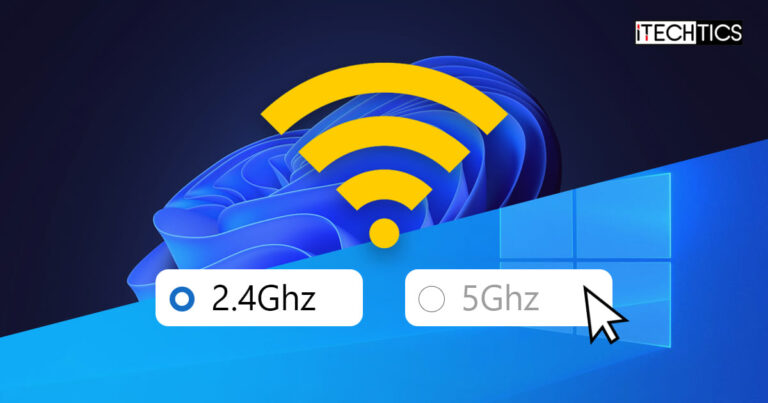
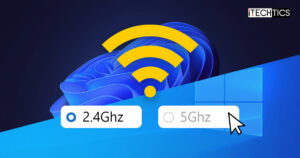
What are Wi-Fi Bands
Wi-Fi bands refer to the two main frequency ranges used for wireless communication: the 2.4GHz band and the 5GHz band. These bands determine the frequency at which your Wi-Fi signal operates.
The 2.4GHz band has been around for a long time and is commonly used by many devices. It offers a longer range and better ability to penetrate through walls and other obstacles. However, because it is widely used, it can suffer from congestion and interference from other devices like cordless phones and microwaves. That said, it results in slower speeds and reduced performance.
On the other hand, the 5GHz band provides faster speeds and is less prone to interference. It is ideal for bandwidth-intensive activities like online gaming, streaming high-definition videos, and transferring large files. However, its shorter range means that it may not reach as far or penetrate through obstacles as effectively as the 2.4GHz band.
Windows allow you to manually select the preferred Wi-Fi band for your computer. As a result, you can optimize your Wi-Fi connection based on factors such as signal strength, network congestion, and device compatibility. This allows you to maximize your wireless performance and ensure a stable connection.
Note: Not all devices support both Wi-Fi bands. Older devices may only be compatible with the 2.4GHz band, while newer devices often support both bands. Therefore, having the ability to manually select the preferred band can be valuable in ensuring the best performance and compatibility for your specific device and network environment.

That said, even if your device supported both bands, there have been reports that the “Preferred Band” option in the wireless adapter properties is often found missing, resulting in the user being unable to select a band to use.
Let us show you how to fix the issue and restore the “Preferred Band” option.
Fix Preferred Band Option Not Showing
There are several effective ways through which you can bring back the preferred bands option in Wi-Fi properties. Perform the solutions below in the given chronological order to resolve the issue.
Check Network Adapter’s Compatibility
In order to bring back the “Preferred Band” option, you must check whether your system is compatible with these bands or not. Here is how to do it:
-
Press the Windows Key + R to open the Run Command box.
-
Type in “cmd” and press CTRL + Shift + Enter to run Command Prompt with elevated privileges.
-
Enter the following command:
netsh wlan show drivers
Show Wi Fi driver details in Command Prompt This will display the properties of WLAN drivers.
-
Note down the values in front of “Radio types supported.”

Note down the supported wireless standards


Here, you will find the following three types of Wi-Fi standards that indicate compatibility:
- 11g 802.11n: 2.4GHz bandwidth comaptible.
- 11n 802.11g 802.11b: 2.4GHz bandwidth compatible.
- 11a 802.11g 802.11n: 2.4Ghz and 5GHz bandwidths compatible.
Using this information, you can now determine if your wireless adapter even supports more than one bands. If only one band is supported, the “Preferred Band” option may be missing, and will be of no use even if it was present.
Change Router Settings
The easiest way to resolve this problem is by changing the settings of your Wi-Fi router itself.
If you cannot find the option to change your preferred Wi-Fi band from the computer, then you can change operating band on the router itself. Here is how to do it:
-
Open any web browser and put in the IP address for your router’s admin panel.
-
Enter the credentials and log in.
-
Locate the Wi-Fi channel settings and change it to the desired channel within the desired frequency bandwidth.
-
After making the channel selection, save the changes.
This will now change the operating channel for your Wi-Fi, and simultaneously change the Wi-Fi band for all connected devices.
However, if this soluton did not work for you, or the option was mising in your router’s settings, there perform the remianing solutions below.
Configure Preferred Band using PowerShell
If you can’t find the “Preferred Bands” options, you can configure it manually through Windows PowerShell. Here are the steps to follow:
-
Press the Windows Key + R to open the Run Command box.
-
Type in “powershell” and press CTRL + Shift + Enter to run PowerShell with elevated privileges.
-
Run the following cmdlet:
Get-NetAdapterAdvancedProperty -Name "*"The settings of your network adapter properties will be displayed. Take note of the Wi-Fi adapter name.

Find Wi-Fi adapter name using PowerShell -
Use the following command while replacing the variables as instruced:
Replace [AdapterName] with the name of the Wi-Fi adapter, and [Band] with either “2 – Prefer 2.4Ghz Band” or “3 – Prefer 5Ghz Band“, depending on your preferred band.
Set-NetAdapterAdvancedProperty -Name "[Wi-Fi]" -DisplayName "Preferred Band" -DisplayValue "[Band]"
Set preferred Wi Fi band from PowerShell The Preferred Band setting for your Wi-Fi adapter will now be set as per your selection.


Update Wi-Fi Driver
Sometimes an outdated driver also impacts the functionality of preferred bands in Wi-Fi properties. That said, make sure to check the driver version installed and update it if needed. Below are the simple steps that can help you update your Wi-Fi driver.
-
Press the Windows Key + R to open the Run Command box.
-
Type in “devmgmt.msc” and press Enter to open the Device Manager.
-
In the Network Adapters list, right-click on the Wireless network and click “Update driver.”

Update network driver -
From the two options, click on “Search automatically for updated driver software.”

Select Search automatically for updated driver software -
Once the process is complete, restart your PC.

Note: To manually update the Wi-Fi driver, select the second option in Step 3 i.e., Browse my computer for driver software option. Then, navigate to the folder on your computer where you downloaded the Wi-Fi adapter driver and select it for the update.
Reinstall the Wi-Fi Driver
There are times when a corrupted Wi-Fi driver is installed. In such cases, you can try reinstalling it to resolve the issues. Here is how you can reinstall a Wi-Fi driver:
-
Press Win + R to open the Run dialogue box and enter “devmgmt.msc.”
This will open the Device Manager.
-
From the “Network Adapter” list, right-click on the wireless network and click “Update driver.”
-
Select the “Browse my computer for drivers “option and choose “Let me pick from a list of available drivers on my computer”.

Select Let me pick from a list of available drivers on my computer -
Click on the correct driver then proceed by selecting “Next”.
This will reinstall the selected driver in your system.

Choose the driver to be reinstalled
Roll Back the Wi-Fi Driver Update
This troubleshooting method is intended for you if you have previously had access to the “Preferred Band” option in the Wi-Fi properties, but are currently unable to find it. In such cases, rolling back the Wi-Fi driver to a previous version could potentially resolve the issue. To do so, follow these steps:
-
Right-click on the Windows icon or press Win + X keys and select Driver Manager.
-
From the list, right-click on the device for which you want to roll back the driver and select Properties.

Open properties of the desired network adapter driver -
Go to the “Driver” tab and click on the “Roll Back Driver” button.

Roll back driver -
Follow the instructions to complete the rollback process. Once done, restart your computer for the changes to take effect.

Ending Words
The missing preferred band issue can really be annoying for you. However, by following the easy troubleshooting methods mentioned in this article, you can potentially regain access to the missed setting.
Whether it’s optimizing your Wi-Fi connection for faster speeds or reducing interference, the “Preferred Band” option plays a crucial role in enhancing your wireless networking experience.


